
Celica GT Ltd Ed Convertible L4-2164cc 2.2L DOHC MFI (1997)
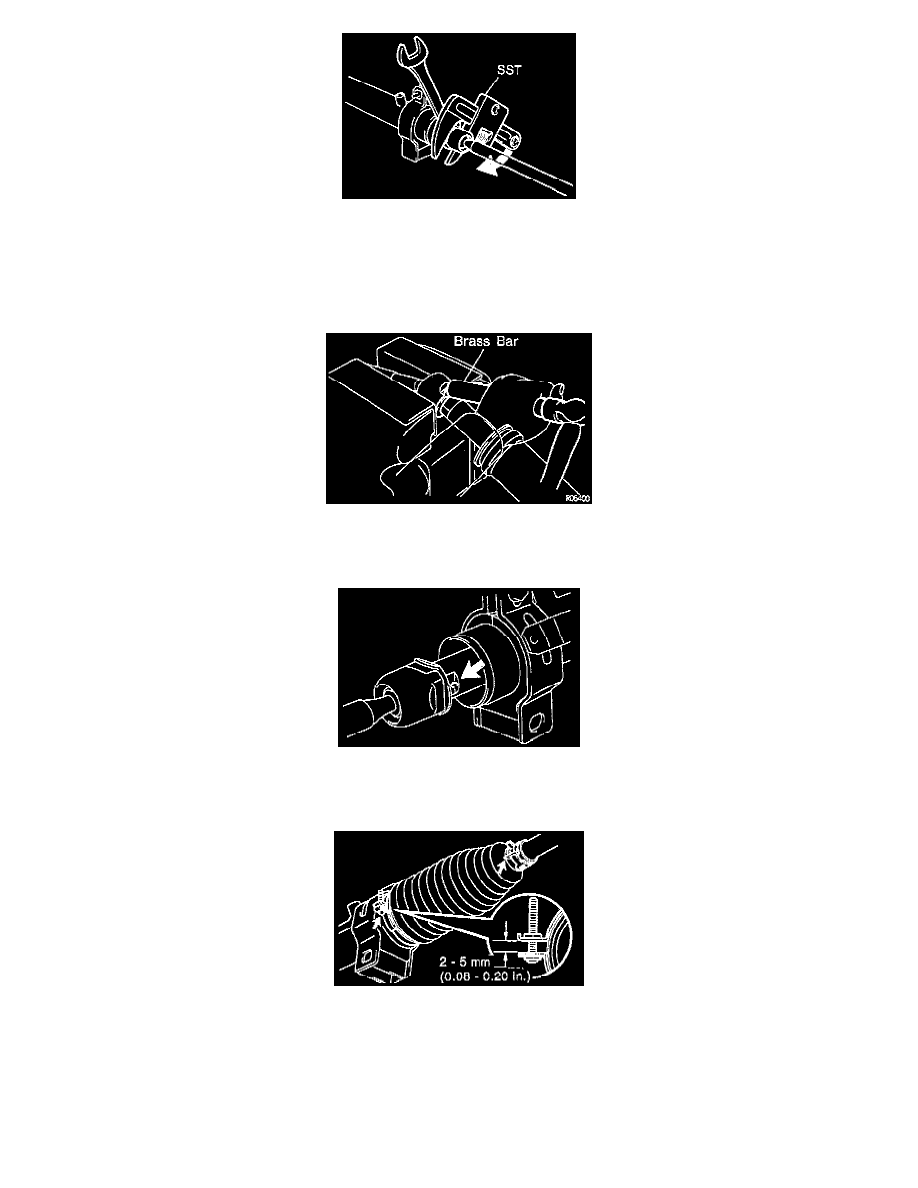
b. Using a spanner to hold the steering rack steady, and using the 09922 - 10010 SST, tighten the rack end to 60 Nm (45 ft. lbs.).
NOTE:
^
Use the 09922 - 10010 SST in the direction shown in the illustration.
^
Use a torque wrench with a fulcrum length of 345 mm (13.58 inch).
c. Using a brass bar and hammer, stake the washer, avoiding any impact to the rack.
19. Install the right and left hand rack boots, clamps / clips
a. Ensure that the steering rack hole is not clogged grease, if the hole is clogged, the pressure inside the boot will change after it is assembled and
the wheel turned.
b. Install the boot, being careful not to damage or twist the boot.
c. Tighten the clamp, as shown in the illustration.
d. Install the clip.
20. Install the right and left hand tie rod ends and lock nuts and do these procedures.
a. Screw the lock nut and tie rod end onto the rack end until the matchmarks are aligned.
b. After adjusting toe-in, tighten the nut to 56 Nm (41 ft. lbs.).
21. Install the two turn pressure tubes by doing the following.