
Celica ST Ltd Ed Liftback L4-1762cc 1.8L DOHC MFI (1997)
Installation Hint: Torque to 20 Nm (14 ft. lbs.).
d. Lower the suspension member.
e. Remove the No.1 lower suspension arm with the 2 bolts and washer.
Installation Hint: Face the paint mark rearward.
INSTALLATION
Reverse the removal procedure to install, noting the following:
-
Check rear wheel alignment.
See: Alignment
Disassembly and Assembly
COMPONENT SERVICE
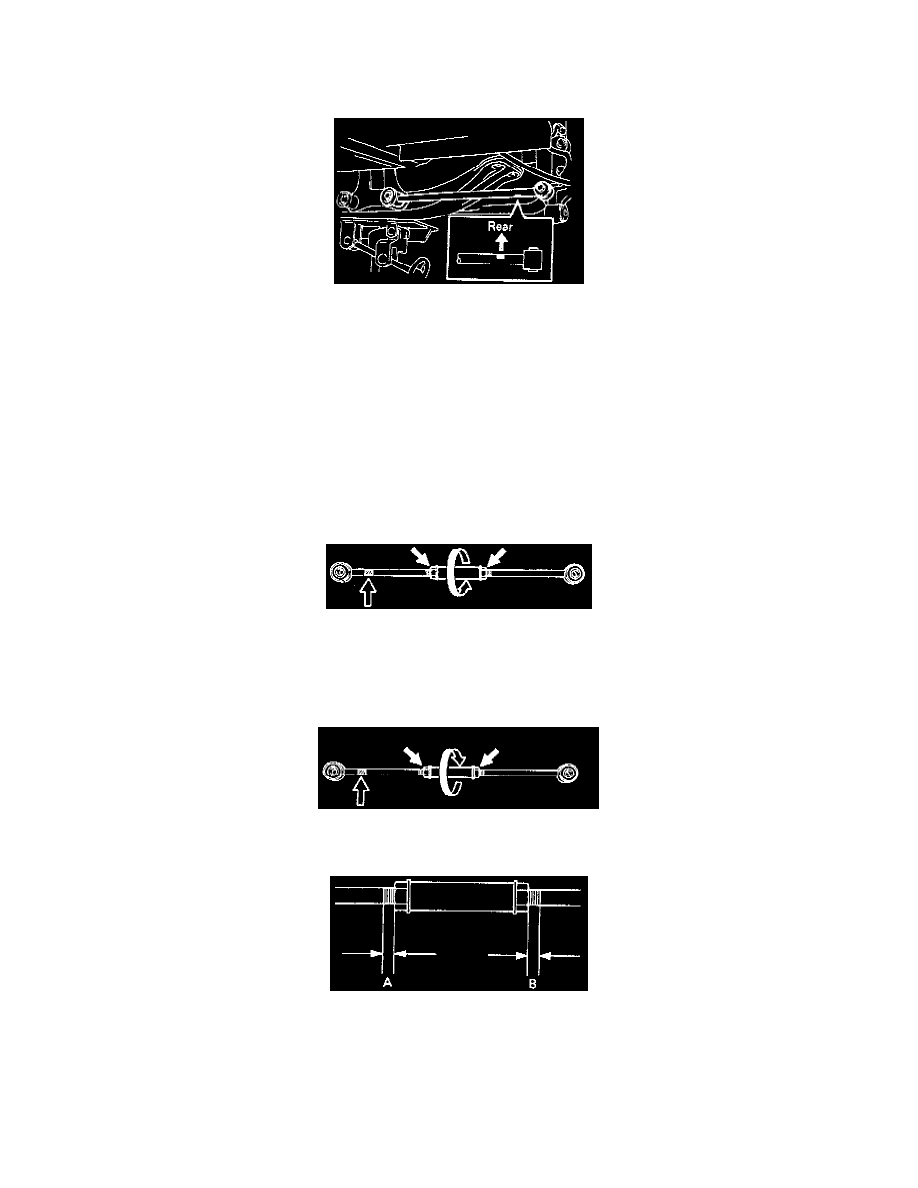
Rear No.2 Suspension Arm Disassembly
1. Loosen the 2 lock nuts.
2. Turn the adjusting tube and disassemble the No.2 lower suspension arm.
3. Remove the 2 lock nuts from the arm.
NO.2 Suspension Arm Assembly
1. Install the lock nuts to the arm.
2. Turn the adjusting tube and assemble the No.2 lower suspension arm.
Hint: When assembling the No.2 lower suspension arm, try to make dimensions A and B as close as possible.
Maximum difference: 3 mm (0.12 inch).