
Celica Supra L6-2759cc 5M Ser (1982)
Rear Door Striker: Technical Service Bulletins
Doors - Striker Adjustment
REFERENCE
BODY
NUMBER
003/4445
DATE
12-10-82
MODEL
MX, RA. MA
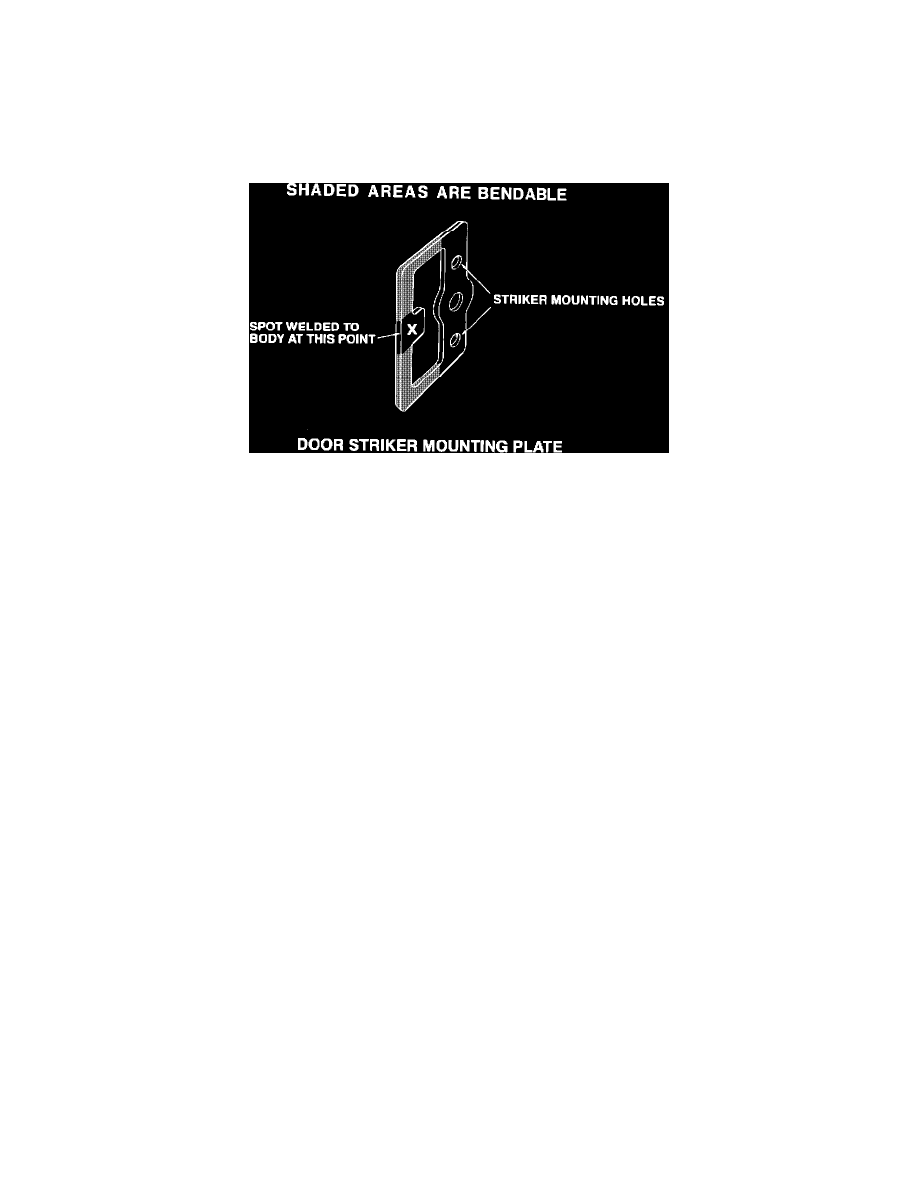
DOOR STRIKER MOUNTING PLATE
DOOR STRIKER ADJUSTMENT 1981, 1982 MX AND 1982 RA, MA
The current models of Celica, Supra and Cressida are now equipped with a new type of door striker mount, (See illustration.) This type of mount gives
the appearance that the striker is in a fixed position, however, adjustment is possible by bending the mount using the following procedure.
^
Loosen the striker mounting screws (approximately 1 turn).
^
Force the striker in the direction required (See Footnote).
For inboard adjustment:
Using a soft-faced mallet, drive the striker inward to the desired position. Be sure to adequately protect the
painted surfaces to avoid damage.
For outboard adjustment:
Use a suitable prybar to force the striker outward to the desired position. Be sure to use a small piece of wood
or other suitable material to pry against to avoid damage to the vehicle body.
^
Retighten mounting screws and check adjustment. Repeat, if necessary.
Footnote:
The Celica & Supra striker will adjust approximately 4 mm total. The Cressida striker will adjust approximately 6 mm total.