
Corolla/FX L4-1587cc 4A SOHC (1984)
Valve Body: Service and Repair
Removal
1.
Clean area around pan, then drain transaxle fluid.
2.
Remove oil pan and gasket, then the oil strainer.
3.
On A130L and A131L models, remove apply tube bracket attaching bolts, then the apply tube.
4.
On all models, remove oil tubes using a suitable screwdriver, then the manual detent spring.
5.
On A130L and A131L models, remove manual valve, then the manual valve body.
6.
On except A130L and A131L models, disconnect solenoid connector.
7.
On all models, remove valve body attaching bolts, then disconnect throttle cable.
8.
On except A130L and A131L models, disconnect manual valve connecting rod.
9.
On all models, remove valve body, then the governor apply gasket.
10.
On A130L and A131L models, remove governor oil strainer.
Installation
1.
On A130L and A131L models, install governor oil strainer.
2.
On all models, install governor apply gasket.
3.
On except A130L and A131L models, connect manual valve connecting rod.
4.
On all models, hold valve body in place, then manually retain cam in downward position and slip cable end into slot.
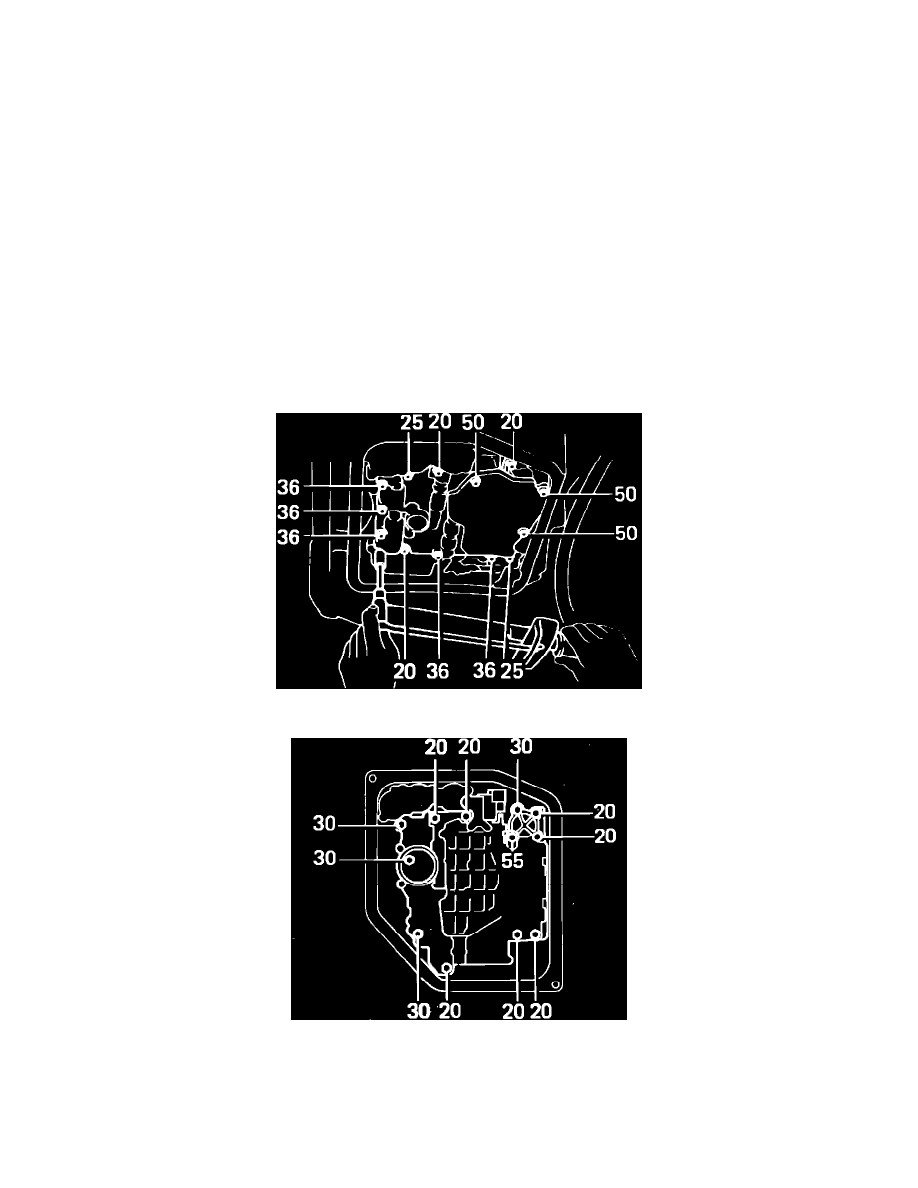
Fig. 4 Valve body bolt identification. A130L & A131L models
Fig. 5 Valve body bolt identification. A240E & A240L models, except 1988