
Corolla CE Sedan 4-Door L4-1587cc 1.6L DOHC MFI (1997)
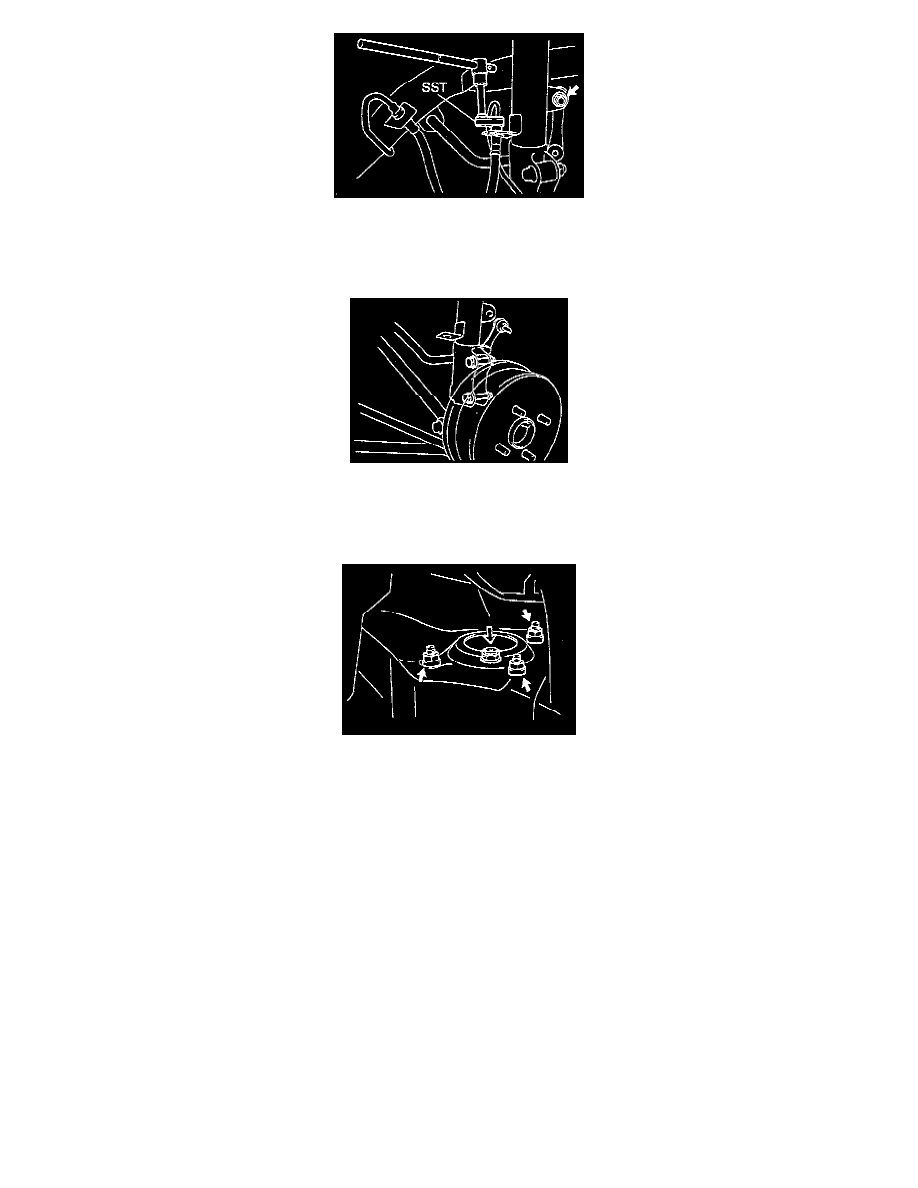
3. Disconnect ABS speed sensor wire harness clamp from shock absorber remove brake hose from shock absorber (ABS equipped).
a. Remove the clip.
b. Using Special Service Tool (SST) 09023 - 00100, disconnect the brake line. Use a container to catch the brake fluid.
[torque: 15 Nm (11 ft. lbs.)].
5. Disconnect stabilizer bar nut and link from shock absorber.
[torque: 44 Nm (33 ft. lbs.)].
NOTE: If the bail joint turns together with the nut, use a hexagon wrench to hold the stud.
6. Remove shock absorber with coil spring.
a. Loosen the 2 nuts on the lower side of the shock absorber.
[torque: 142 Nm (105 ft. lbs.)].
Removal Note: Do not remove the 2 nuts and bolts.
b. Support the rear axle carrier with a jack.
c. Remove the cap from the suspension support.
d. Loosen the suspension support center nut.
[torque: 49 Nm (36 ft. lbs.)].
CAUTION: Do not remove the nut.
Removal Note: If not disassembling the rear shock absorber, loosening the nut is not necessary.
e. Remove the 3 nuts of the suspension support.
[torque: 39 Nm (29 ft. lbs.)].
f.
Lower the rear axle carrier and remove the 2 nuts and bolts on the lower side of the shock absorber.
g. Remove the shock absorber with the coil spring.
7. Install in reverse order of removal, noting the torque specifications in brackets [ ].
8. After installation, bleed the brake system and check the rear wheel alignment. See: Alignment
Disassembly