
Corolla LE Sedan L4-1762cc 1.8L DOHC MFI (1998)
4. Remove piston stopper bolt.
Using a screw driver, push the pistons in all the way and using a 3-mm hexagon wrench, remove the piston stopper bolt at the reservoir port of the
master cylinder with ABS actuator.
HINT: Tape the screw driver tip before use.
Torque: 4.0 Nm (35.5 inch lb)
5. Remove pistons.
a. Push in the piston with a screwdriver and remove the snap ring with snap ring pliers.
HINT: Tape the screw driver tip before use.
b. Remove the No.1 piston and spring by hand, pulling straight out, not at an angle.
NOTICE:
-
If pulled out and installed at an angle, there is a possibility that the cylinder bore could be damaged.
-
At the time of reassembly, be careful not to damage the rubber lips on the pistons.
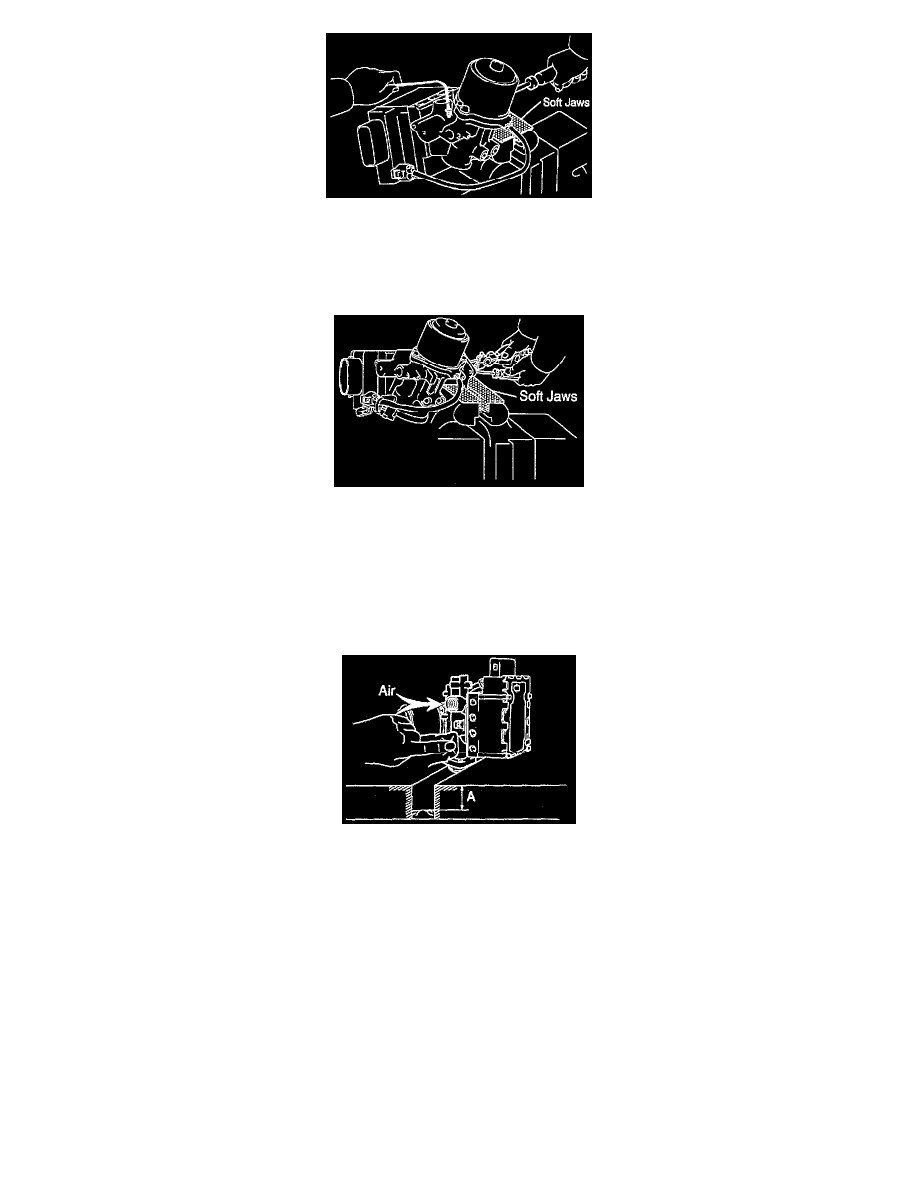
c. Cover the port for removing the piston of the master cylinder and place the cylinder on a stand with the port facing downward.
d. Supply air to taskmaster cylinder reservoir port with covering the wheel cylinder port with a shop rug to remove the No.2 piston and spring.
HINT: Make sure the distance a from the rag to the blocks is at least 100 mm (3.94 inch).
6. Remove ABS ECU.
a. Disconnect the connector from the ABS ECU.
b. Using a torx wrench (T25), remove the ABS ECU (with the ABS actuator) from the master cylinder.
Torque: 3.9 Nm (34.7 inch lb)
NOTICE:
-
Protect the actuator in order to prevent sealing surface from getting dirty and causing damage on the valve body.
-
If the dirt and the like are stuck to the sealing surface, use plastic tools or soft objects to remove the dirt. Do not use chemical solvents.
INSPECTION
HINT: Clean the disassembled-parts with compressed air.