
Corolla LE Sedan L4-1762cc 1.8L DOHC MFI (1998)
15. Install cylinder head cover.
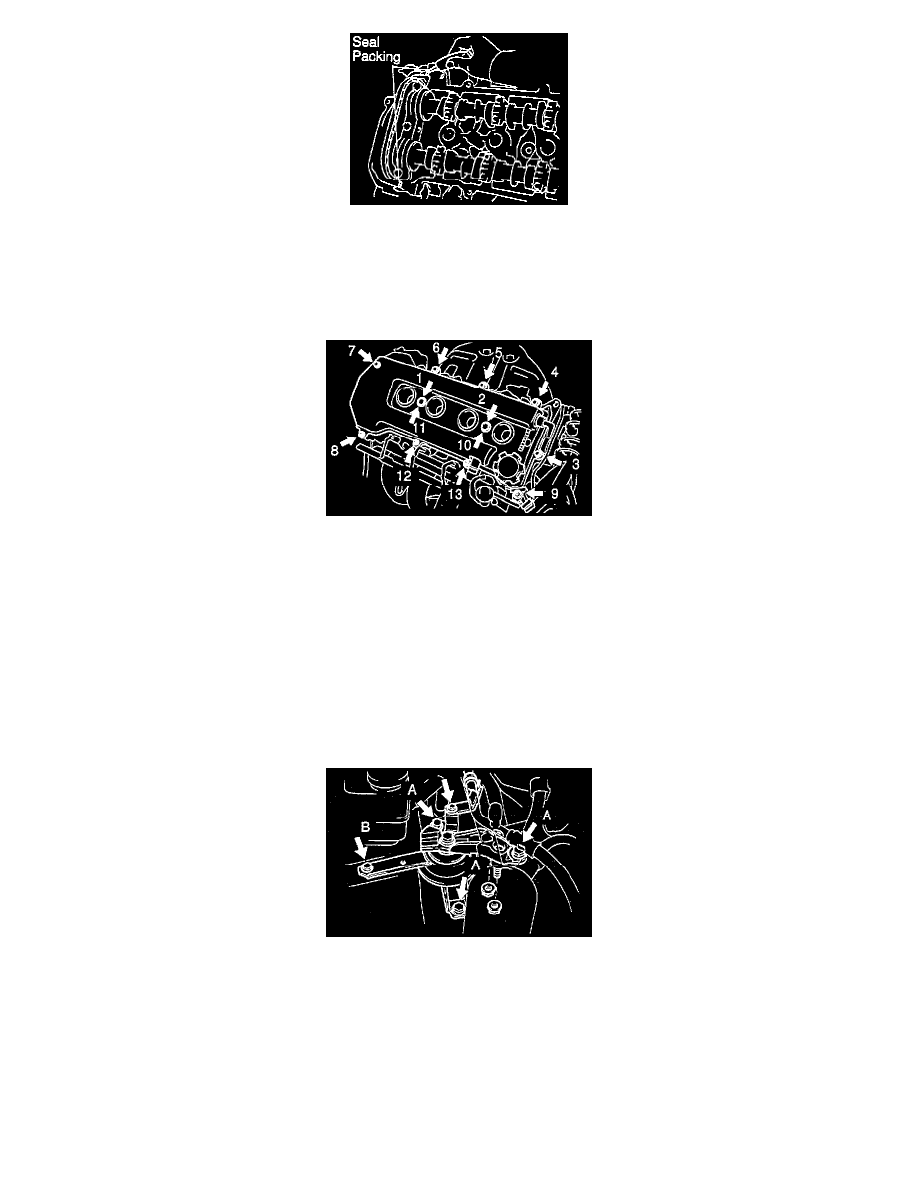
a. Remove any old packing (FIPG) material.
b. Apply seal packing to 2 locations as shown in the illustration.
Seal packing: P/N 08826-00080 or equivalent
c. Install the gasket to the cylinder head cover.
HINT: Part must be assembled within 3 minutes of application. Otherwise the material must be remove and reapplied.
Cylinder Head Cover Tightening Sequence
d. Install the cylinder head cover and cable bracket with the 9 bolts, 2 seal washers and 2 nuts.
Uniformly tighten the bolts and nuts, in the several passes, in the sequence shown.
Torque:
-
w/o washer: 11 Nm (8 ft.lb)
-
w/ washer: 9 Nm (80 inch lbs.)
Install the wire harness protector cover with the 2 nuts and bolt.
f.
Connect the 2 PCV hoses to the cylinder head cover.
g. Connect the 4 high-tension cords to the spark plugs.
h. Connect the 4 high-tension cords to the clamp on the cylinder head cover.
16. Install RH engine mounting insulator.
a. Install the mounting insulator with the 4 bolts and 2 nuts.
Torque:
-
Bolt A: 63.7 Nm (47 ft.lb)
-
Bolt B: 25.5 Nm (19 ft.lb)
-
Nut: 52.0 Nm (38 ft.lb)
With A/C: Install the bolt holding the A/C piping clamp to the mounting insulator.
17. Install PS pump.
a. Install the PS pump with the 2 through bolts and nuts.
Torque: 37 Nm (27 ft.lb)
b. Install the PS pump pulley with the pulley nut.