
Corolla LE Sedan L4-1762cc 1.8L DOHC MFI (1998)
b. Torque the cap.
Torque: 59 Nm (43 ft. lbs.)
c. Using a punch and hammer, stake the 2 parts of the cap.
12. Install rack guide sub-assembly, conical spring washer, rack guide spring and rack guide spring cap.
a. Apply sealant to 2 or 3 threads of the cap.
Sealant: THREE BOND 1344, LOCTITE 242 or equivalent
b. Temporarily install the cap.
13. Adjust total preload.
a. To prevent the steering rack teeth from damaging the oil seal lip, temporarily install the RH and LH rack ends.
b. Using a hexagon wrench (19 mm), torque-the rack guide spring cap.
Torque: 25 Nm (18 ft. lbs.)
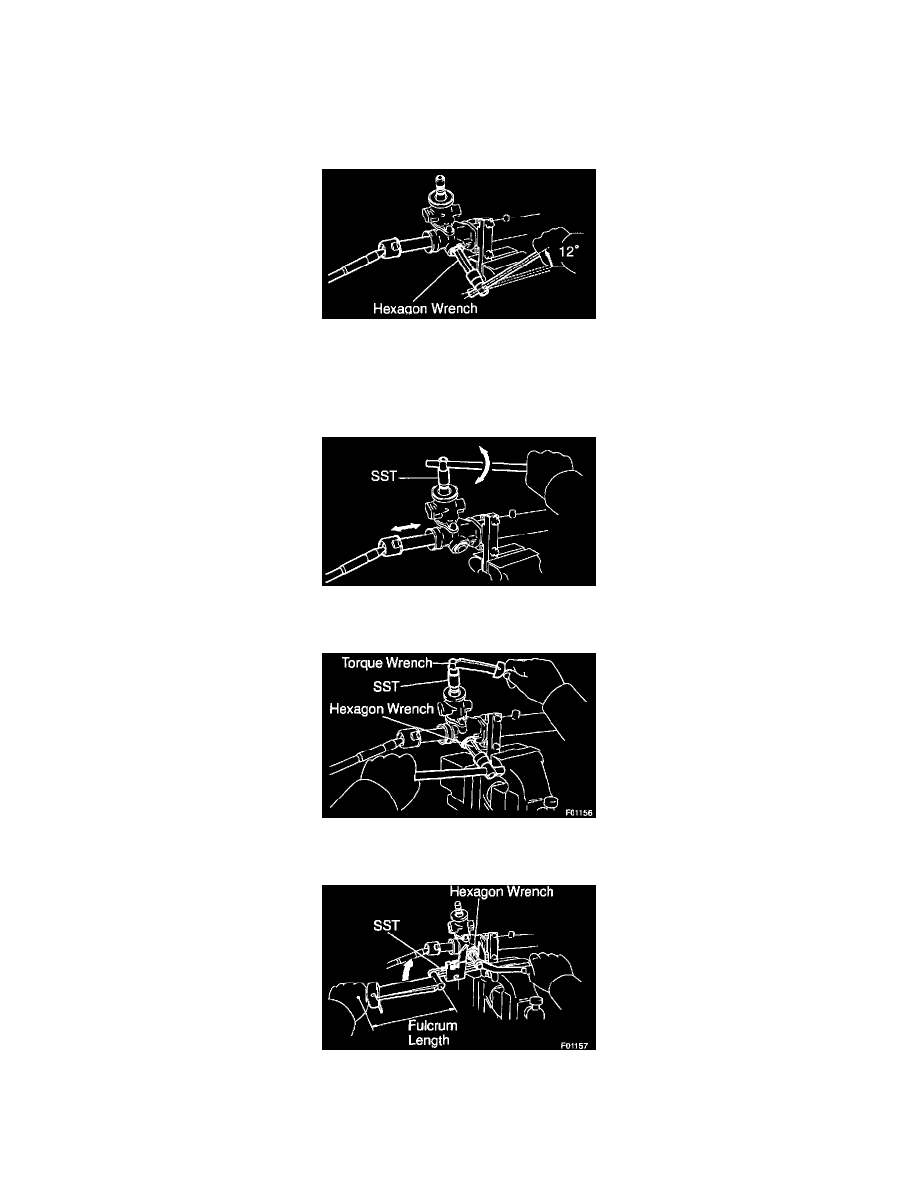
c. Using a hexagon wrench (19 mm), return the cap 12°.
d. Using SST 09610-00010, turn the control valve shaft right and left 1 or 2 times.
e. Using a hexagon wrench (19 mm), loosen the cap until the rack guide spring is not functioning.
f.
Using SST 09610-00010, a torque wrench and hexagon wrench (19 mm), tighten the cap until the preload is within the specification.
Preload (turning): 0.8 - 1.4 Nm (6.9 -12.2 inch lbs.)
14. Install rack guide spring cap lock nut.
a. Apply sealant to 2 or 3 threads of the nut.
Sealant: THREE BOND 1344, LOCTITE 242 or equivalent
b. Using a hexagon wrench (19 mm) to hold the rack guide spring cap, and using SST 09922-10010, torque the nut.