
Corolla LE Sedan L4-1762cc 1.8L DOHC MFI (1998)
4. Disconnect lower suspension arm from lower ball joint.
Remove the 2 nuts and bolt.
Torque: 142 Nm (105 ft. lbs.)
5. A/T RH side, M/T both sides:
Disconnect lower suspension arm.
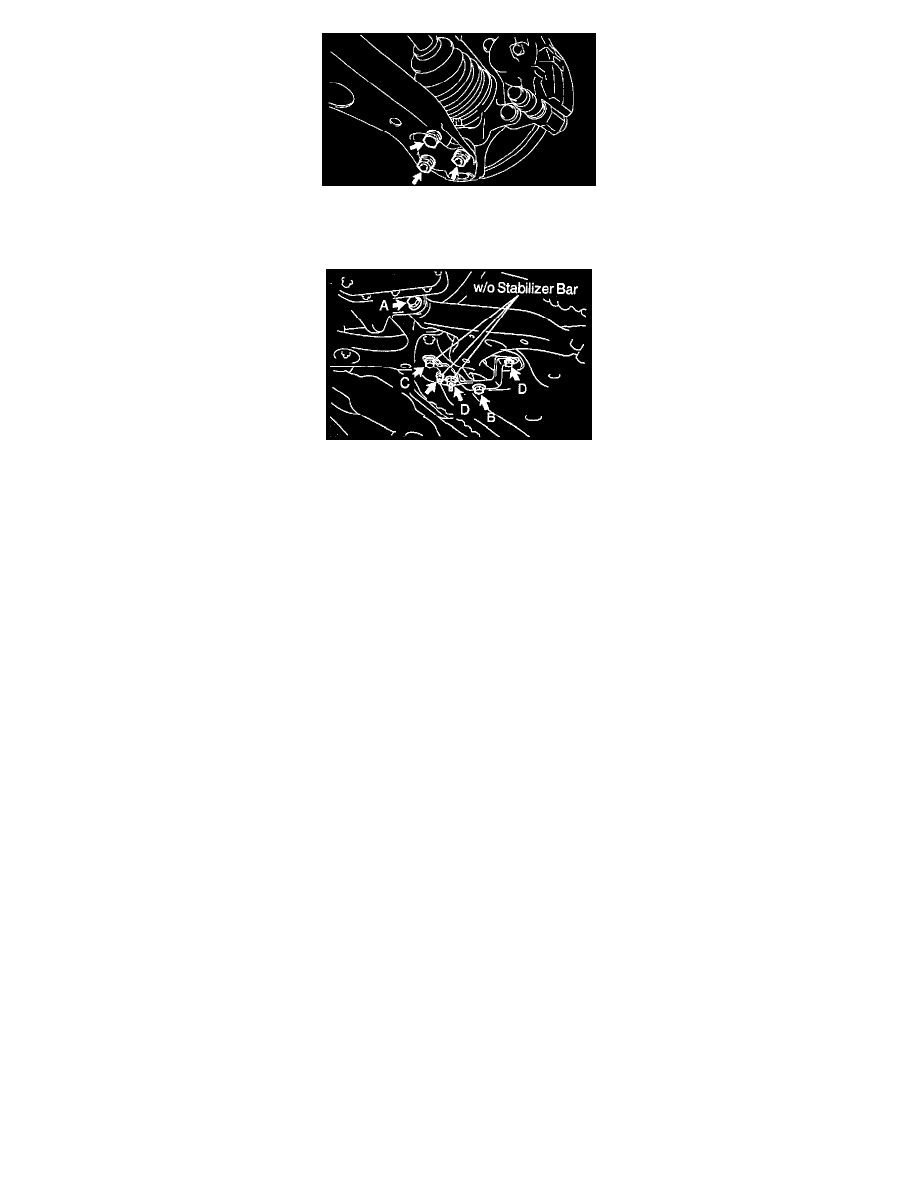
Remove the 5 (w/o stabilizer bar) or 3 (w/ stabilizer bar) bolts, nut (w/o stabilizer bar) and lower suspension arm.
Torque:
-
Bolt A: 215 Nm (158 ft. lbs.)
-
Bolt B: 175 Nm (129 ft. lbs.)
-
Bolt C: 225 Nm (167 ft. lbs.)
-
Bolt D: 147 Nm (109 ft. lbs.)
-
Nut: 19 Nm (14 ft. lbs.)
HINT: At the time of installation, after stabilizing the suspension, torque the bolt A and B.
6. A/T LH side:
Remove front suspension crossmember with lower suspension arm.
a. Remove the 11 (w/o stabilizer bar) or 7 (w/ stabilizer bar) bolts, 6 (w/o stabilizer bar) or 4 (w/ stabilizer bar) nuts and suspension crossmember
with the lower suspension arm, as shown in the illustration.
Torque:
-
Bolt A: 175 Nm (129 ft. lbs.)
-
Bolt B: 225 Nm (167 ft. lbs.)
-
Bolt C: 147 Nm (109 ft. lbs.)
-
Bolt D: 60 Nm (45 ft. lbs.)
-
Nut E: 60 Nm (45 ft. lbs.)
-
Nut F: 57 Nm (42 ft. lbs.)
-
Nut G: 19 Nm (14 ft. lbs.)
HINT: At the time of installation, after stabilizing the suspension, torque the bolt A, B and C.