
Corolla Sedan 4-Door L4-1587cc 1.6L DOHC MFI (1997)
e. Turn the crankshaft pulley, and align its groove with the timing mark "0" of the No.1 timing belt cover.
NOTE (When re-using timing belt):
^
Support the timing belt, so that the meshing of the crankshaft timing pulley and timing belt does not shift.
^
Check that the matchmarks on the timing belt matches the end of No.1 timing belt cover.
^
Align the matchmarks of the timing belt and camshaft timing pulley.
f.
Install the timing belt, checking the tension between the crankshaft timing pulley and camshaft timing pulley.
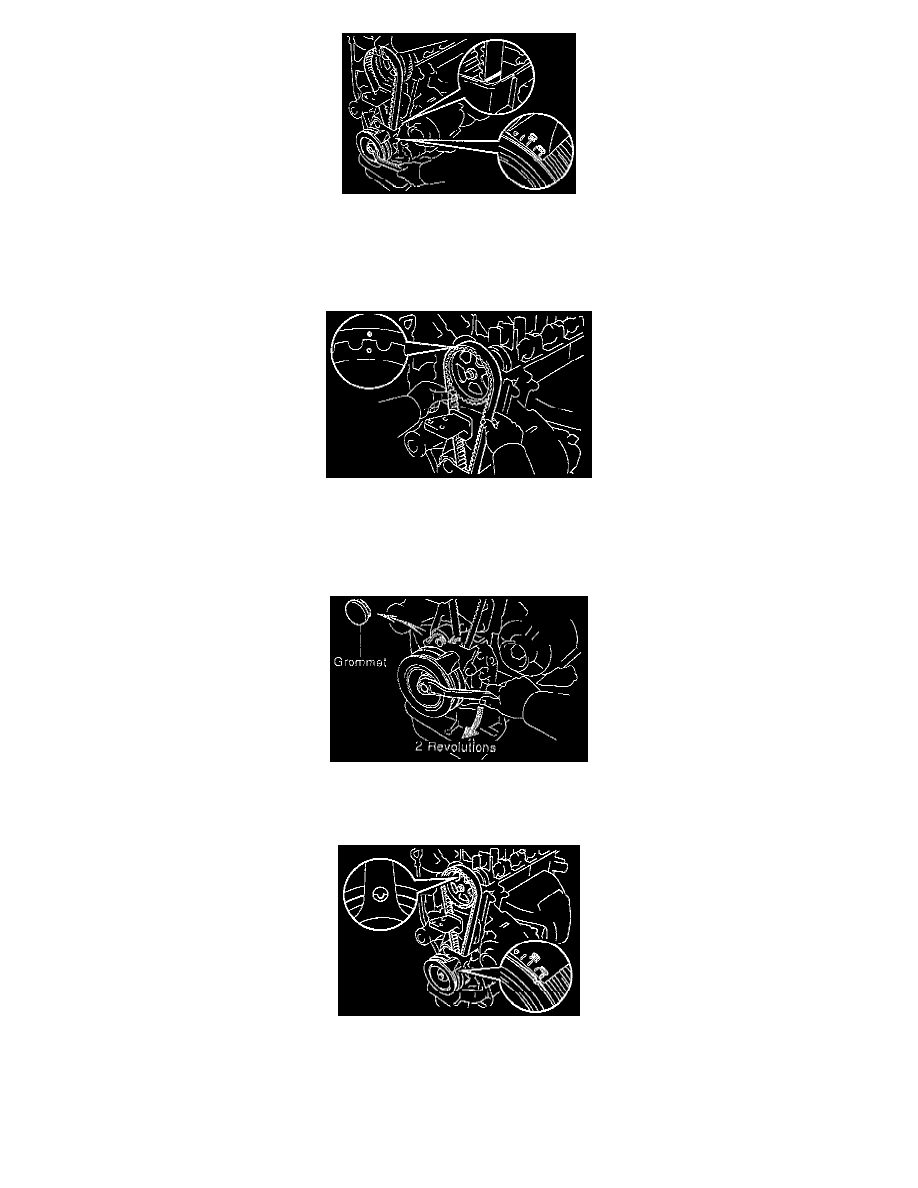
6. Check valve timing and timing belt tension as follows:
a. Remove the grommet and loosen the timing belt idler pulley mounting bolt.
b. Turn the crankshaft pulley 2 revolutions from TDC to DC.
CAUTION: Always turn the crankshaft clockwise.
c. Check that each pulley aligns with the marks as shown in the illustration. If the timing marks do not align, remove the timing belt and reinstall
it.
d. Tighten the timing belt idler pulley mounting bolt. Torque to 37 Nm (27 ft. lbs.).
e. Install the grommet to the No.1 timing belt cover.