
Corolla Sedan 4-Door L4-1587cc 1.6L DOHC MFI (1997)
Valve Clearance: Testing and Inspection
NOTE: Inspect and adjust the valve clearance when the engine is cold.
1. Disconnect high-tension cords from spark plugs
2. Remove cylinder head cover
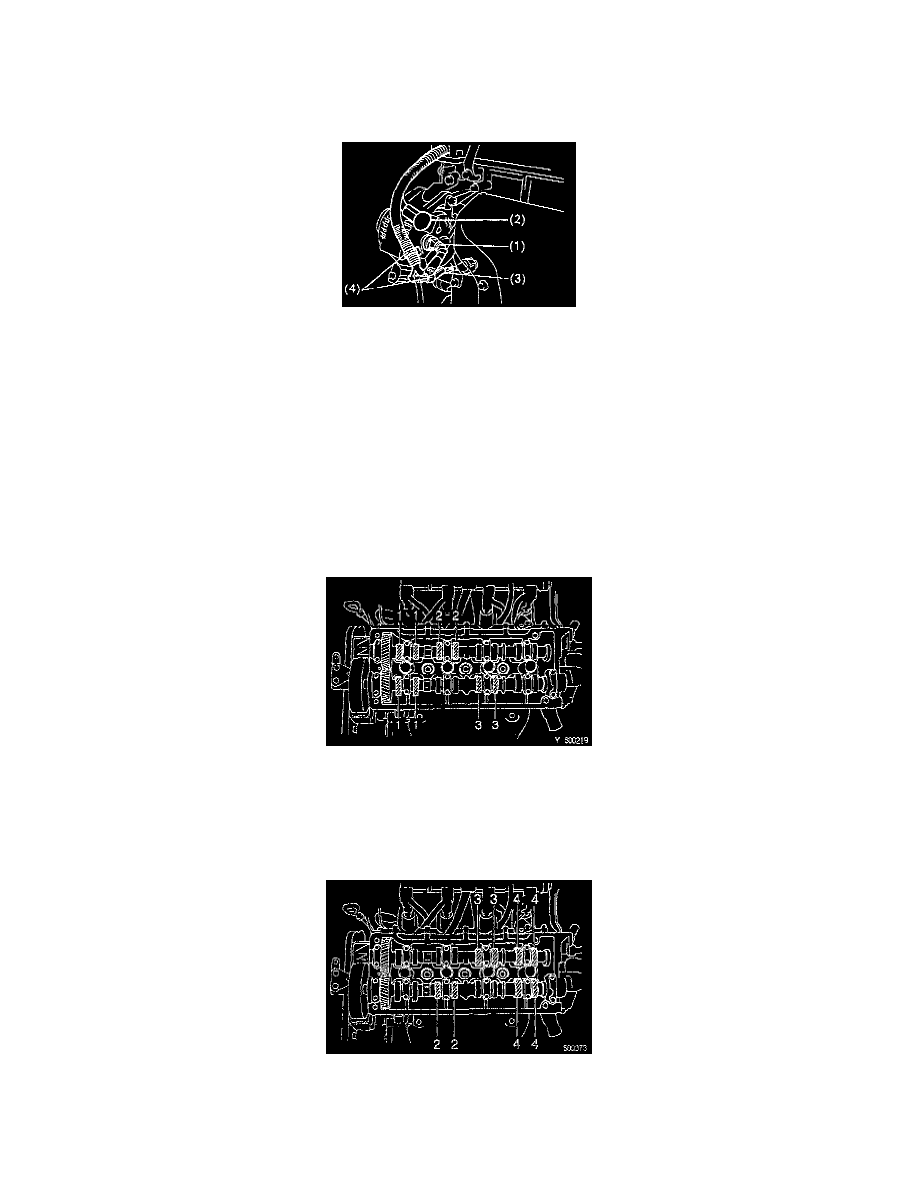
a. Disconnect the following wires and clamps:
^
Generator connector(1)
^
Generator wire(2)
^
Oil pressure switch connector(3)
^
2 wire clamps(4)
b. Remove the 2 bolts and wire harness protector.
c. Disconnect the wire harness from the cylinder head cover.
d. Disconnect the 2 PCV hoses from the cylinder head cover.
e. Remove the 4 cap nuts, seal washers, cylinder head cover and gasket.
3. Set no.1 cylinder to TDC/compression
a. Turn the crankshaft pulley and align its groove with the timing mark "0" of the No.1 timing belt cover.
b. Check that the hole of the camshaft timing pulley is aligned with the timing mark of the bearing cap. If not, turn the crankshaft 1 revolution
(360°).
4. Inspect valve clearance
a. Check only the valves indicated. Using a thickness gauge, measure the clearance between the valve lifter and camshaft. Record the
out-of-specification valve clearance measurements. They will be used later to determine the required replacement adjusting shim. Valve
clearance (Cold):
^
Intake: 0.15 - 0.25 mm (0.006 - 0.010 inch)
^
Exhaust: 0.25 - 0.35 mm (0.010 - 0.014 inch)
b. Turn the crankshaft pulley 1 revolution (360°) and align its groove with timing mark "0" of the No. 1 timing belt cover.
c. Check only the valves indicated shown. Measure the valve clearance. (See procedure in step (a))
5. Install cylinder head cover
a. Remove any old packing material.