
Corolla Sedan 4-Door L4-1587cc 1.6L DOHC MFI (1997)
(a)
Install a new air bag sensor assembly (computer).
Torque: 21 N.m (210 Kg.cm, 15 ft.lb)
(b)
Connect the air bag sensor connector.
6.
Reconnect negative (-) terminal cable to the battery. Vehicle is now ready for the SRS warning light check as instructed in Step V.
7.
After vehicle passes the SRS warning light check, reinstall the following parts.
(a)
Bracket No. 2.
(b)
Console box.
NOTE:
When installing console box, there is interference between seat belt buckle and console box, make sure not to damage console box.
(c)
Shift hole bezel for A/T or shift lever knob and shift hole cover for M/T.
8.
After work is finished, reset the radio stations as preset by the customer and adjust the clock.
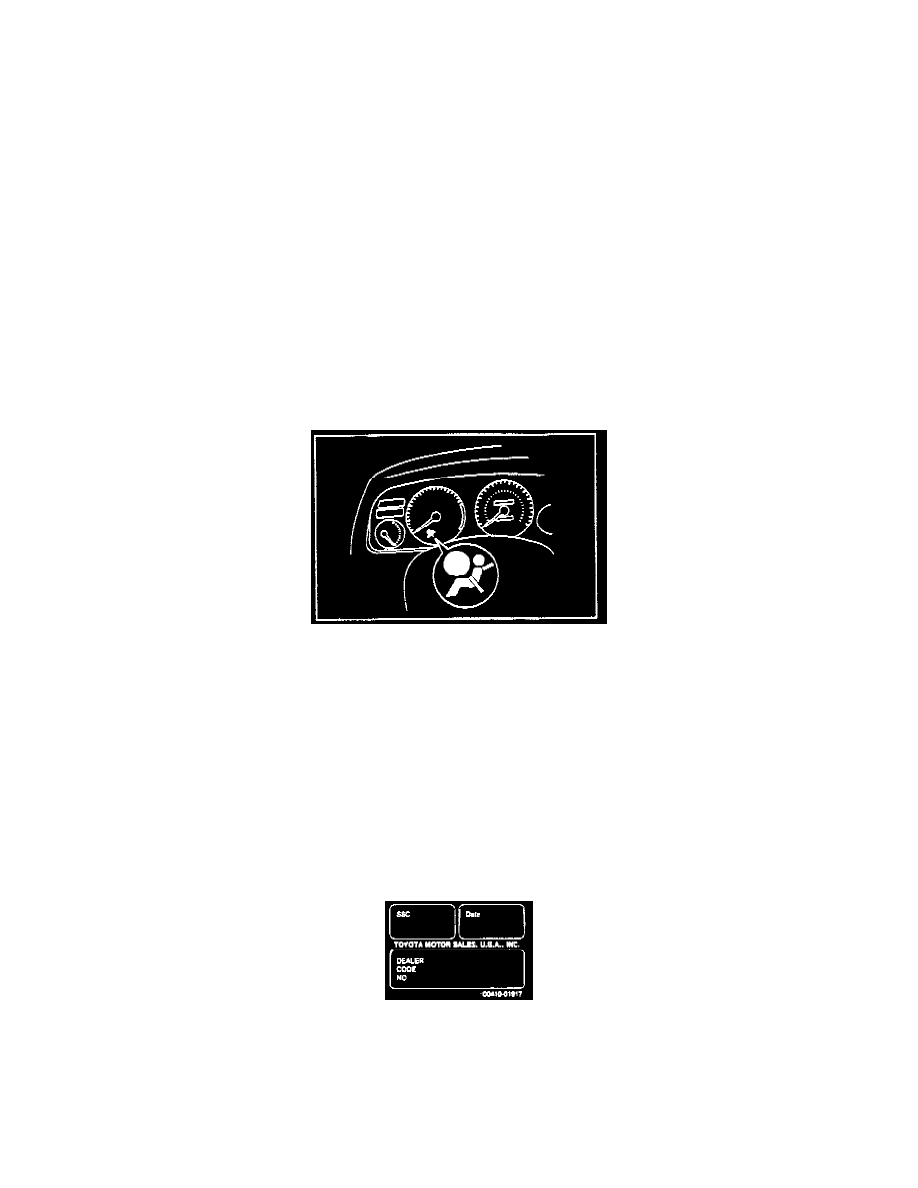
V. SRS Warning Light Check
1.
SRS Warning light check.
(a)
Turn the ignition switch to either "ACC" or "ON" position and check that the SRS warning light comes on.
(b)
Check that the SRS warning light goes out after approximately 6 seconds.
2.
Diagnostic trouble code check.
(a)
Check the diagnostic trouble codes using the diagnostic check wire or the Toyota hand-held tester.
(b)
Investigate the cause of any malfunction codes and repair according to the repair manual.
VI. SSC Completion Label Installation
(a)
After completing repair and before returning vehicle to the owner, a SSC completion label that is enclosed in the owner's notification must
be affixed to the left front door hinge post near the check strap.
(b)
The label is to be filled out as follows:
Write in SSC V01
Write in date of repair
Write in your Dealer Code
(c)
Additional SSC completion labels, in sheets of 50 (P/N 00410-01917), may be ordered through the non-parts system on a 1450 order form