
Corolla Sedan 4-Door L4-1587cc 1.6L DOHC MFI (1997)
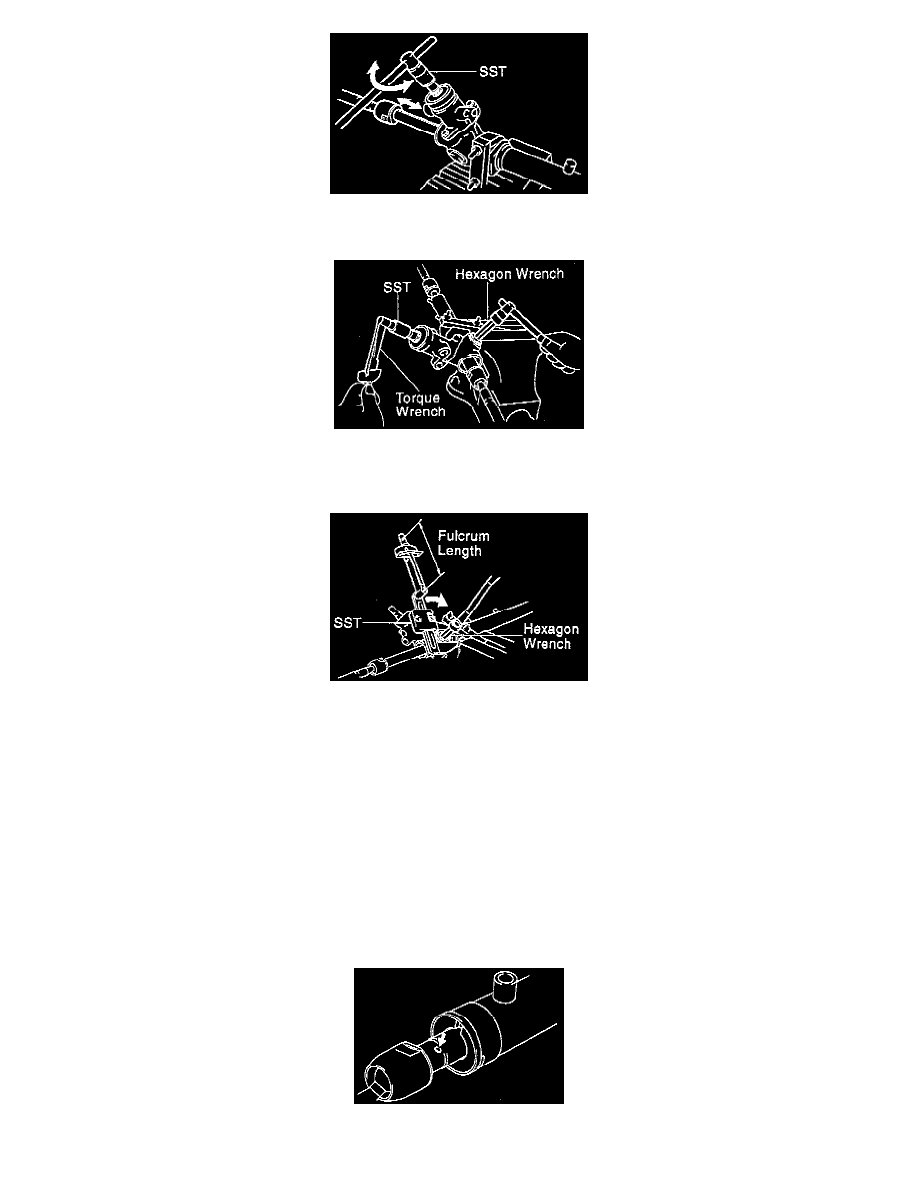
d. Using SST 09616 - 00010, turn the control valve shaft right and left 1 or 2 times.
e. Using a hexagon wrench (19 mm), loosen the cap until the rack guide spring is not functioning.
f.
Using SST 09616 - 00010, a torque wrench and hexagon wrench (19 mm), tighten the cap until the preload is within the specification.
Preload (Turning): 0.8 - 1.4 Nm (6.9-12.2 inch lbs.)].
15. Install rack guide spring cap lock nut.
a. Apply sealant to 2 or 3 threads of the nut.
[Sealant: Part No.08833 - 00080, THREE BOND 1344, LOCTITE 242 or equivalent].
b. Using a hexagon wrench (19 mm) to hold the rack guide spring cap, and using SST 09922 - 10010, torque the nut to 43 Nm (32 ft. lbs.).
NOTE:
^
Use SST 09922 - 10010 in the direction shown in the illustration.
^
Use a torque wrench with a fulcrum length of 345 mm (13.58 inch).
c. Recheck the total preload.
Preload (Turning): 0.8 - 1.4 Nm (6.9-12.2 inch lbs.)].
d. Remove the RH and LH rack ends.
16. Install RH and LH claw washers and rack ends.
17. Install RH and LH rack boots, clamps and clips