
Corolla Sedan 4-Door L4-1587cc 1.6L DOHC MFI (1997)
Control Arm: Service and Repair
Front
1. Remove front wheel.
[torque: 103 Nm (76 ft. lbs.)].
2. Remove stabilizer bar (if equipped).
3. Disconnect lower suspension/control arm from lower ball joint by removing the 2 nuts and bolt.
[torque: 142 Nm (105 ft. lbs.)].
4. Disconnect lower suspension arm.
RH Side (Manual and Automatic Transaxle)
-
Remove the 4 bolts and lower suspension arm.
[torque: Bolt A: 218 Nm (161 ft. lbs.)].
[torque: Bolt B: 175 Nm (129 ft. lbs.)].
[torque: Bolt C: 147 Nm (109 ft. lbs.)].
Installation Note: After stabilizing the suspension, torque the bolt A and B.
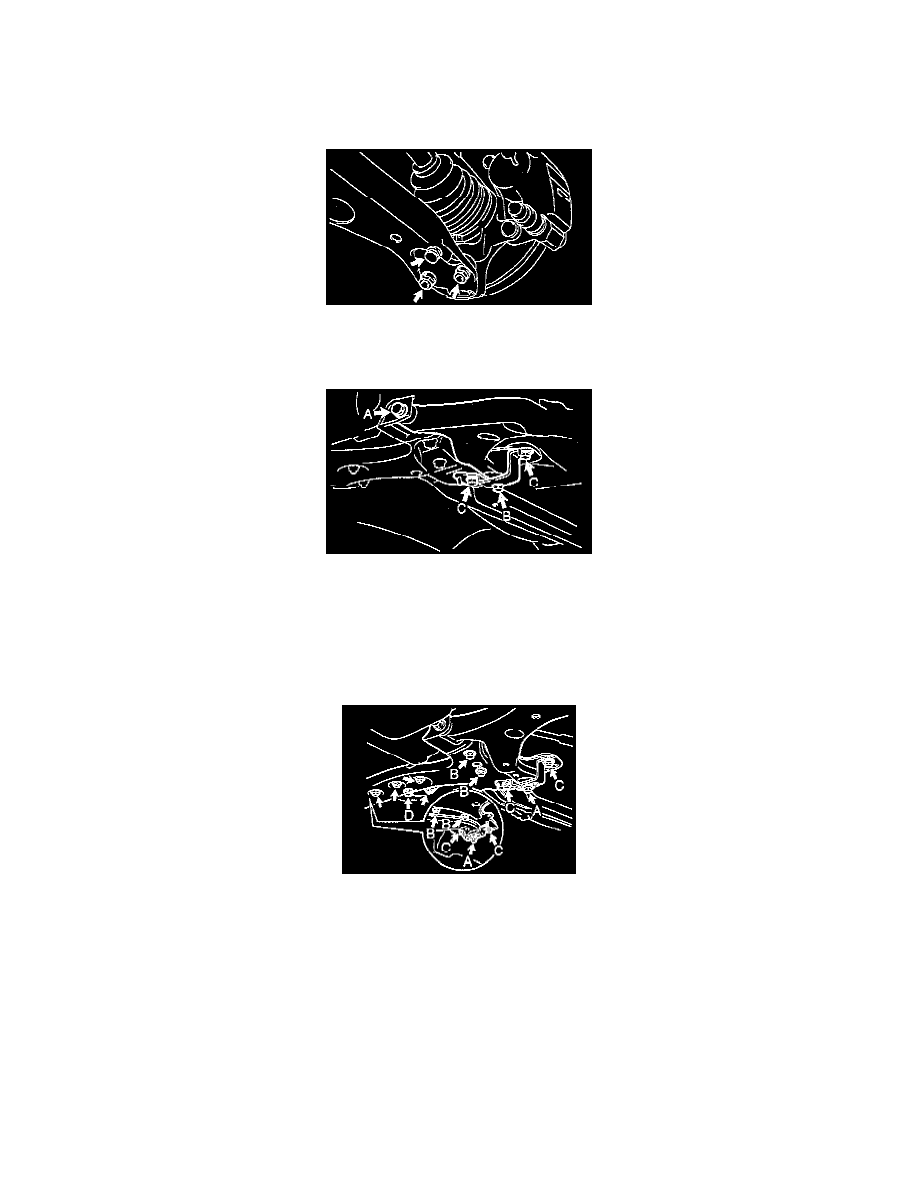
LH Side (Automatic Transaxle)
a. Remove the 10 bolts, 4 nuts and suspension crossmember with the lower suspension arm.
[torque: Bolt A: 175 Nm (129 ft. lbs.)].
[torque: Bolt B: 225 Nm (167 ft. lbs.)].
[torque: Bolt C: 147 Nm (109 ft. lbs.)].
[torque: Bolt D: 60 Nm (45 ft. lbs.)].
[torque: Nut: 60 Nm (45 ft. lbs.)].
Installation Note: After stabilizing the suspension, torque the bolt A, B and C.
b. Support the center member securely.