
Paseo Coupe L4-1497cc 1.5L DOHC MFI (1997)
^
Using a non-residue solvent, clean both sealing surfaces.
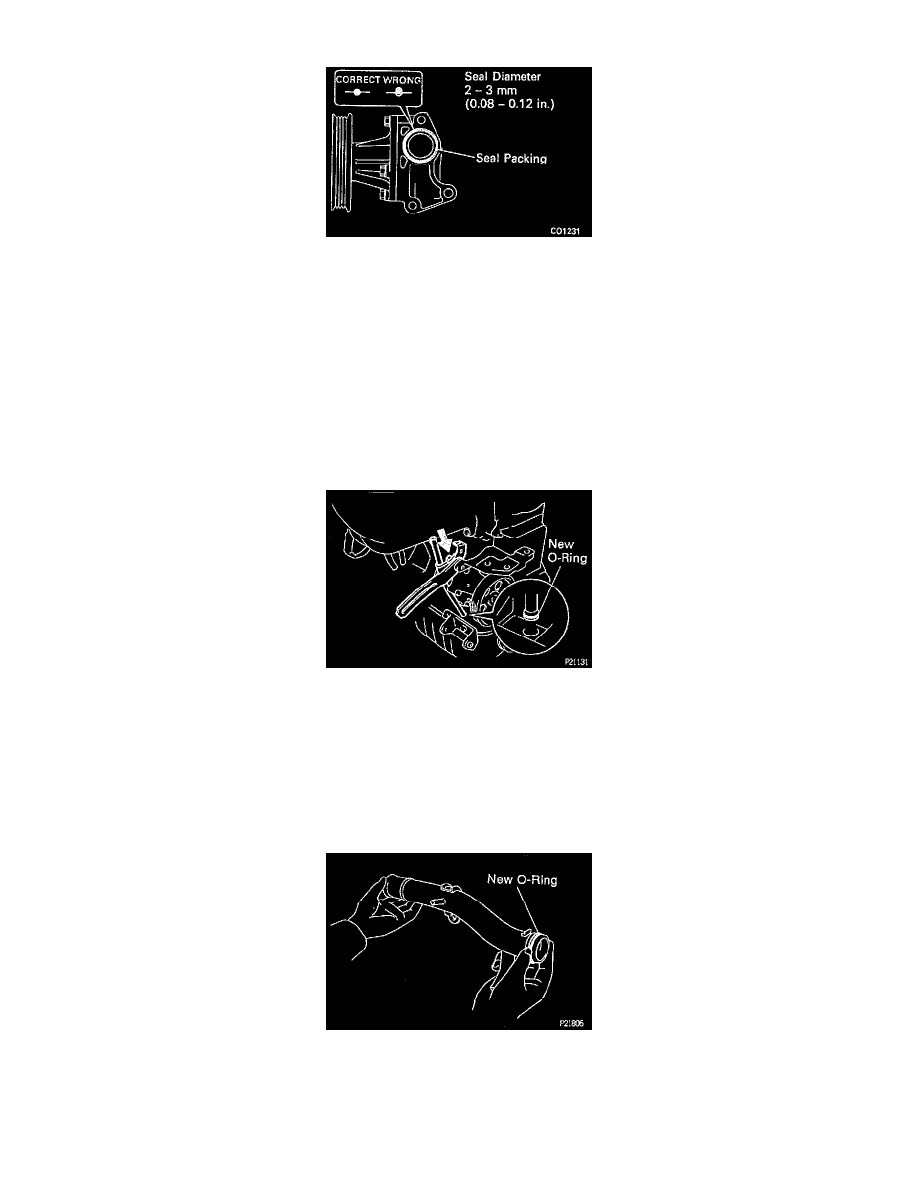
(b) Apply seal packing to the water pump groove.
Seal packing:
Part No. 08826 - 00100, THREE BOND 1282B or equivalent.
^
Install a nozzle that has been cut to a 2 - 3 mm (0.08 - 0.12 inch) opening.
NOTE: Avoid applying an excessive amount to the surface.
^
Parts must be assembled within 5 minutes of application. Otherwise the material must be removed and reapplied.
^
Immediately remove nozzle from the tube and reinstall cap.
^
Do not pour in any coolant until at least 2 hours after installation is completed.
(c)
Install the water pump with the bolt and 2 nuts.
Torque: 17.5 Nm (175 kg.cm, 14 ft. lbs.)
2. Install oil dipstick guide and generator adjusting bar.
(a)
Install a new O-ring to the dipstick guide.
(b) Apply soapy water to the O-ring.
(c)
Push in the dipstick guide, and install it with the mounting bolt of the generator adjusting bar and dipstick guide clamp.
Torque: 18.5 Nm (185 kg.cm, 14 ft. lbs.)
(d) Install the oil dipstick.
(e)
Connect these wire clamps:
^
Connector clamp (to crankshaft position sensor).
^
Engine wire clamp.
3. Install water inlet pipe.
(a)
Install a new O-ring to the water inlet pipe.
(b) Apply a little soap and water to the O-ring.