
Paseo Coupe L4-1497cc 1.5L DOHC MFI (1997)
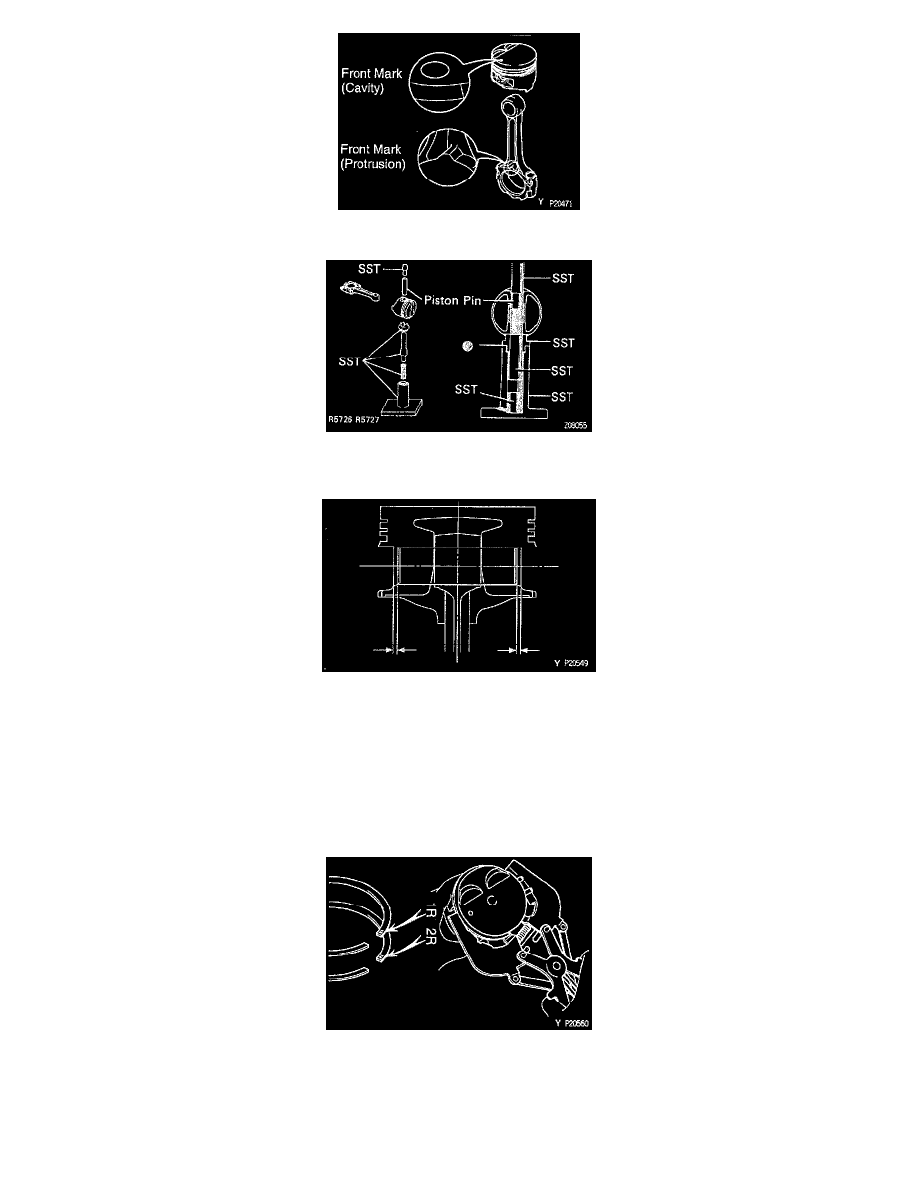
(b) Align the cavity on the piston with the protrusion on the connecting rod.
(c)
Using SST, press in the piston pin.
SST 09221 - 25026 (09221 - 00020, 09221 - 00030, 09221 -00130, 09221 -00140, 09221 -00150) or equivalents.
(d) After installing the piston pin, check that when the connecting rod is aligned with the center of the piston the space between the piston and
each end of the piston pin are equal on the left and right sides.
NOTE: If the piston pin is off-center due to insufficient insertion pressure on the piston pin, place a washer at the position indicated by the
DOT in the illustration for (c). Then, while checking that the space is equal at the ends of the piston pin on the left and right sides, press in the
washer.
2. Install piston rings.
(a)
Install the oil ring expander and 2 side rails by hand.
(b) Using a piston ring expander, install the 2 compression rings with the code mark facing upward.
Code Mark:
No. 1: 1R
No. 2: 2R