
Previa Van LE 4WD L4-2438cc 2.4L DOHC SC MFI (1997)
REMOVAL HINT: Be careful that the drain hose does not drop from the unit.
COOLING UNIT INSTALLATION
Installation is in the reverse order of removal.
Nippondenso Type
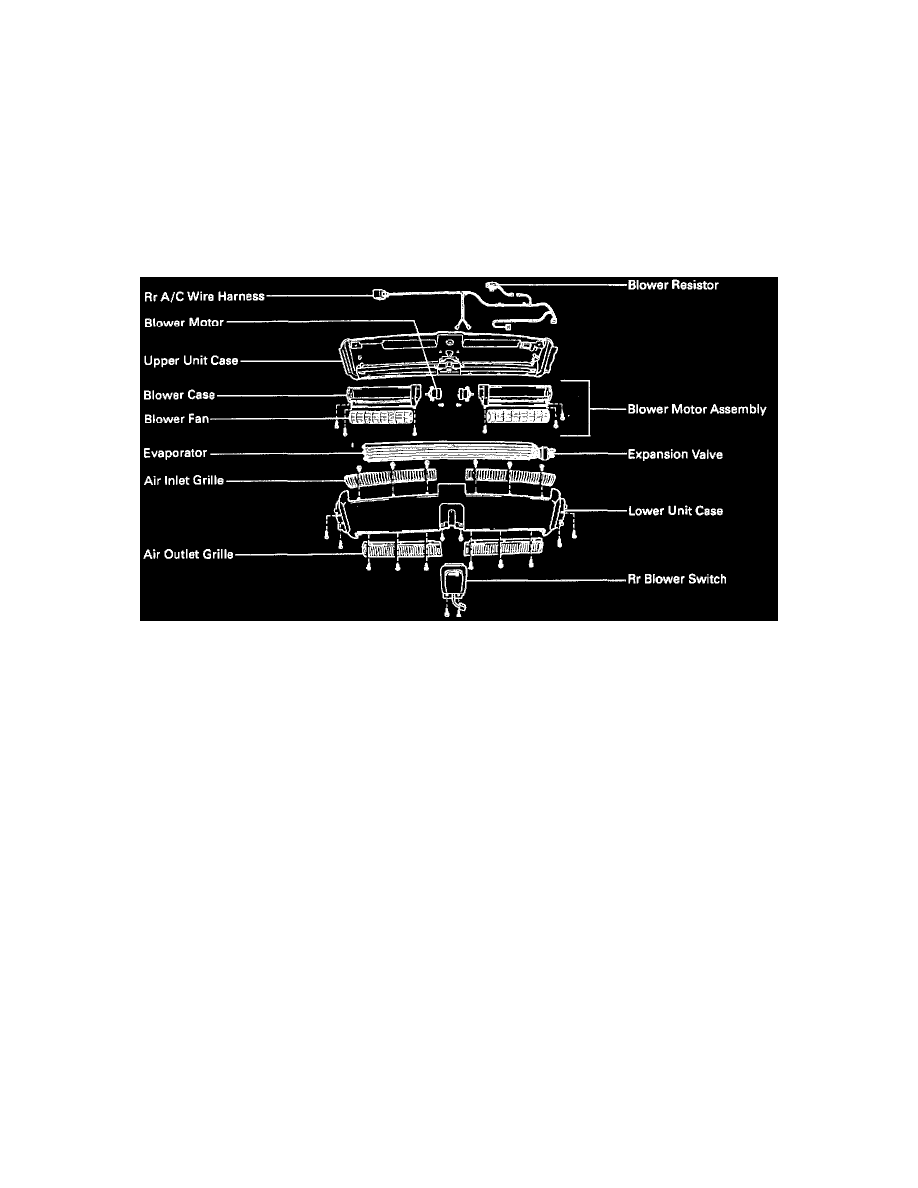
COOLING UNIT DISASSEMBLY
NIPPONDENSO type:
HINT: Steps 1 to 7 can be done without removing the entire cooling unit. Accordingly. for steps 1 to 4 there is no need to discharge the
refrigeration system.
Rear Cooling Unit / Nippondenso Type
1. REMOVE RIGHT AND LEFT AIR INLET GRILLS AND AIR OUTLET GRILLS
2. REMOVE LOWER CASE
3. REMOVE REAR A/C SWITCH
4. REMOVE EVAPORATOR
INSTALLATION HINT: If evaporator was replaced, add compressor oil to compressor.
Add 40 - 50 cc (1.4 - 1.7 fl.oz.)
Compressor oil:
ND-OIL 8 or equivalent
5. REMOVE RIGHT AND LEFT BLOWER MOTOR ASSEMBLIES
6. REMOVE BLOWER RESISTOR
7. DISASSEMBLE BLOWER MOTOR ASSEMBLY