
Previa Van LE 4WD L4-2438cc 2.4L DOHC SC MFI (1997)
Ball Joint: Service and Repair
REMOVAL
1. Remove front wheel.
Torque: 103 Nm (76 ft. lbs.)
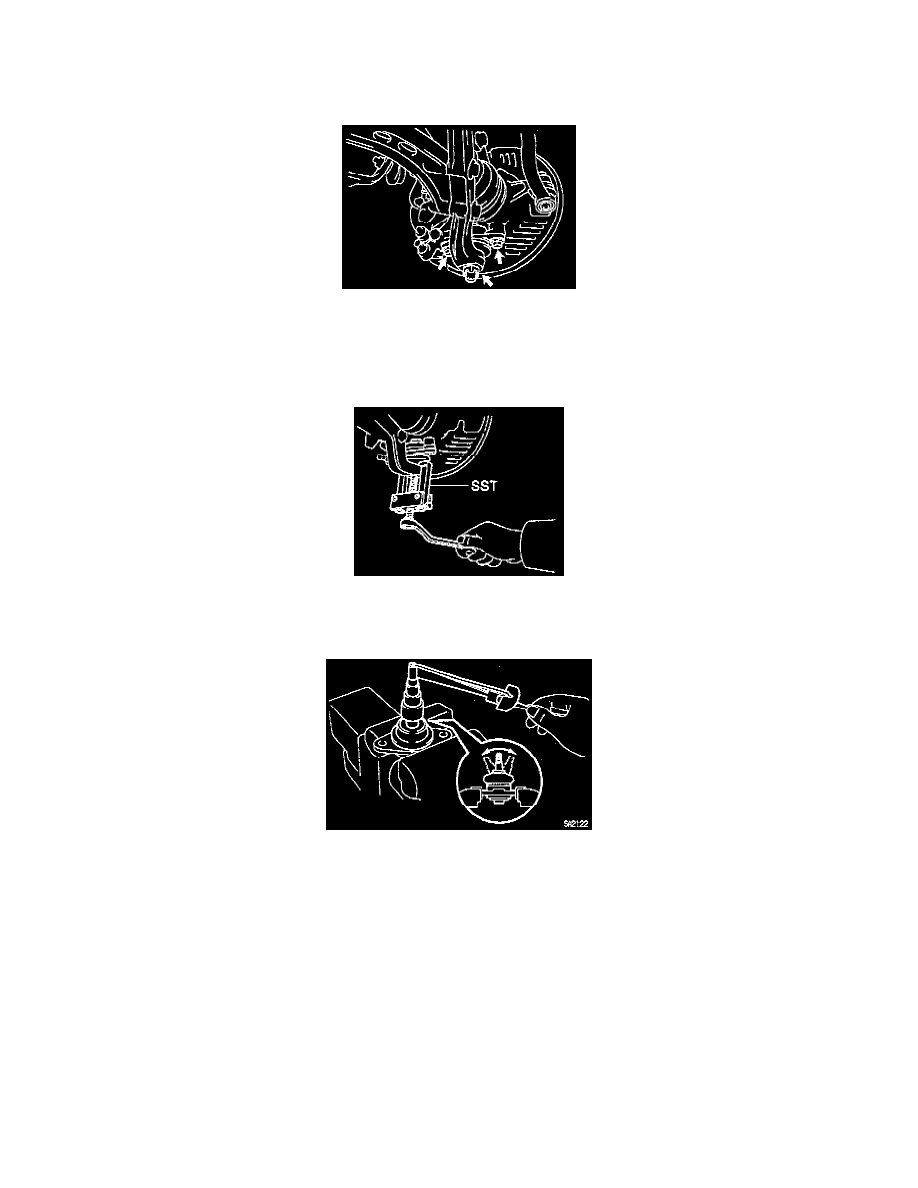
2. Remove lower ball joint.
a. Remove the cotter pin and nut.
Torque: 103 Nm (76 ft. lbs.)
b. Remove the 2 bolts.
Torque: 127 Nm (94 ft. lbs.)
c. Using Special Service Tool (SST) # 09628 - 62011 or equivalent, remove the lower ball joint.
INSPECTION
1. Inspect ball joint for rotation condition.
a. As shown, flip the ball joint stud back and forth 5 times, before installing the nut.
b. Using a torque wrench, turn the nut continuously one turn each 2 - 4 seconds and take the torque reading on the 5th turn.
Turning torque: 1.5 - 3.9 Nm (13 - 35 inch lbs.)
INSTALLATION
Installation is in the reverse order of the removal.
HINT: After installation, check the front wheel alignment.