
Previa Van LE 4WD L4-2438cc 2.4L DOHC SC MFI (1997)
companion flange.
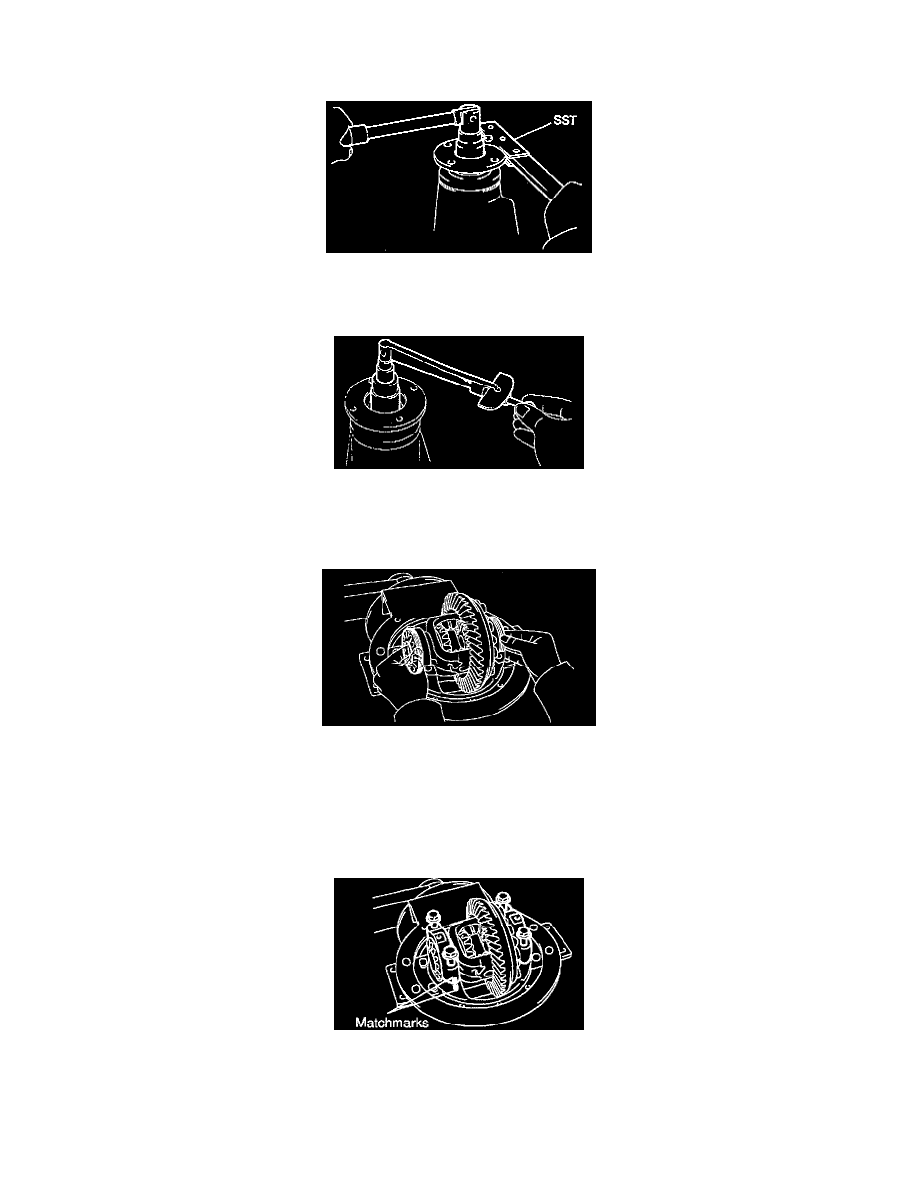
d. Coat the threads of the nut with gear oil.
e. Adjust the drive pinion preload by tighten the companion flange nut.
HINT: Using SST # 09330 - 00021 or equivalent to hold the flange, tighten the nut.
NOTICE: As there is no spacer, tighten the nut a little at a time, being careful not to overtighten it.
f.
Using a torque wrench, measure the drive pinion preload.
Preload (at starting):
New bearing: 1.4 - 2.1 Nm (12.2 - 18.3 inch lbs.)
Reused bearing: 0.6 - 1.0 Nm (5.2 - 8.7 inch lbs.)
9. Install differential case in carrier.
a. Place the 2 bearing outer races on their respective bearings. Make sure the left and right outer races are not interchanged.
b. Install the case in the carrier.
HINT: Make sure that there is a backlash between the ring gear and drive pinion.
10. Install adjusting nuts. Install the 2 adjusting nuts on the carrier, making sure the nuts are threaded properly.
11. Install bearing caps. Align the matchmarks on the cap and carrier. Screw in the 2 bearing cap bolts 2 or 3 turns and press down the bearing cap by
hand.
HINT: If the bearing cap does not fit tightly on the carrier, the adjusting nuts are not threaded properly. Reinstall the adjusting nuts if necessary.
12. Adjust side bearing preload.