
Supra Liftback L6-2997cc 3.0L DOHC MFI Twin-Turbo (1997)
(e) Remove the two lower radiator supports.
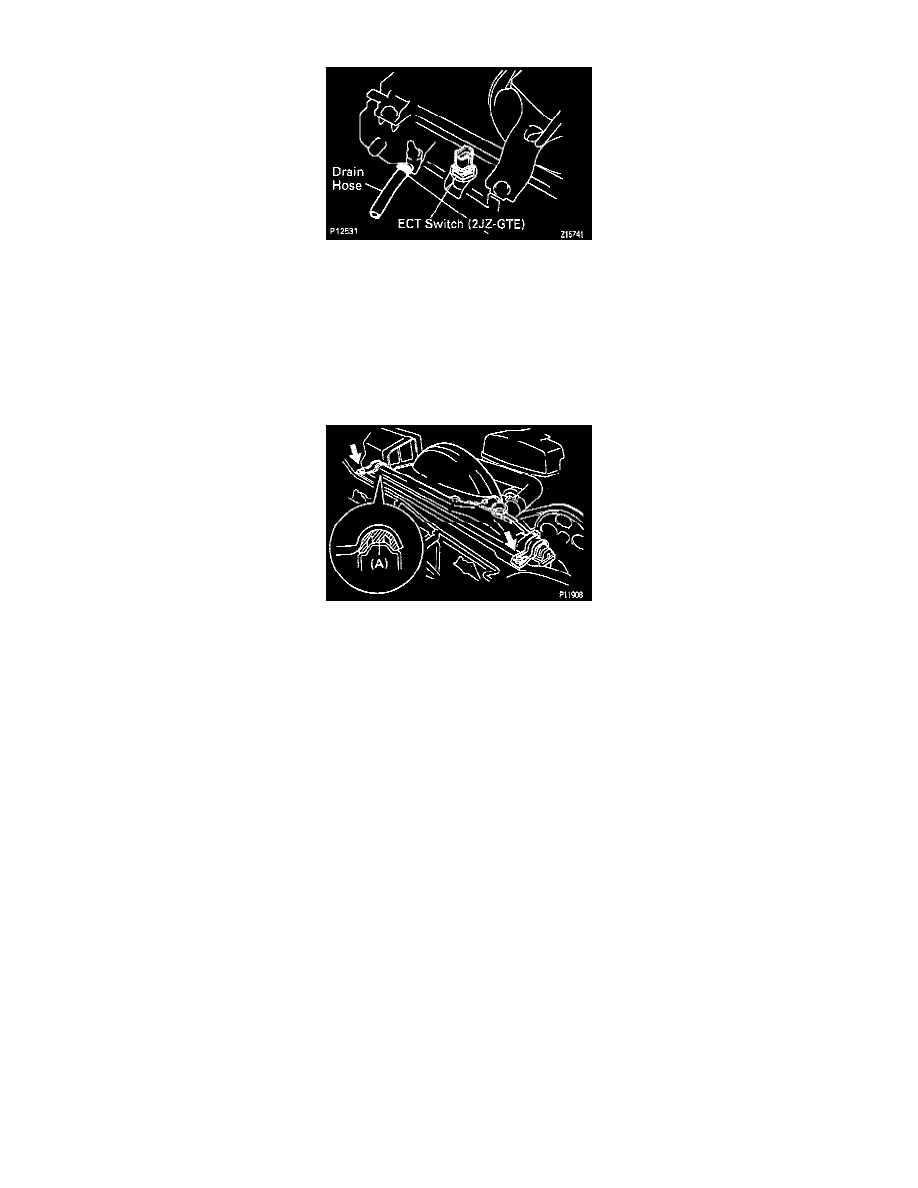
11. Remove drain hose from radiator.
12. Remove Engine Coolant Temperature (ECT) switch and O-ring from radiator
13. Remove the five bolts and No.1 fan shroud from radiator
INSTALLATION
Installation is the reverse of removal, noting the following information:
(a) Install a new O-ring to the ECT switch then tighten to: 7.4 Nm (75 kg. cm., 65 inch lbs.).
NOTE: Apply soapy water to the O-ring.
(b) After radiator installation, check that the rubber cushion (A) of the support is not depressed, then tighten supports bolts to: 15 Nm (155 kg.
cm., 11 ft. lbs.).
(c) Start the engine, and check for coolant and A/T fluid leaks.