
Supra Liftback L6-2997cc 3.0L DOHC MFI Twin-Turbo (1997)
B. Install connecting rod cap bolts:
NOTE:
^
The connecting rod cap bolts are tightened in 2 progressive steps.
^
If any of the connecting rod bolts break or deform, replace them.
(a) Apply a light coat of engine oil on the threads and under the heads of the connecting rod cap bolts.
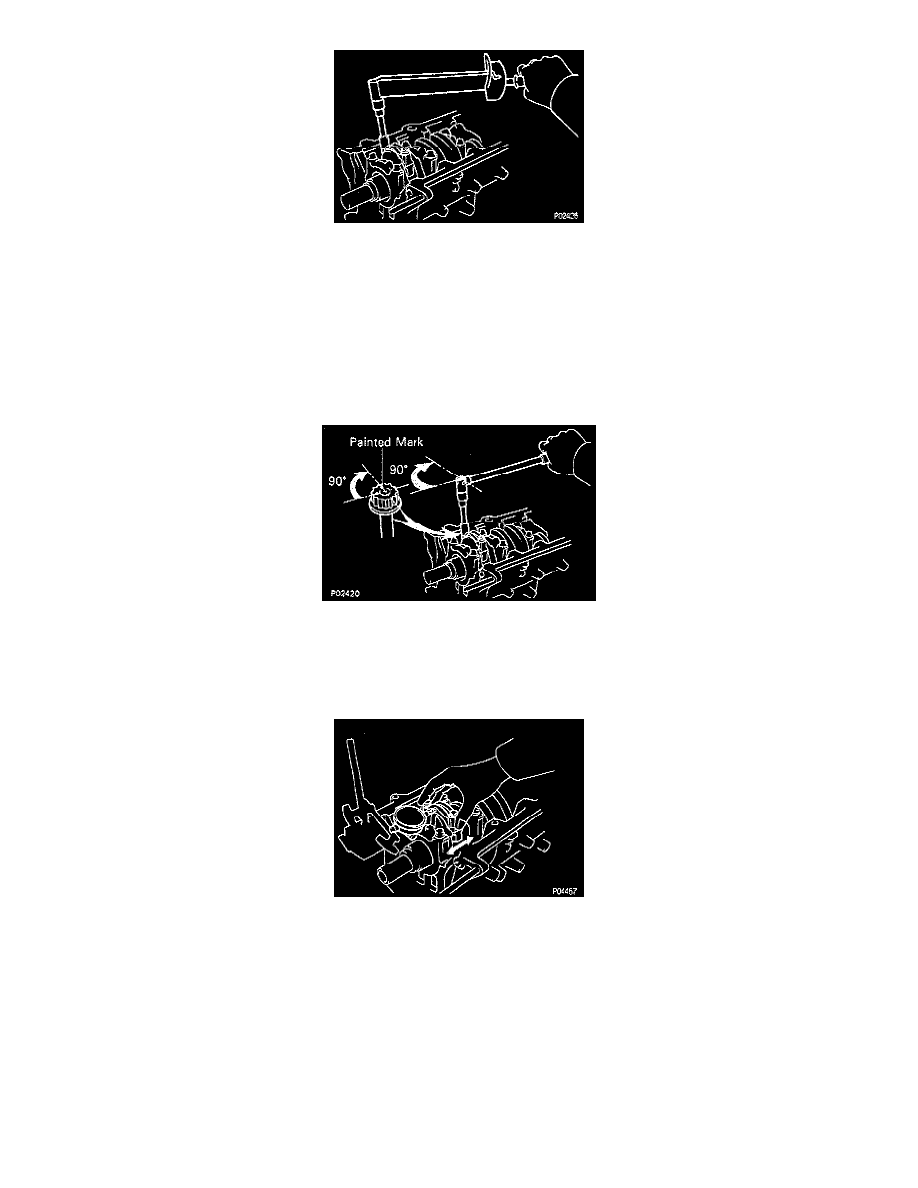
(b) Install and alternately tighten the bolts of the connecting rod cap in several passes to 29 Nm (300 kg. cm., 22 ft. lbs.).
NOTE: If any one of the connecting rod cap bolts does not meet the torque specification, replace the cap bolt.
(c) Mark the front of the connecting rod cap bolt with paint.
(d) Retighten the connecting rod cap bolts 90° in the numerical order shown.
(e) Check that the painted mark is now at a 90°.
(f) Check that the crankshaft turns smoothly.
9. Check connecting rod thrust clearance as follows:
(a) Using a suitable dial indicator, measure the thrust clearance while moving the connecting rods back and forth.
Standard thrust clearance: 0.250-0.402 mm (0.0098-0.0158 inch).
Maximum thrust clearance: 0.50 mm (0.0197 inch).
(b) If the thrust clearance is greater than maximum, replace the connecting rod assembly(s).
(c) If necessary, replace the crankshaft.
Connecting rod thickness: 25.898-25.950 mm (1.0196-1.0217 inch).
10. Install rear oil seal retainer as follows:
A. Remove any old packing (FIPG) material:
(a) Be careful not to drop any oil on the contact surfaces of the retainer and cylinder block.
(b) Using a razor blade and gasket scraper, remove all the old packing (FIPG) material from the gasket surfaces and sealing groove.
(c) Thoroughly clean all components to remove all debris.
(d) Using a non-residue solvent, clean both sealing surfaces.