
Supra Liftback L6-2997cc 3.0L DOHC MFI Twin-Turbo (1997)
Valve Seat: Service and Repair
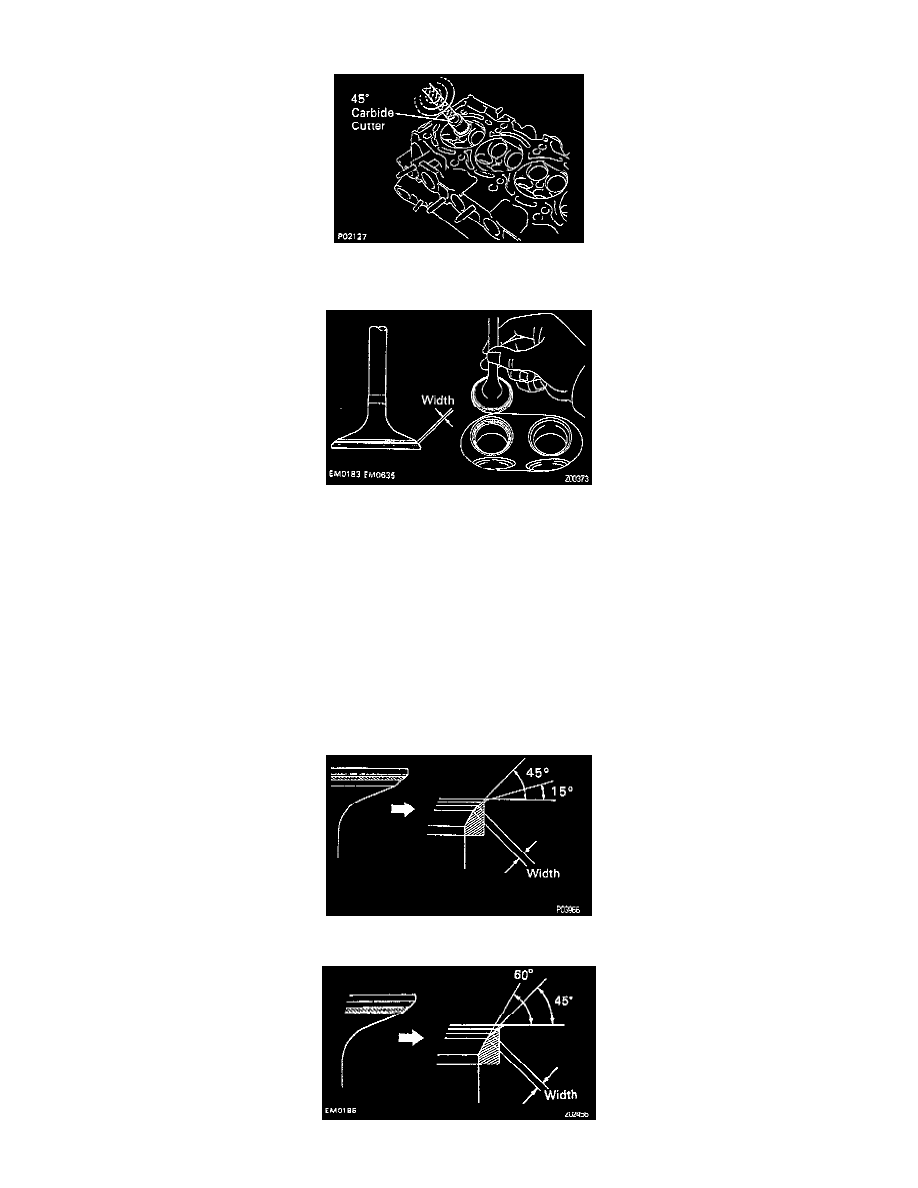
1. Using a 45° carbide cutter, resurface the valve seats. Remove only enough metal to clean the seats.
2. Check the valve seating position as follows:
(a) Apply a thin coat of prussian blue (or white lead) to the valve face.
(b) Lightly press the valve against the seat.
NOTE: Do not rotate the valve.
(c) Check the valve face and seat for the following:
-
If blue appears 360° around the face, the valve is concentric.
-
If not, replace the valve.
-
If blue appears 360° around the valve seat, the guide and face are concentric.
-
If not, resurface the seat.
(d) Check that the seat contact is in the middle of the valve face with the following width:
-
Intake: 1.0-1.4 mm (0.0390-0.0550 inch).
-
Exhaust: 1.2-1.6 mm (0.0470-0.0630 inch).
(e) If not, correct the valve seats as follows:
-
If the seating is too high on the valve face, use 15° and 45° cutters to correct the seat.