
Supra Sport Roof L6-2997cc 3.0L DOHC MFI (1998)
NOTICE: At the time of tightening the screw, as the sensor itself tends to turn causing to slanting, check that it is within the standard
value after having finished the torque.
(5) Fully close the throttle valve with a screwdriver and check that the value of the throttle valve opening percentage (THROTTLE POS) of
the CURRENT DATA stays with the standard value.
Standard throttle valve opening percentage: 10 - 14%
If the throttle valve opening percentage is not as specified, repeat steps (4) through (5).
(6) Paint the sensor set screws.
(7) Turn the ignition switch OFF.
(8) Disconnect the TOYOTA hand-held tester or OBD II scan tool from the DLC3.
(9) Disconnect the throttle position sensor connector
2. REPLACE THROTTLE CONTROL MOTOR
(a) Remove the throttle position sensor.
(b) Remove the throttle control motor.
(1) Disconnect the connector from the bracket.
(2) Remove the 5 screws, bracket and cover.
(3) Remove the 3 screws and throttle control motor.
(c) Reinstall the throttle control motor.
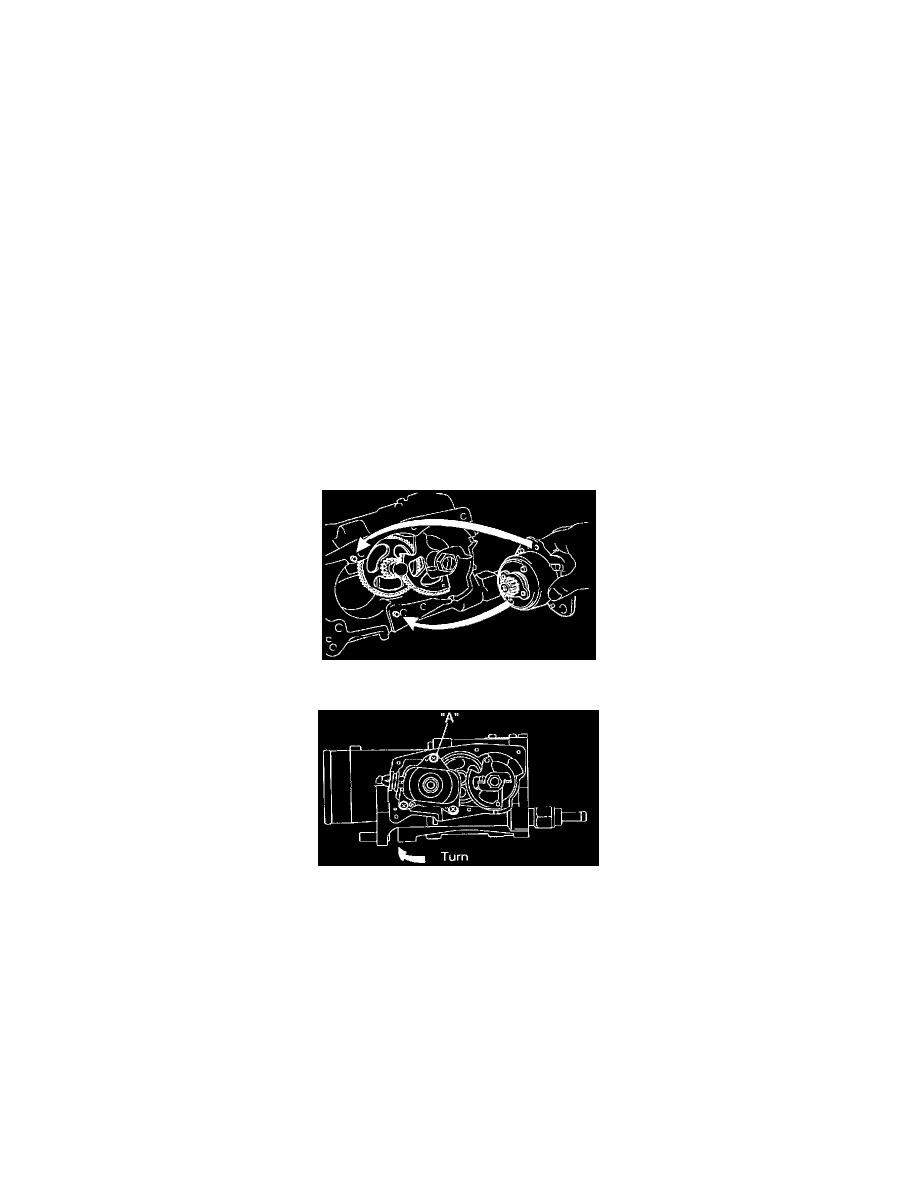
(1) Apply the grease thinly on the whole surface of the gear teeth.
NOTICE: Do not apply the grease other than specified because grease has been already applied to the component to be replaced.
(2) Align the protrusions of the motor with the positioning pin holes of the throttle body.
(3) Rotate the motor to the direction marked with an arrow and temporarily install the set screw "A" under the condition that there is no
wobbles in the motor and the positioning pin.
(4) Tighten the 3 set screws.
Torque: 3.7 N.m (37.5 kgf.cm, 33 in. lbf)
(5) Temporarily install the cover with the 2 screws "B# and "C".
NOTICE: The grommet of motor not be caught.