
Supra Sport Roof L6-2997cc 3.0L DOHC MFI (1998)
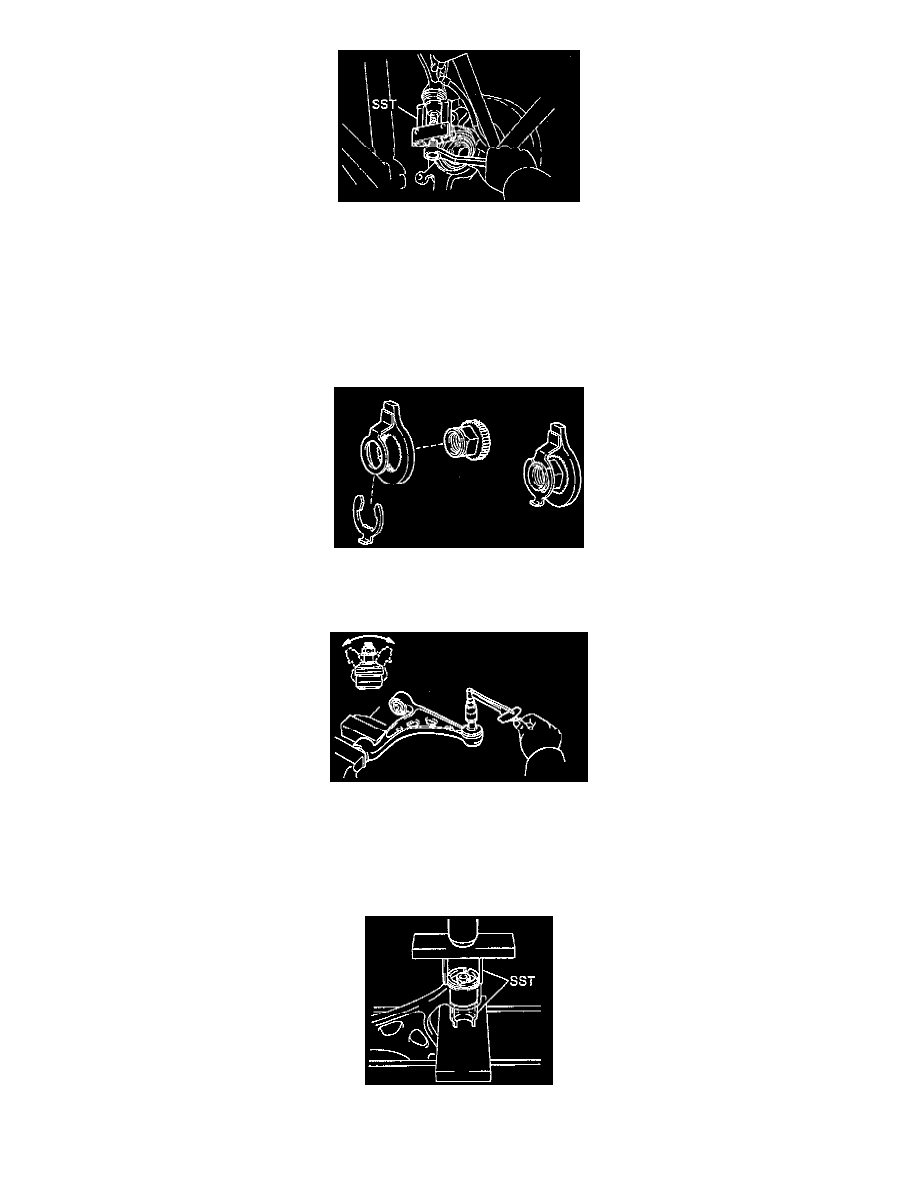
b. Using Special Service Tool (SST) 09628-62011 or equivalent, disconnect the upper suspension arm from the axle carrier.
NOTICE: Be careful not to damage the dust cover.
c. Remove the bolts, nuts and upper suspension arm.
Torque: 164 Nm (121 ft. lbs.).
HINT:
-
At the time of installation, after stabilizing the suspension, torque the bolt and nut.
-
If replacing the front nut, assemble the nut and E-ring to the washer with lock protrusion before installing.
INSPECTION
1. Inspect ball joint for rotation condition.
a. Flip the ball joint stud back and forth five times, as shown in the illustration, before installing the nut.
b. Using torque wrench, turn the nut continuously one turn every 2 - 4 seconds and take the torque reading on the fifth turn.
Turning torque: 1.0 - 3.4 Nm (9 - 30 inch lbs.).
BUSHING REPLACEMENT
1. Remove bushing.
Using Special Service Tool (SST) 09710-26010 (09710-05070), 09710-30020 (09710-03030) or equivalents, remove the bushing.