
Tacoma Extra Cab 2WD L4-2438cc 2.4L DOHC MFI (1997)
Engine RPM Sensor (NE signal): Service and Repair
CRANKSHAFT POSITION SENSOR REMOVAL
1. REMOVE ENGINE UNDER COVER
2. REMOVE GENERATOR
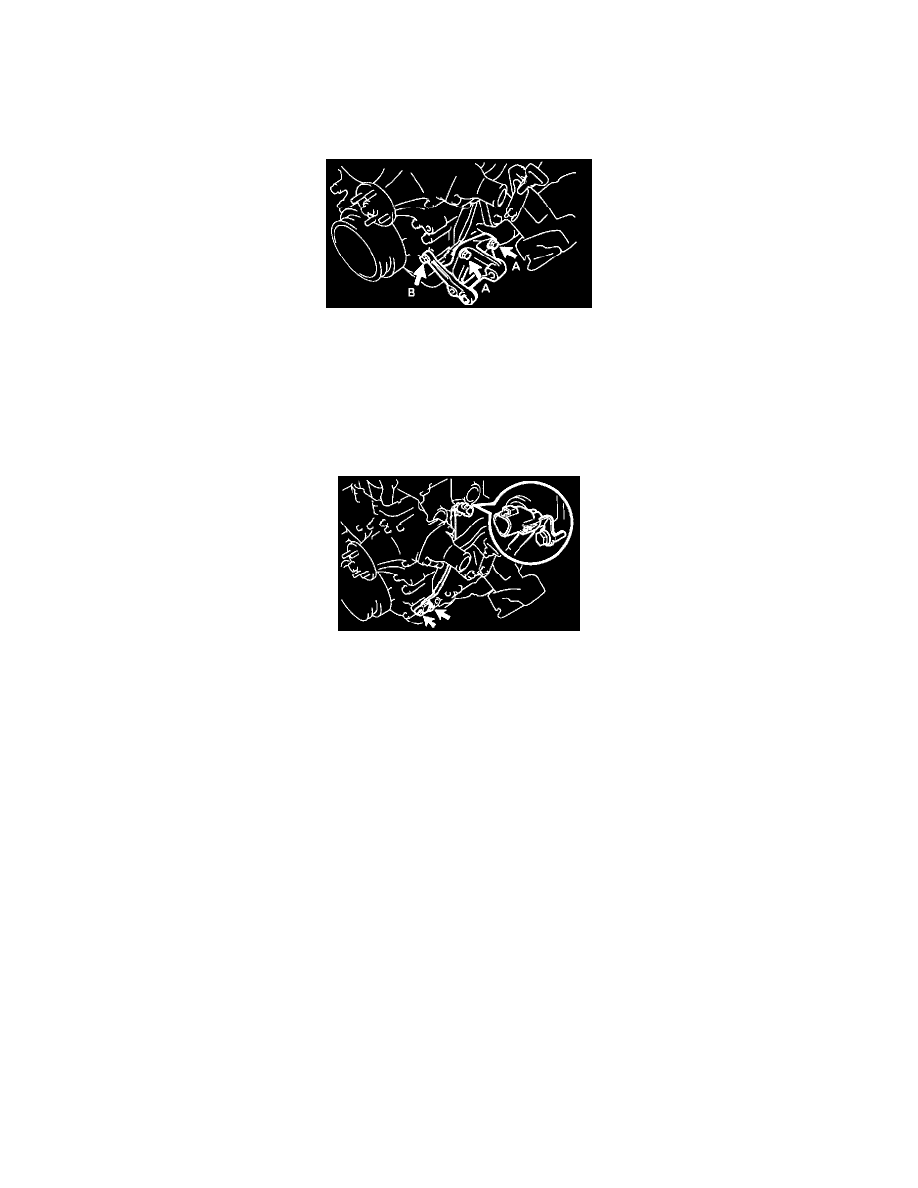
3. REMOVE GENERATOR BRACKET
Remove the 3 bolts and bracket.
Torque:
Bolt A: 74.5 N.m (760 kgf.cm, 55 ft.lbf)
Bolt B: 18 N.m (180 kgf.cm, 13 ft.lbf)
4. DISCONNECT CRANKSHAFT POSITION SENSOR CONNECTOR
5. REMOVE CRANKSHAFT POSITION SENSOR
(a) Remove the 2 bolts and crankshaft position sensor.
Torque: 8.5 N.m (85 kgf.cm, 74 in.lbf)
(b) Remove the O-ring.
INSTALLATION HINT:
-
Always use a new O-ring when installing the crankshaft position sensor.
-
Apply a light coat of engine oil on the O-ring.
CRANKSHAFT POSITION SENSOR INSTALLATION
Installation is in the reverse order of removal.