
Tacoma Extra Cab 4WD L4-2693cc 2.7L DOHC MFI (1997)
Camshaft: Service and Repair
Installation
1. Install camshafts.
CAUTION: Since the thrust clearance of the camshaft is small, the camshaft must be kept level while it is being installed. If the camshaft is not
kept level, the portion of the cylinder head receiving the shaft thrust may crack or be damaged, causing the camshaft to seize or break. To avoid
this, these steps should be carried out.
A. Install intake camshaft.
(a)
Apply Multipurpose (MP) grease to the thrust portion of the intake camshaft.
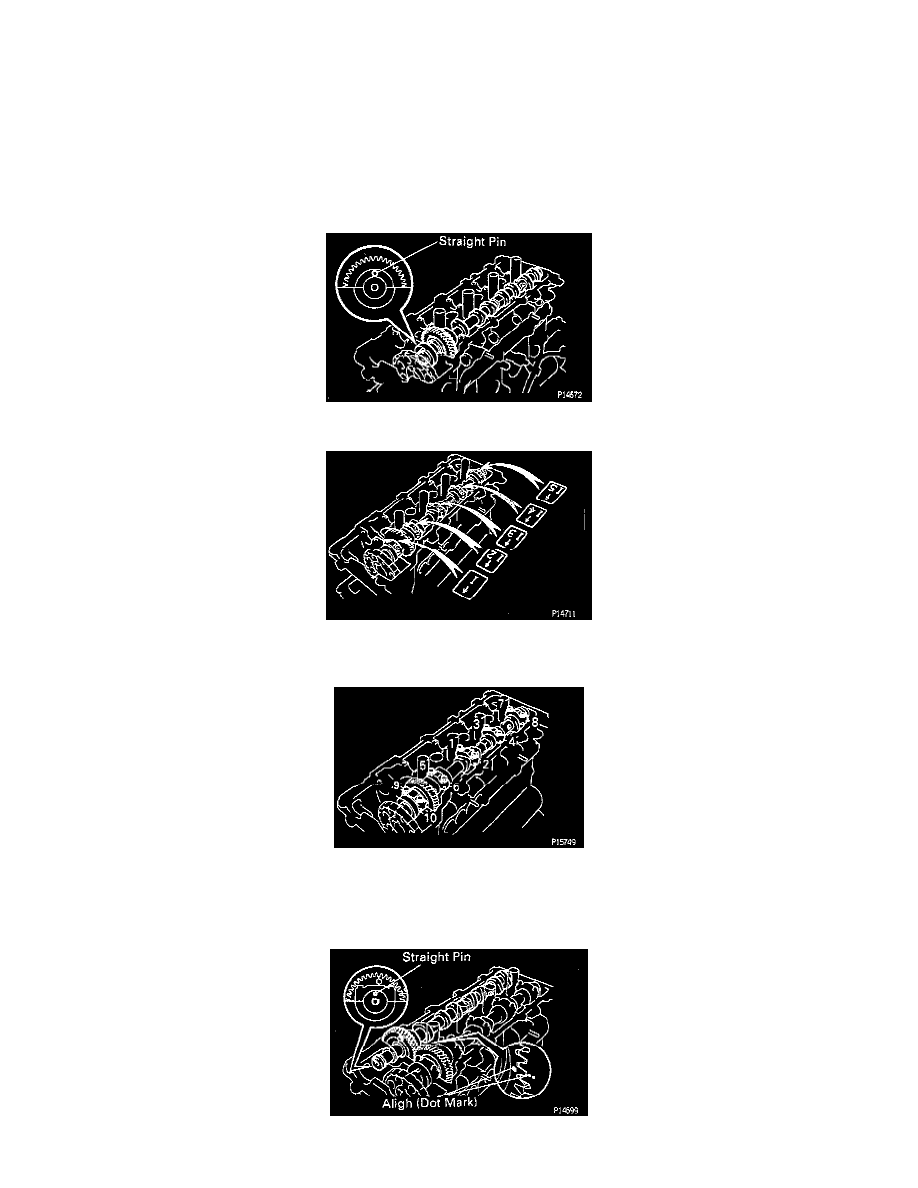
(b) Place the intake camshaft with knock pin facing upward of camshaft angle on the cylinder head.
(c)
Install the bearing caps in their proper locations.
(d) Apply a light coat of engine oil on the threads and under the heads of the bearing cap bolts.
(e)
Install and uniformly tighten the 10 bearing cap bolts in the sequence shown.
Torque: 15.5 Nm (12 ft. lbs.)
B. Install exhaust camshaft.
(a)
Apply MP grease to the thrust portion of the exhaust camshaft.
(b) Engage the exhaust camshaft gear to the intake camshaft gear by matching the timing marks (1 and 2 dots) on each gear.