
Tacoma Extra Cab 4WD L4-2693cc 2.7L DOHC MFI (1997)
Valve Seat: Testing and Inspection
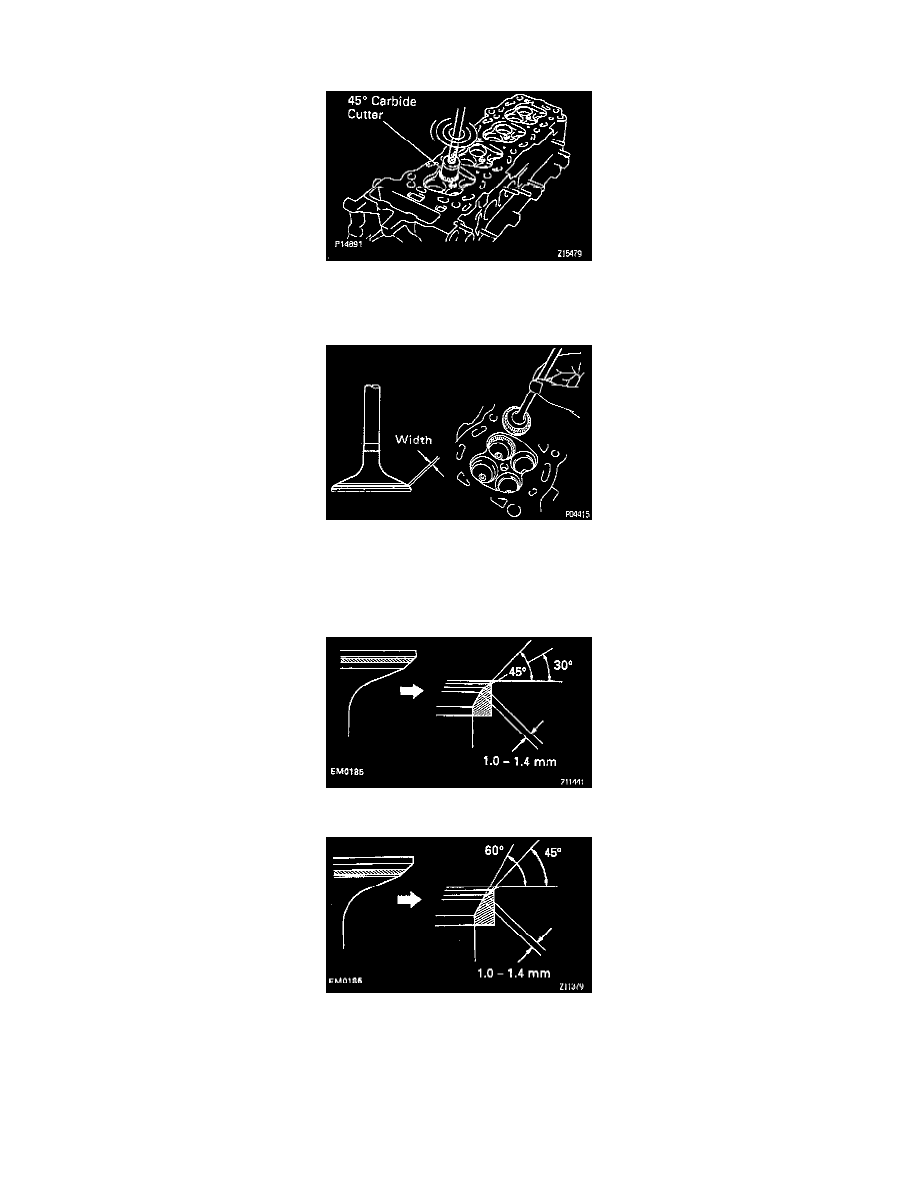
INSPECT AND CLEAN VALVE SEATS
1. Using a 45° carbide cutter, resurface the valve seats. Remove only enough metal to clean the seats.
2. Check the valve seating position.
Apply a light coat of prussian blue (or white lead) to the valve face. Lightly press the valve against the seat. Do not rotate valve.
3. Check the valve face and seat for the following:
-
If blue appears 360° around the face, the valve is concentric. If not, replace the valve.
-
If blue appears 360° around the valve seat, the guide and face are concentric. If not, resurface the seat.
-
Check that the seat contact is in the middle of the valve face with the following width: 1.0 - 1.4 mm (0.039 - 0.055 inch)
If not, correct the valve seats as follows:
(1) If the seating is too high on the valve face, use 30° and 45° cutters to correct the seat.
(2) If the seating is too low on the valve face, use 60° and 45° cutters to correct the seat.