
Tacoma Extra Cab 4WD L4-2693cc 2.7L DOHC MFI (1997)
Light Control Rheostat: Initial Inspection and Diagnostic Overview
INSPECT LIGHT CONTROL RHEOSTAT
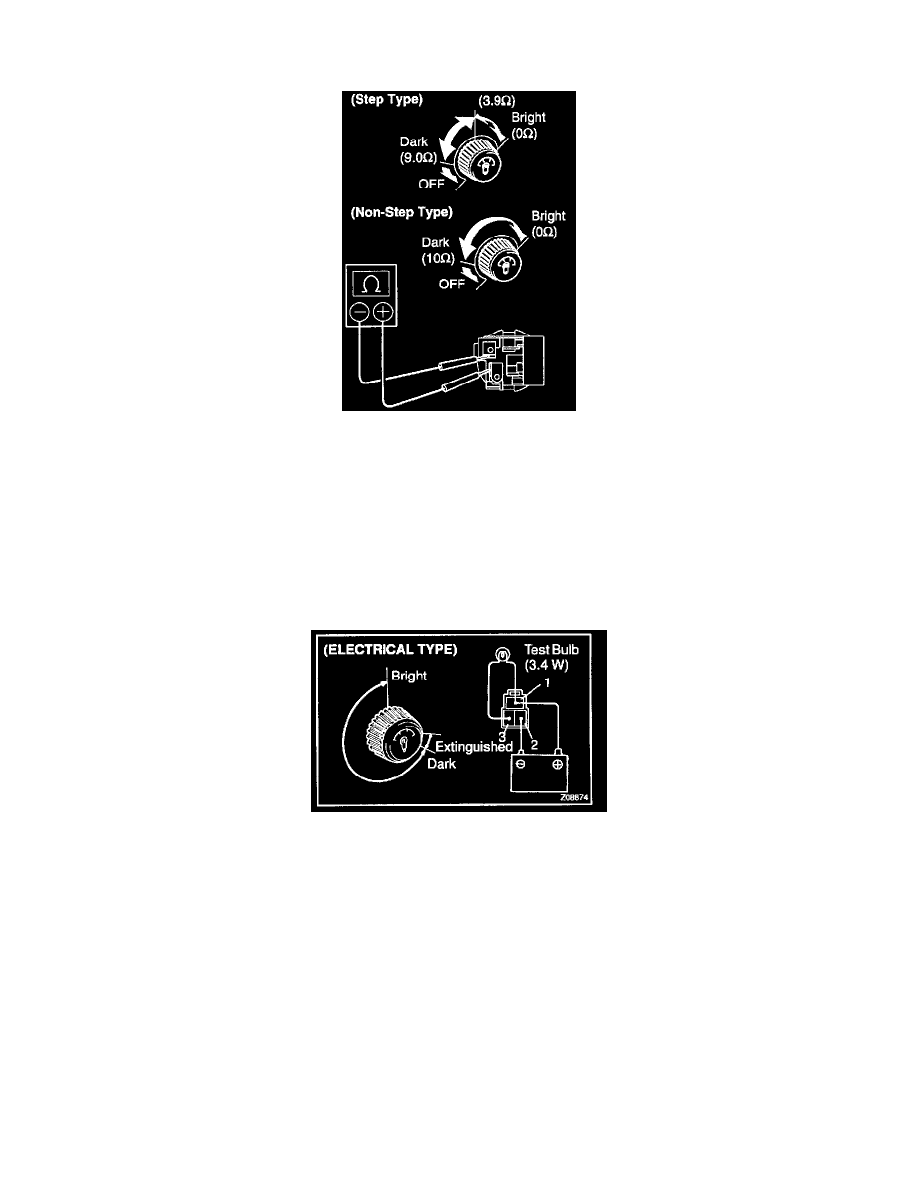
STEP TYPE:
w/o Tachometer (DLX Grade M/T Vehicle)
Gradually turn the rheostat knob from the bright side to dark side, check that the resistance between terminals increases from approximately 0 to 9.0
Ohms. If operation is not as specified, replace the rheostat.
NON-STEP TYPE:
w/Tachometer (DLX Grade M/T Vehicle)
1. Turn the rheostat knob OFF and check that there is no continuity between terminals. (Rheostat knob turned to fully counterclockwise)
2. Gradually, turn the rheostat knob from the dark side to bright side and check that the resistance decreases from 10 to 0 Ohms. (Rheostat knob
turned to clockwise) If operation is not as specified, replace the rheostat.
ELECTRICAL TYPE:
w/ All A/T Vehicle and SR5 Grade M/T Vehicle
1. Connect terminals 1 and 3 through a 3.4 W test bulb.
2. Connect the positive (+) lead from the battery to terminal 1 and the negative (-) lead to terminal 2.
3. Turn the rheostat knob to fully counterclockwise and check that the test bulb goes out.
4. Gradually turn the rheostat knob to clockwise and check that the test bulb brightness changes from dark to bright.
If operation is not as specified, replace the rheostat.