Important: Note
specification for welded, brazed and riveted joints and body repair
with structural adhesive !
Remove
1.
Detach attaching parts
2.
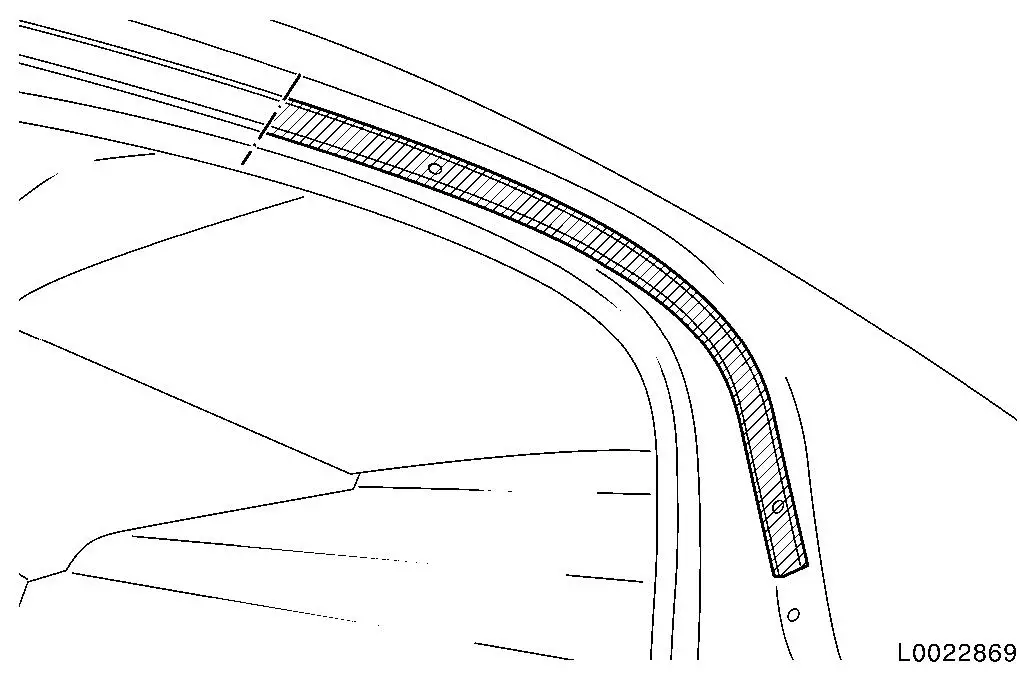
Cut and drill away additional seal holder strip roof frame
3.
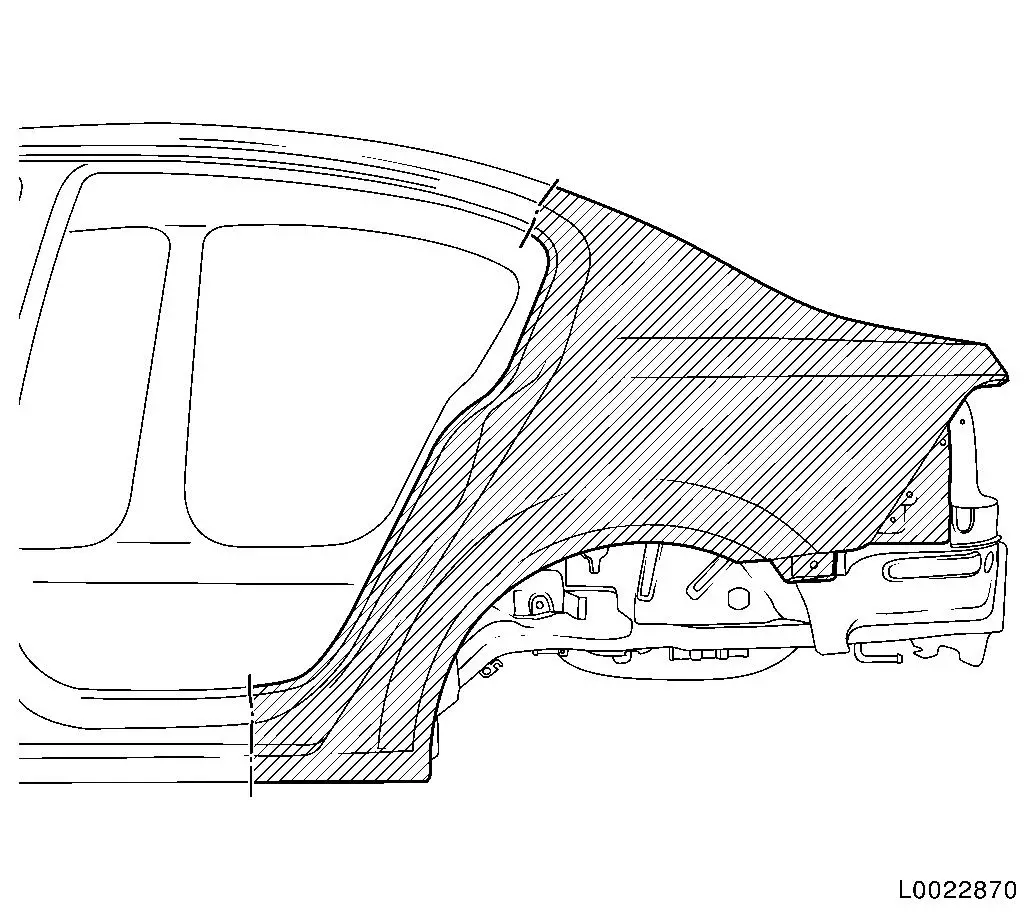
Cut and drill away side panel
Install
4.
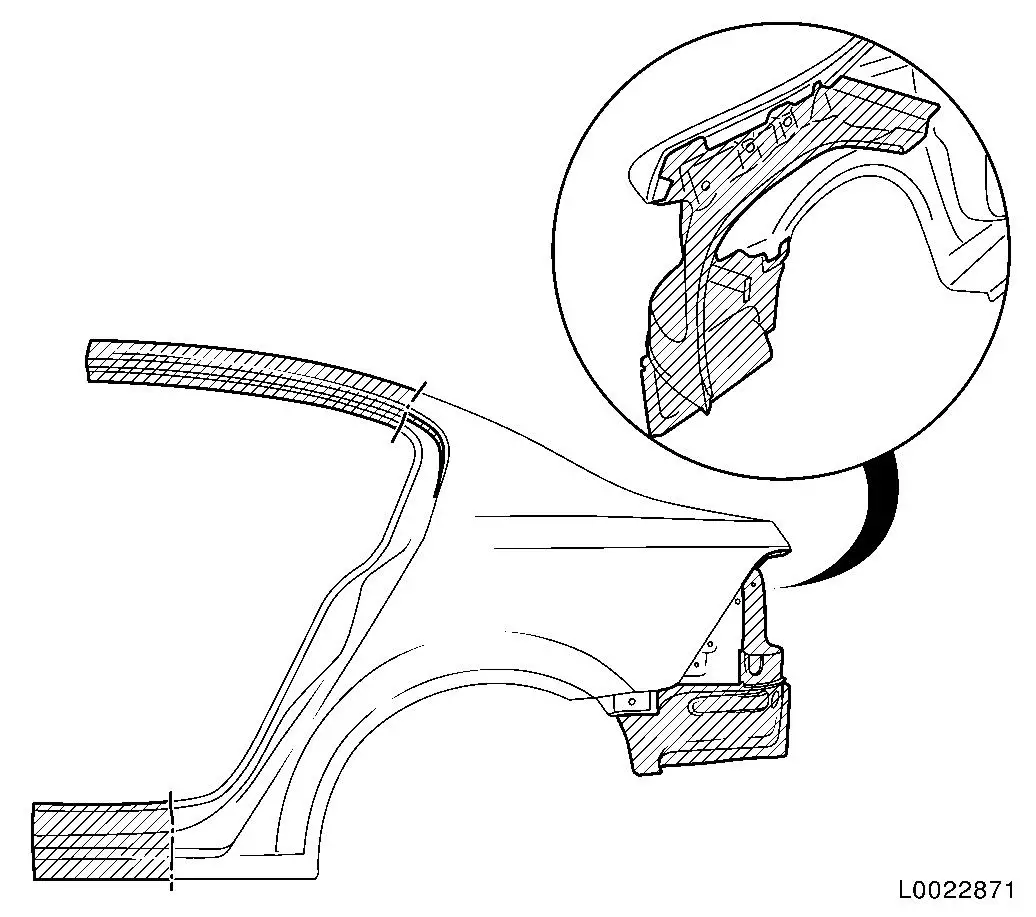
Prepare new side panel part
•
Drill away attachments
•
Remove side panel
5.
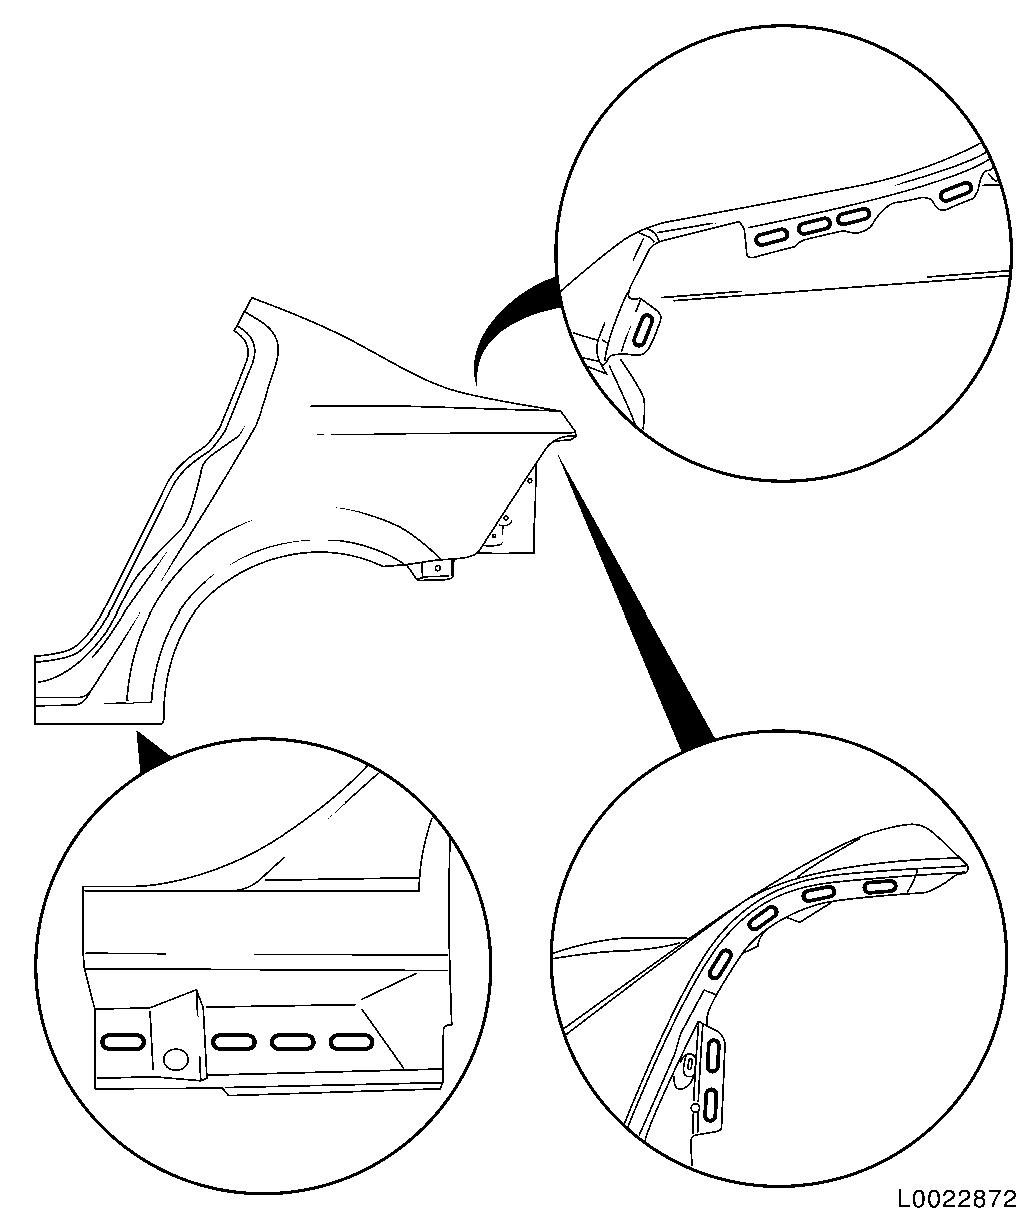
Prepare new side panel part
•
Incorporate 15x ( 5x18 mm )
slot
6.
Adjust side panel to fit
7.
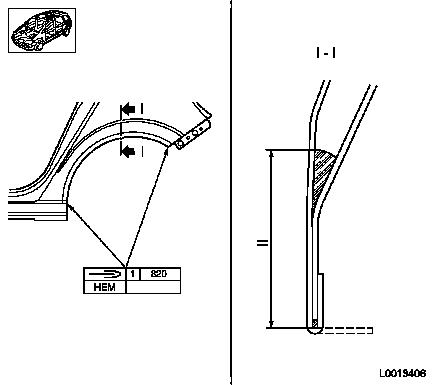
Prepare side panel
•
Drill 5x 4.0 mm fastening holes
for waterproof rivets
8.
Remove side panel
9.
Apply corrosion protection adhesive system Note: In addition, if
replacing the right side panel, apply corrosion protection adhesive
system to tank filler pipe area
10.
Fit the new side panel
11.
Rivet on side panel
•
Rivet on 5x waterproof rivet
12.
Weld in side panel
13.
MIG-braze side panel.
14.
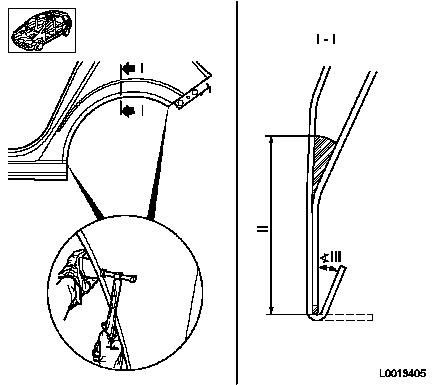
Pre-flange wheel housing
•
Using a suitable hammer, bend over the flanged edge, at the
same time holding a small mallet or block against it.
–
Use structural adhesive in area (II)
15.
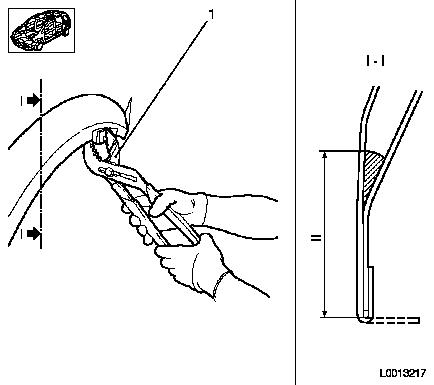
Bend the wheel arch
•
Bend over flanged edge using bending pliers (1) KM-6396
•
Apply excess adhesive as a seam seal and corrosion protection
using a spatula or flat paintbrush
–
Use structural adhesive in area (II)
16.
Bend the wheel arch
17.
Grind MIG brazed seams
18.
Cut rear mounting strip for roof frame additional seal to size
from new component and adjust
19.
Drill 4x fastening holes for waterproof rivets
20.
Remove extra seal holder strip
21.
Apply corrosion protection adhesive system
22.
Fit and rivet on additional seal holder strip
23.
Seal body, weld and brazing seams Note: Observe corrosion
protection measures for seam seals.
24.
Apply underseal. Note: Observe corrosion
protection measures for PVC protection.
25.
Seal cavity Note: Observe
protective wax corrosion protection measures.