|
Replace sill panelling spoiler (attached with
adhesive)
 Remove Remove
|
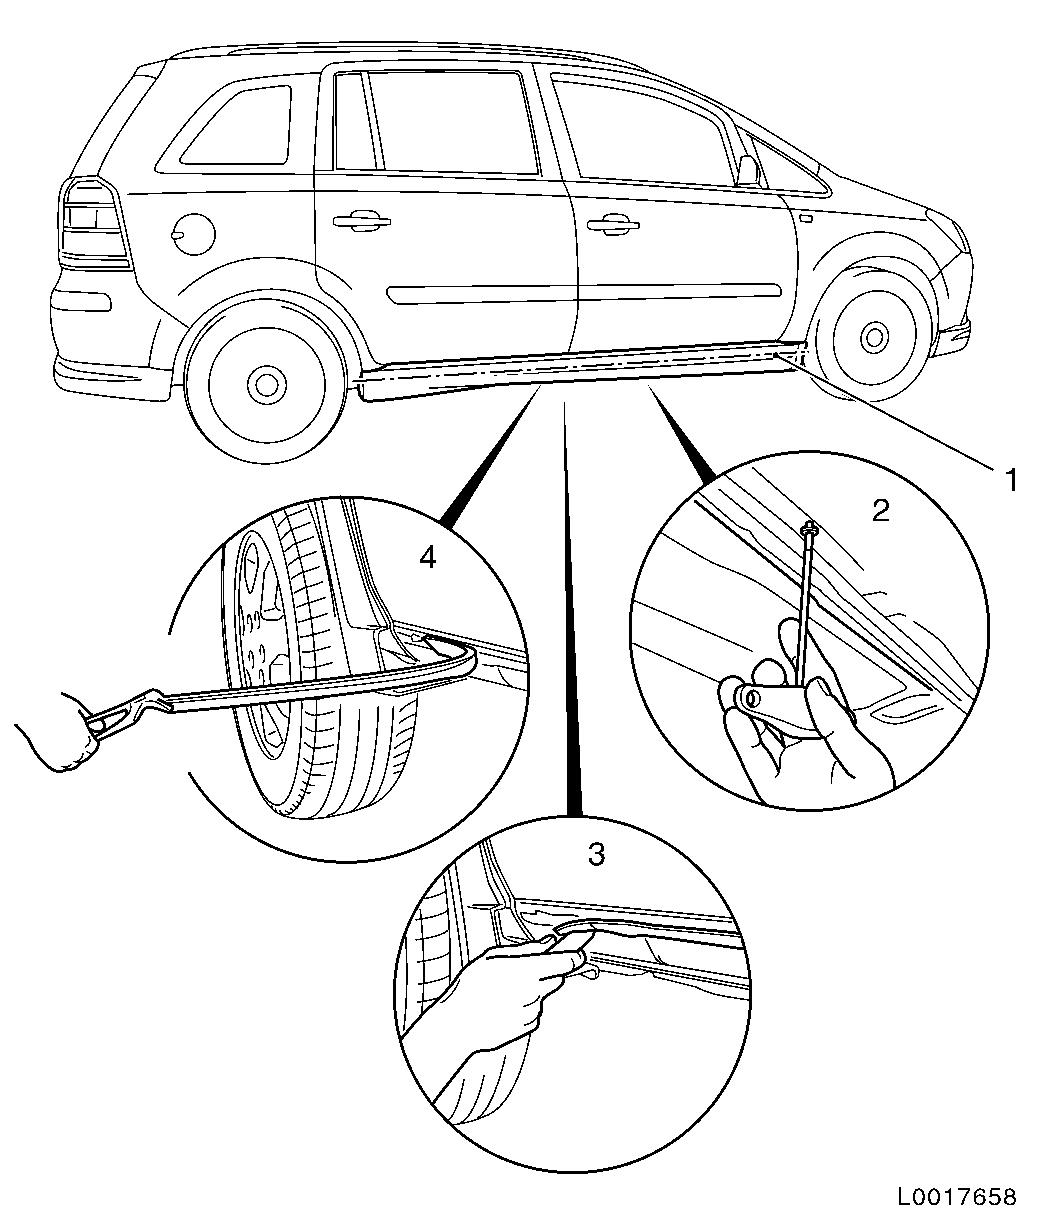
| 1. |
Detach sill panelling spoiler from sill panelling
| • |
Detach body-bound rivets or unscrew bolts (2)
|
|
| 2. |
Mark out a cross cut below the adhesive (1)
Note: The exact
position of the adhesive is specified in the installation
instructions for sill panelling spoiler OPC line that accompany the
new part.
|
| 3. |
Detach the sill panelling spoiler at the marked cross cut using
a suitable tool (3).
Note: Pay attention to
the immersion depth of the separating tool!
Note: In order to
prevent paintwork damage to the body, affix adhesive tape to be
areas requiring protection!
|
| 4. |
Pierce the adhesive seam with a palette knife or flat scraper
and remove the rest of the sill panelling spoiler from the sill
panelling (4).
Note: Do not damage the
paintwork!
|
| 5. |
Remove adhesive residue with a flat scraper.
|
|
 Install
| 6. |
Follow the instructions accompanying the new part for
installation.
|
Remove
|
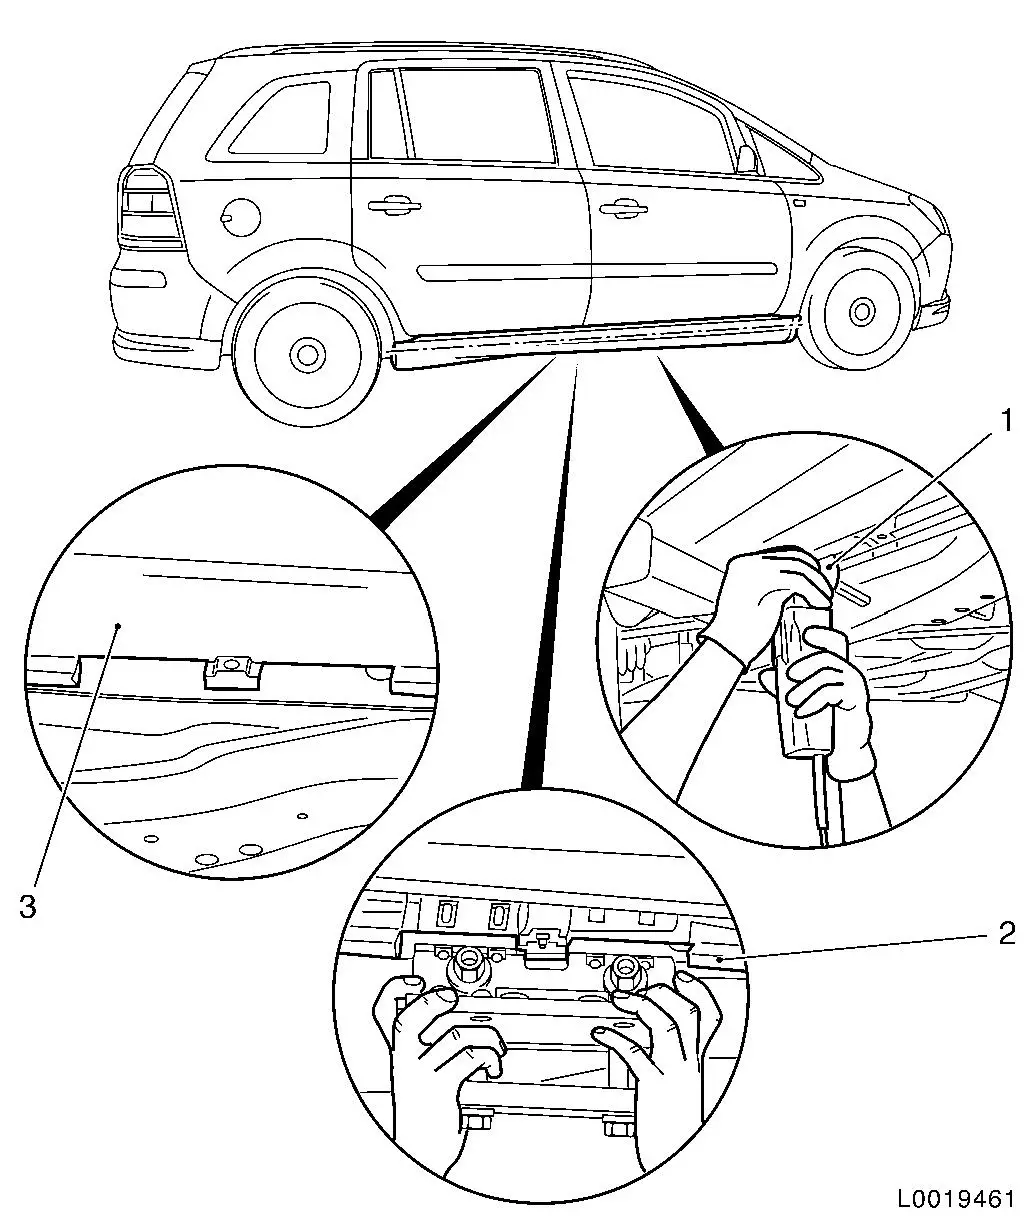
Important: When using
straightening systems it is not absolutely essential to dismantle
the sill panelling spoiler to fix the mounting jaws. A cut-out to
hold the latter can be cut in the sill panelling spoiler! (3)
However, this only applies to components attached with adhesive.
Sill panelling spoilers which can be removed without causing damage
should always be dismantled when using straightening systems!
|
| 7. |
Scribe cut-outs for straightening system fixing jaws on sill
panelling spoiler
Note: Fixing points for
sill panelling spoiler must not be damaged!
|
| 8. |
Cut out the cut-outs with a suitable tool (1)
Note: Note submersion
depth of cutting tool! Do not damage sill panelling under this!
|
| 9. |
Align fixing jaws of straightening system and check fit, rework
if necessary (2)
|
|
|
