Replace folding roof hinge wiring harness (right side) - L67
Replace folding roof hinge wiring harness (right
side) - L67
Important: Replace
or repair wiring harnesses observing the safety regulations of
electrics/electronics.
Important: Only
certified Service Centres should perform this work.
Note: Before starting
work, check and record the settings of the gaps with the folding
roof open and closed.
Using Tech2, select function "factory mode" in the folding roof
control unit.
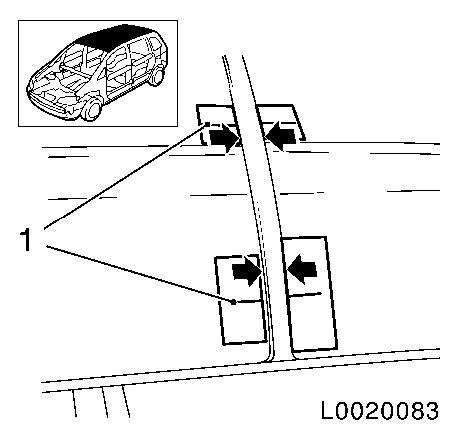
Measure
1.
Measure gaps at centre of folding roof at the passenger and
driver's sides.
•
Attach adhesive tape strips to the inside and outside of the
folding roof centre and C-pillar.
•
Draw a solid line on opposing tape strips (1) and note the gap
and offset measured (arrows).
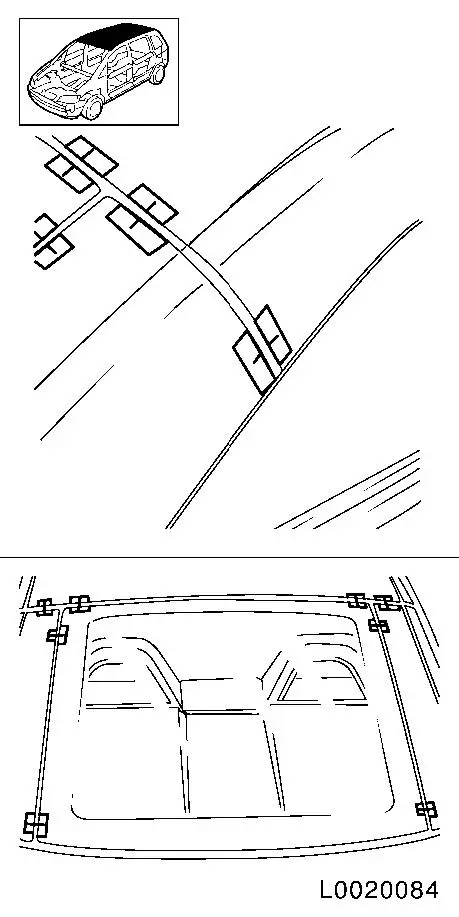
2.
Measure gap of folding roof at C-pillar and rear screen on
passenger and driver's sides.
•
Attach strips of adhesive tape on inside and outside of the
rear screen and C-pillar
•
Attach adhesive tape strips on the upper outsides of the rear
window and opposite on the roof centre.
•
Draw a solid line on opposing tape strips and note the gap and
offset measured.
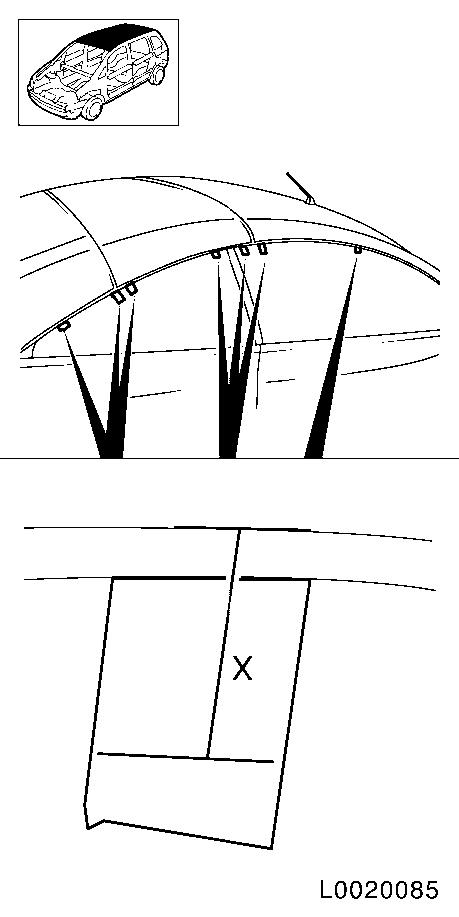
3.
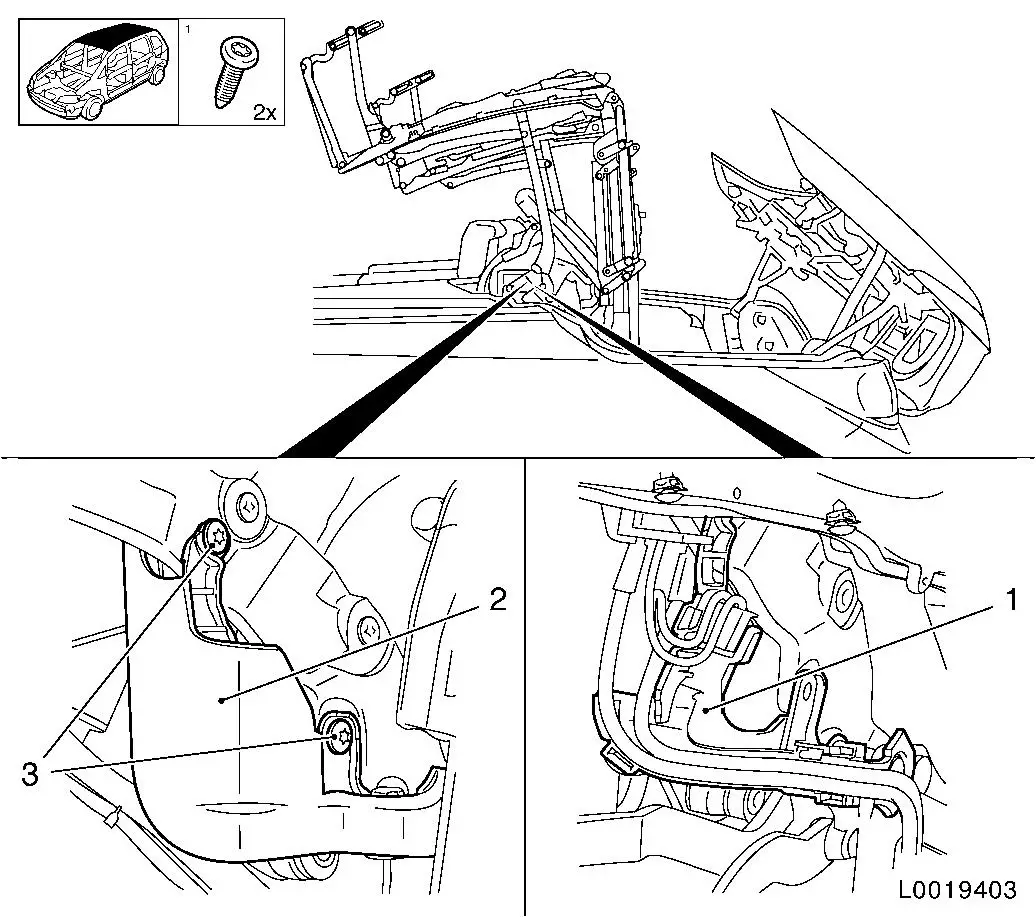
Mark positions of the closed side windows front and rear on
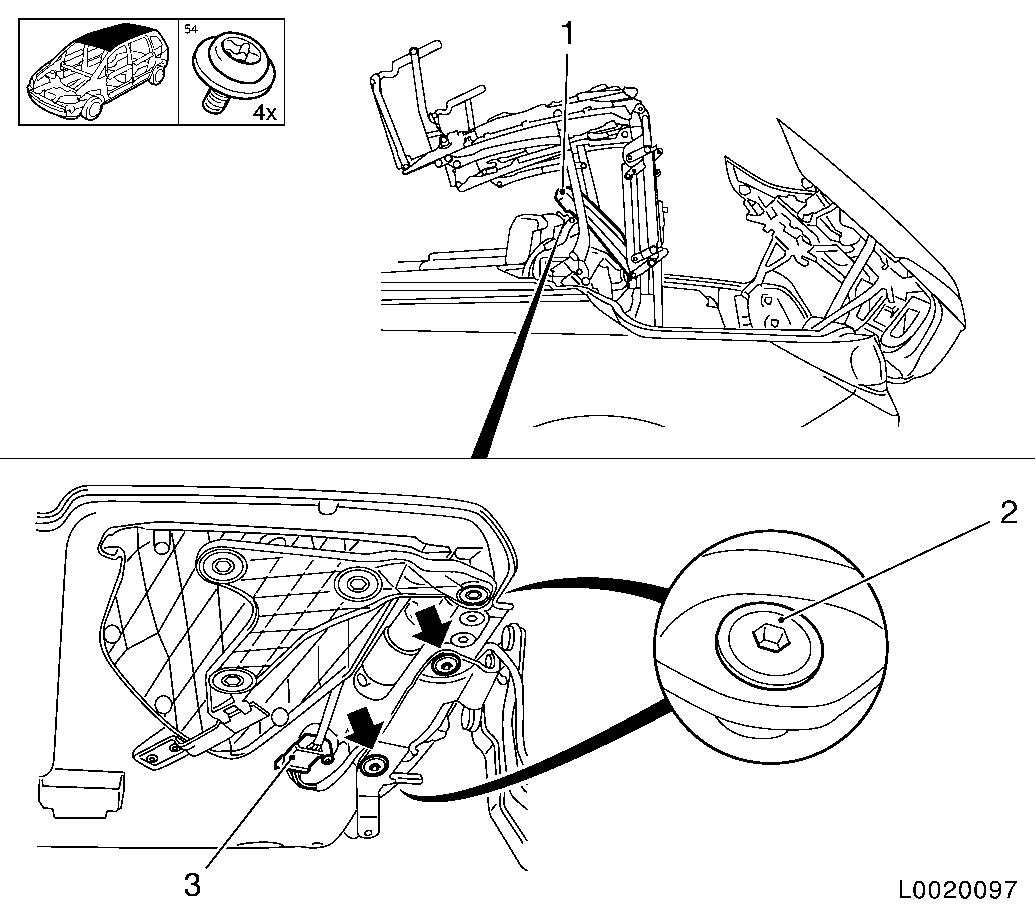
passenger and driver's sides.
•
Attach 4x adhesive tape strips all round on the upper edge of
the rear side windows.
•
Attach 3x adhesive tape strips all round on the upper edge of
the front side windows.
•
Using a suitable aid (e.g. angle bracket), mark distance to
roof (X).
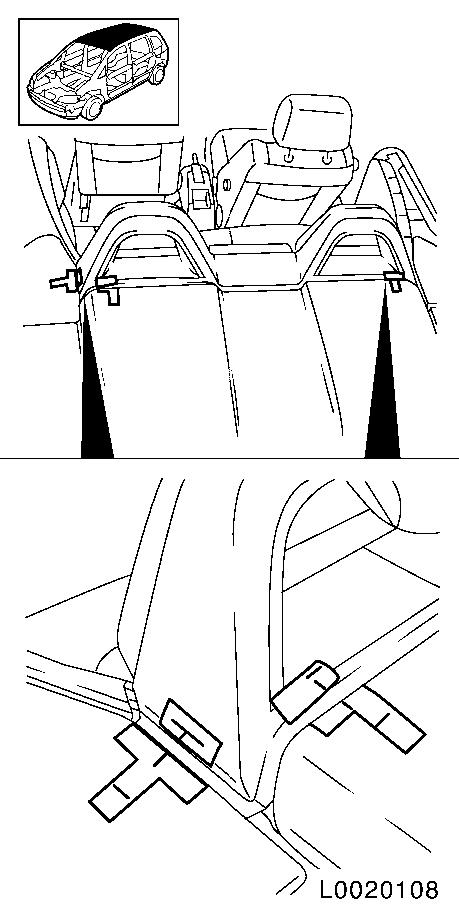
4.
Move folding roof to cabrio position
5.
Determine gap of parcel shelf flap and parcel shelf on
passenger and driver's sides.
•
Attach adhesive tape strips to parcel shelf flap and roll-over
bar panelling at sides.
•
Attach adhesive tape strips to parcel shelf and roll-over bar
panelling outside.
•
Draw a solid line on the opposing tape strips and note the gap
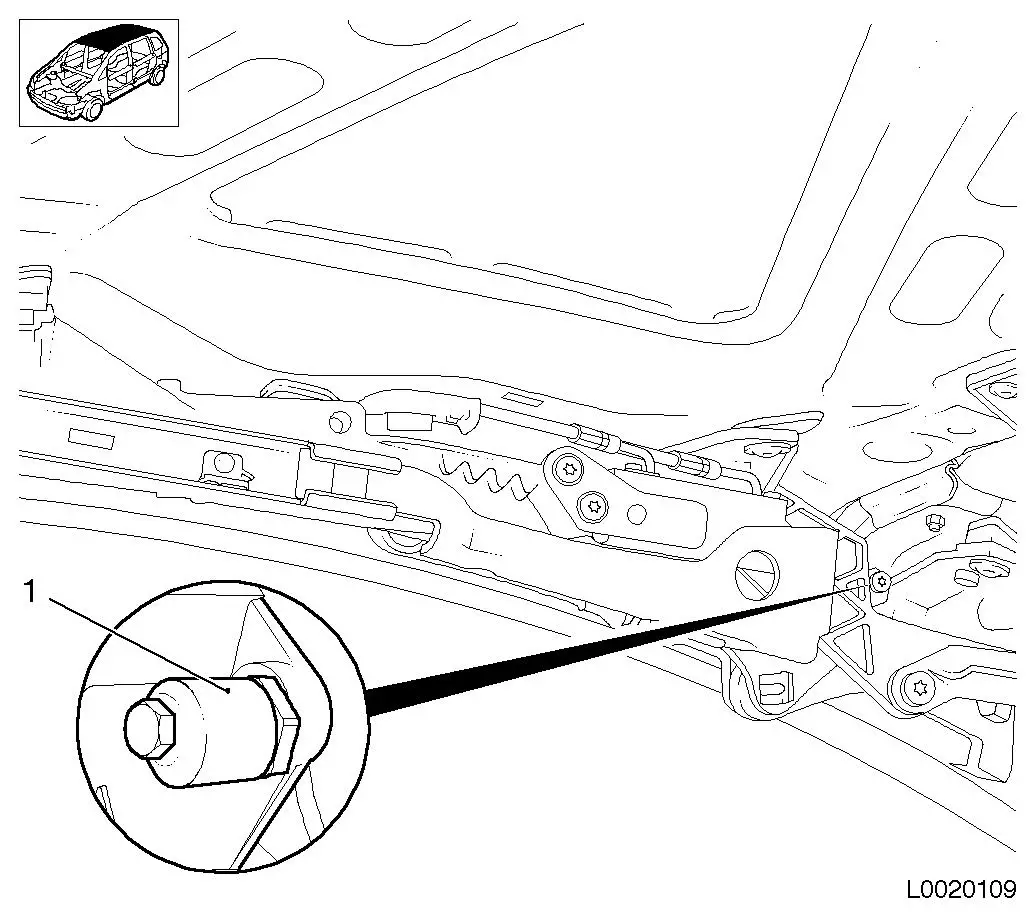
measured.
6.
Close folding roof
Remove
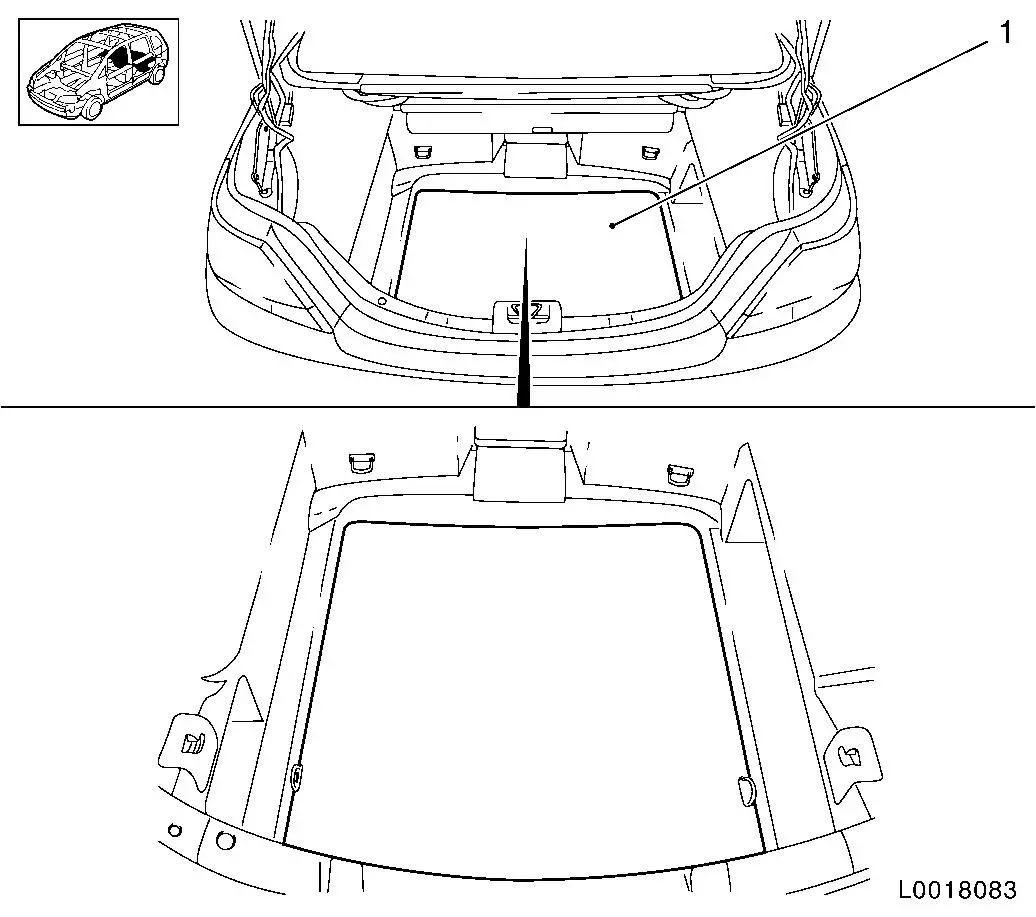
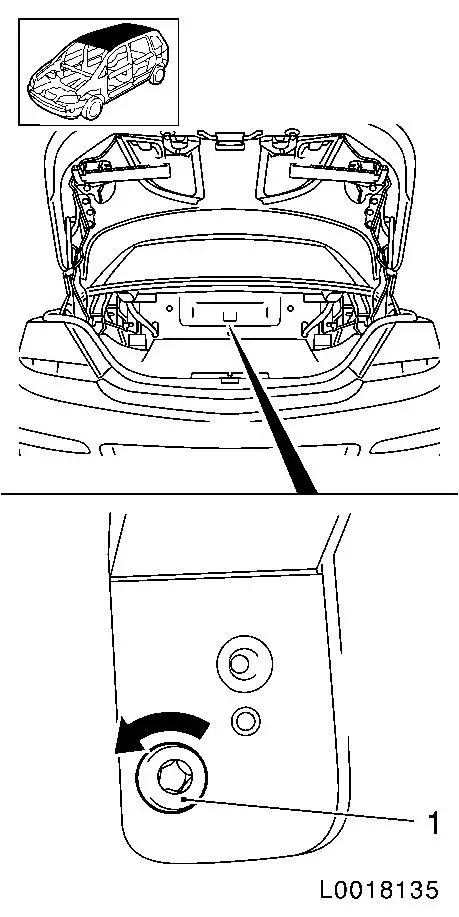
7.
Remove luggage compartment mat
•
Remove luggage compartment mat (1)
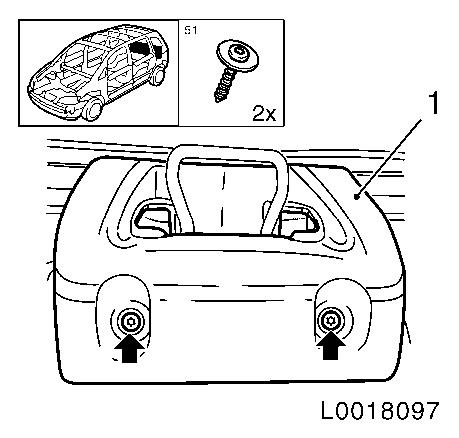
8.
Detach protective blind for steel folding roof (1)
•
Unscrew 2x bolt (arrow)
9.
Detach closing bar panelling (1)
•
Unscrew 2x bolts (arrows)
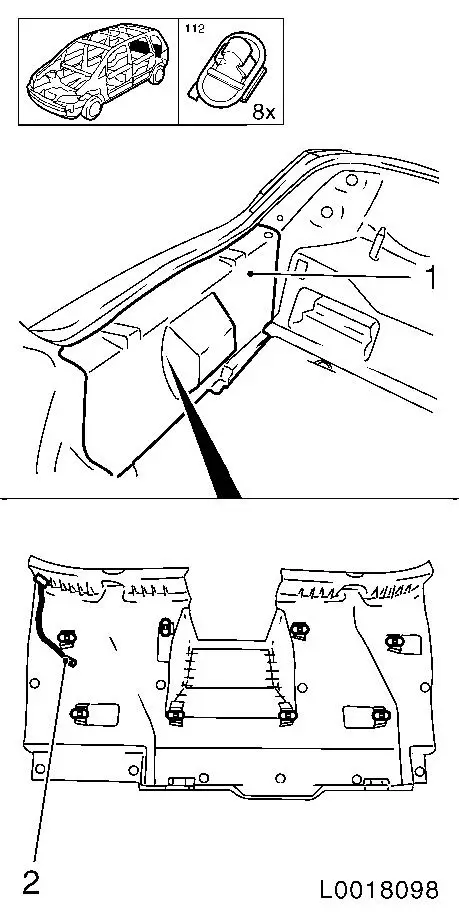
10.
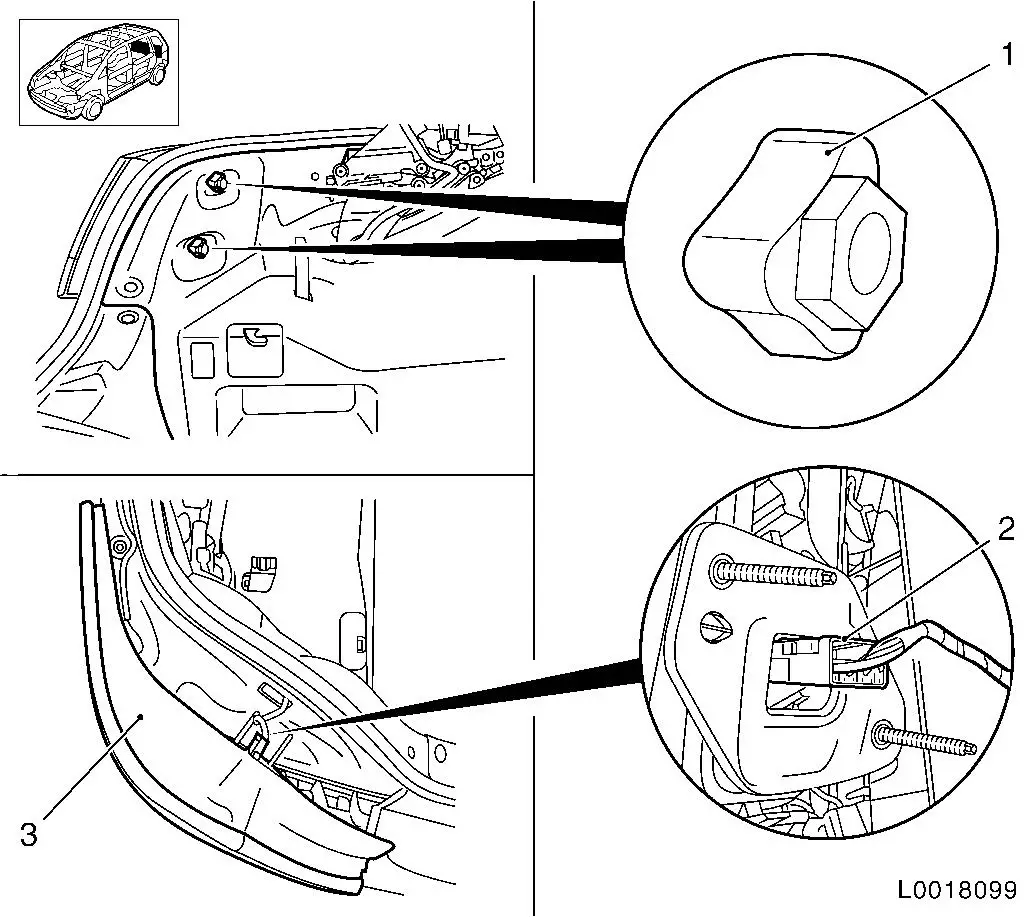
Remove lower tailgate inner panelling (1)
•
Undo 8x clip
•
Disconnect wiring harness plug (2)
11.
Detach right tail light Note: Only the left
side is shown for clearer depiction.
•
Unscrew 2x nut (1)
•
Remove 2x from guide
•
Disconnect wiring harness plug (2)
•
Remove tail light (3)
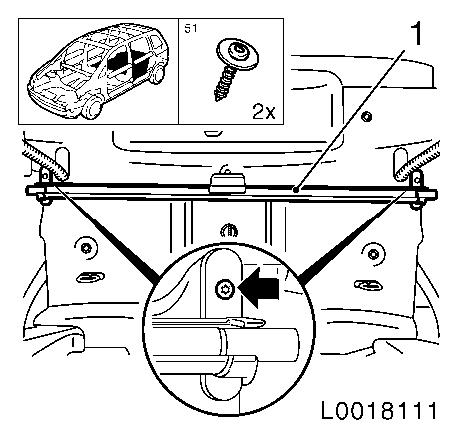
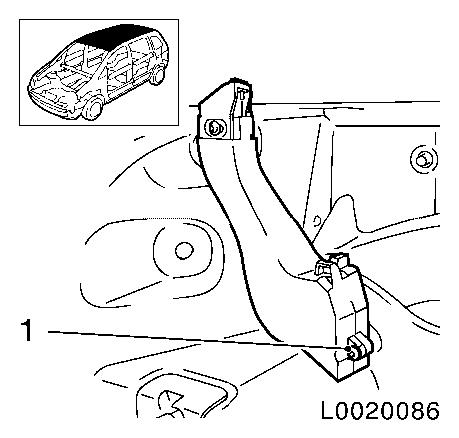
12.
Detach support for folding roof Note: Only the right
side is shown for clearer depiction.
•
Unscrew bolt (1)
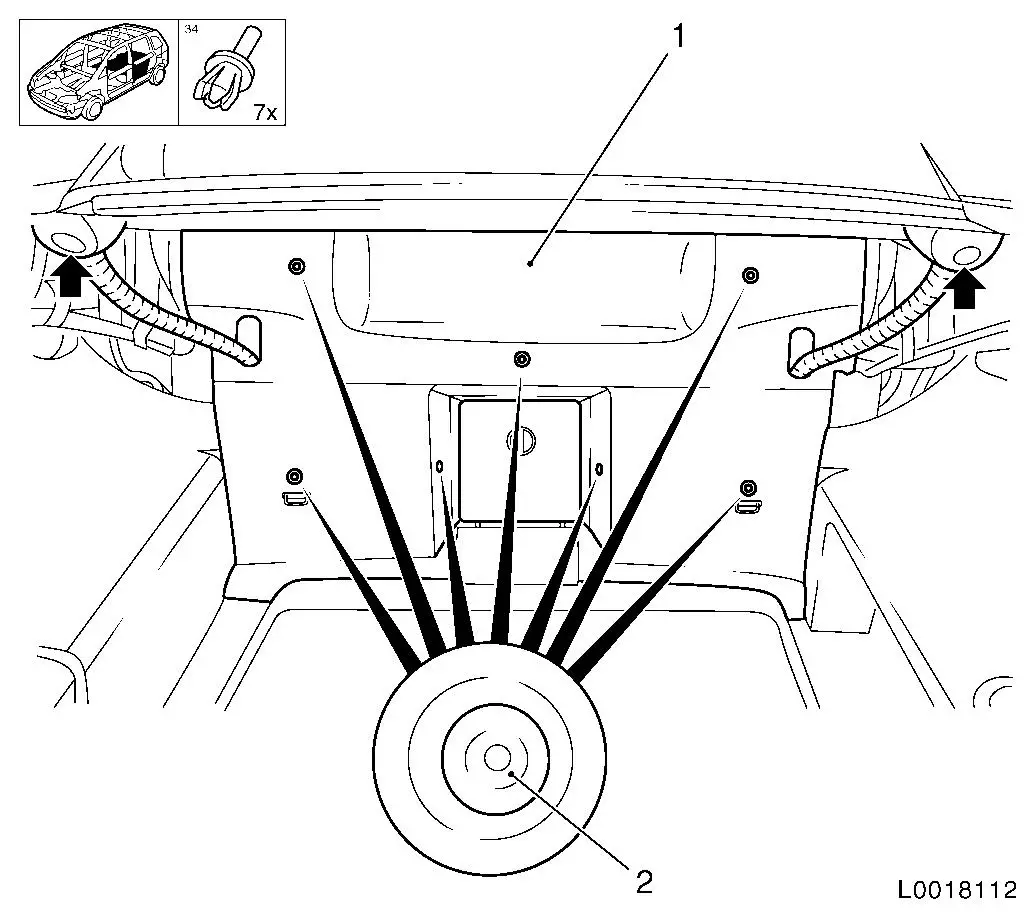
13.
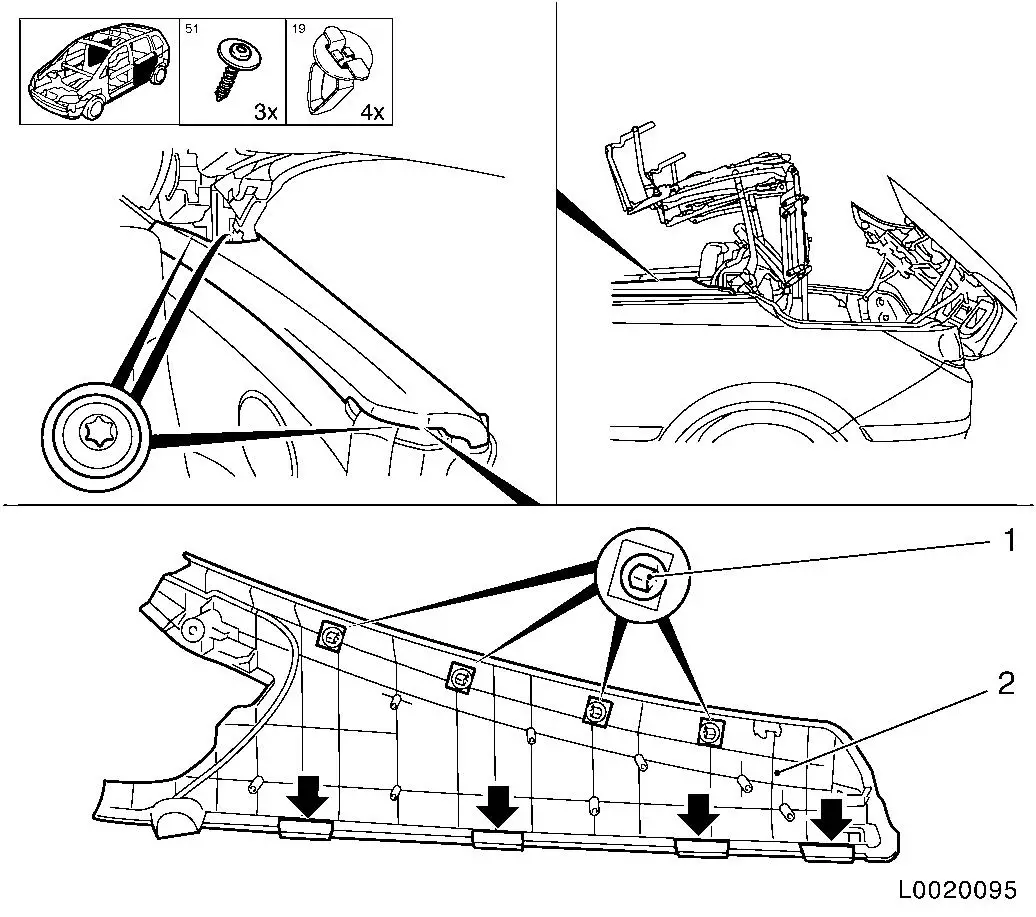
Remove right side luggage compartment panelling (1)
•
Remove 4x body-bound rivets (arrows)
•
Remove panelling
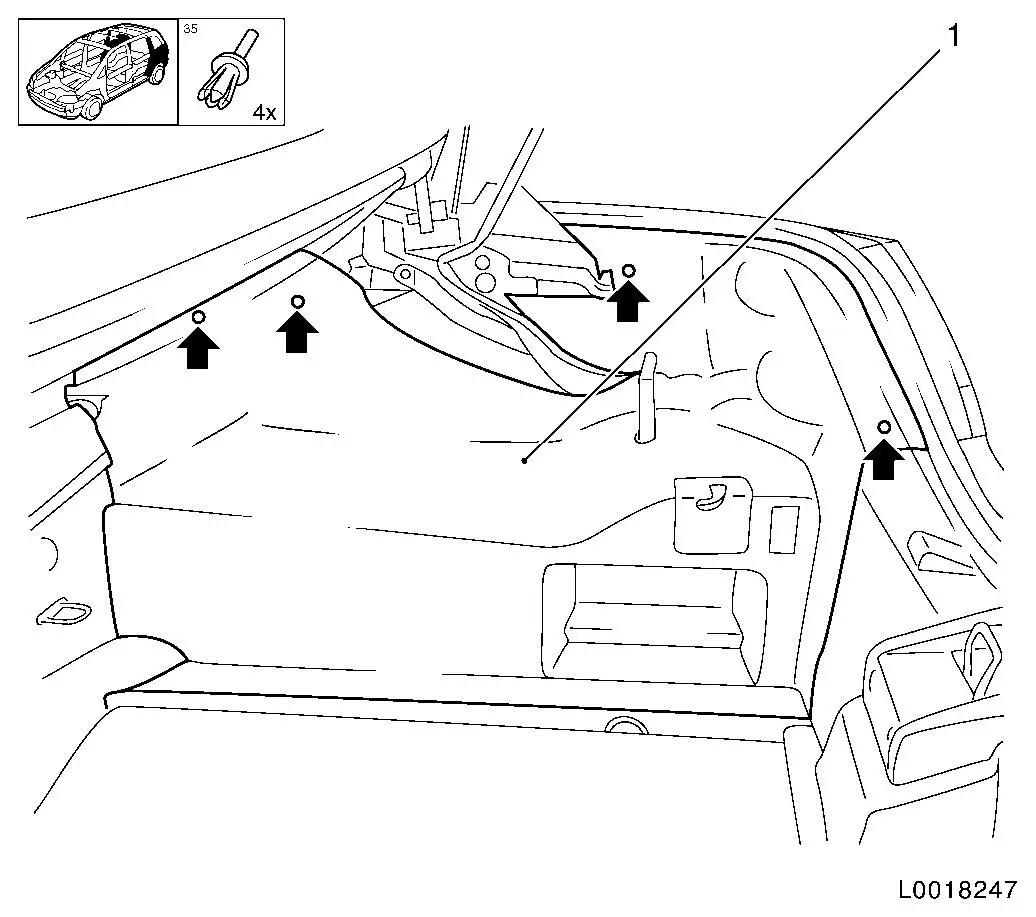
14.
Remove upper tailgate inner panelling (1)
•
Remove 7x body-bound rivets (2)
•
Remove 2x water drain hose (arrows)
•
Remove panelling
15.
Close luggage compartment
16.
Bring steel roof to Service position
•
Half open steel roof
•
Insert special tool BO-47651-200
(1)
•
Secure roof with strap supplied (2)
17.
Disconnect battery.
18.
Detach front roof frame cover
19.
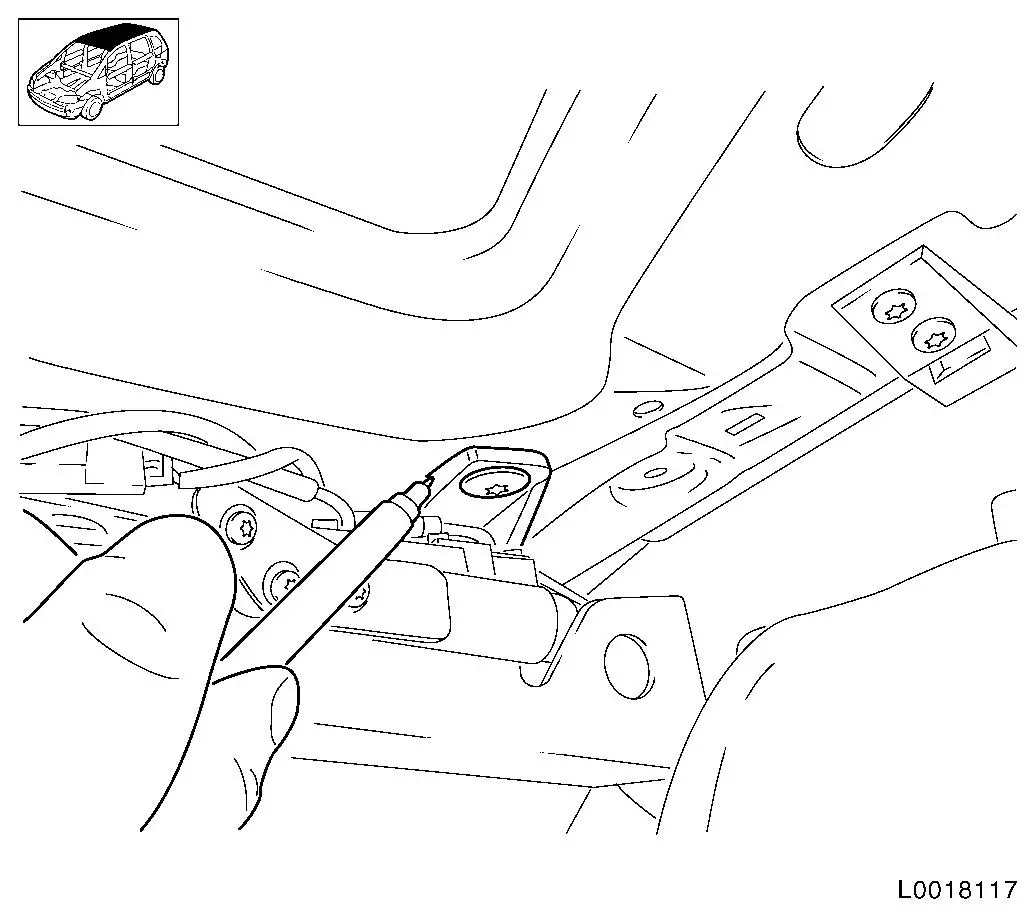
Open pump pressure
•
Break perforation bulkhead panelling
•
Turn emergency actuation bolt (1) carefully to the stop using a
hex wrench
20.
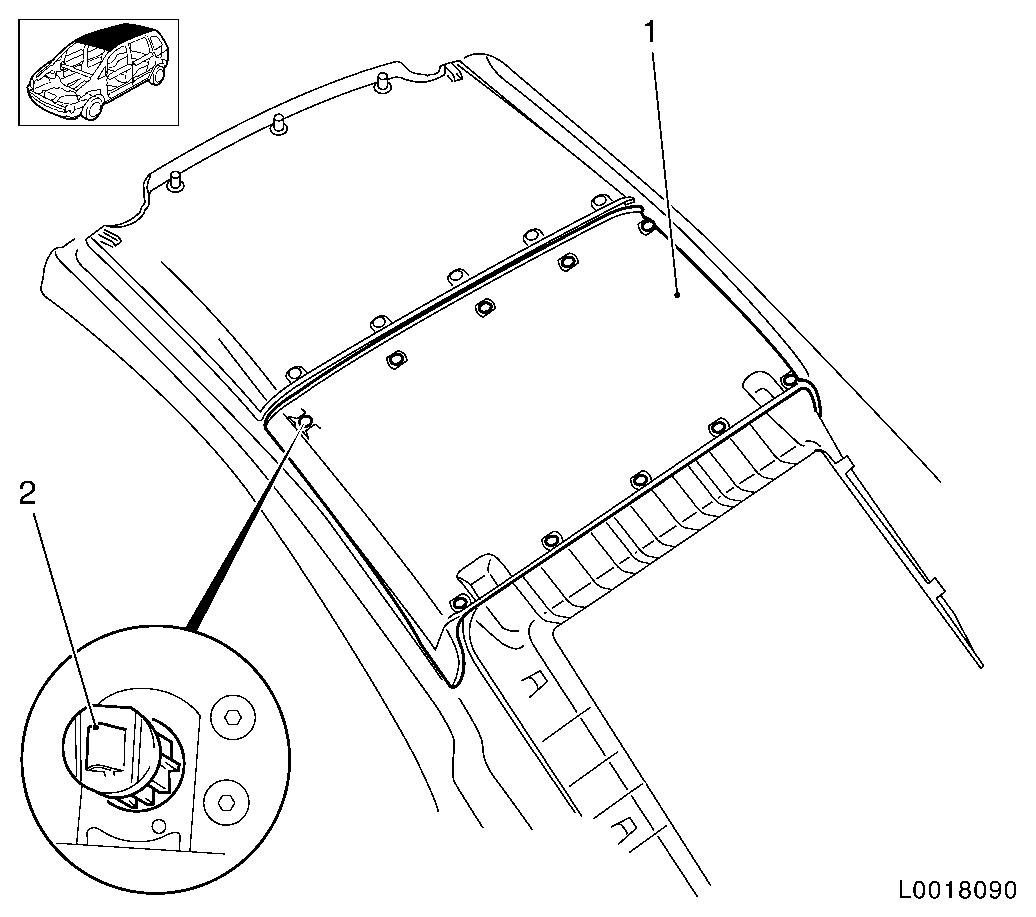
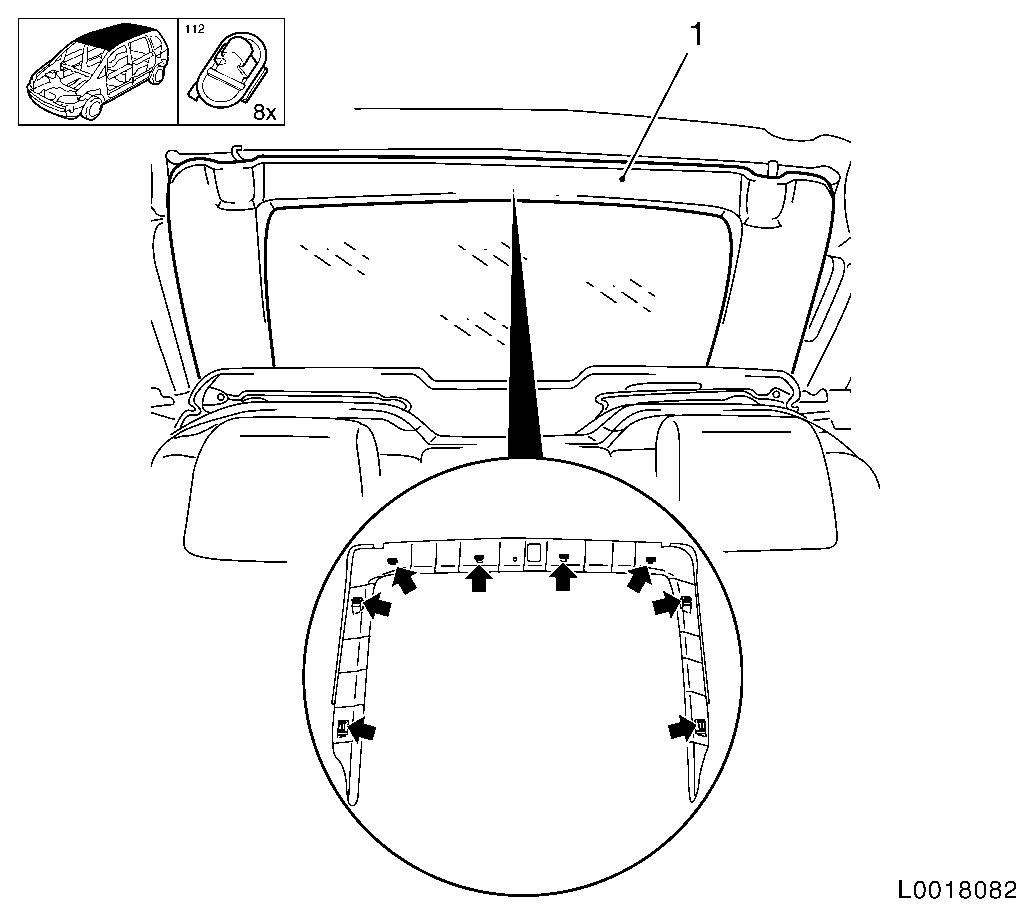
Remove moulded headlining centre (1)
•
Undo 10x clip (2)
•
Remove moulded headlining
21.
Detach centre hinge panelling - both sides Note: Only the left
side is shown for clearer depiction.
•
Release 3x clamps
22.
Detach outer right C-pillar panelling (1) Note: Only the left
side is shown for clearer depiction.
•
Release 2x clamps
23.
Detach inner right C-pillar panelling Note: Only the left
side is shown for clearer depiction.
•
Unscrew 2x bolts (arrows)
•
Remove inner C-pillar panelling (2)
–
Detach clamp (1)
24.
Detach rear window panelling
•
Unclip 8x unclip (arrows)
•
Remove panelling (1)
25.
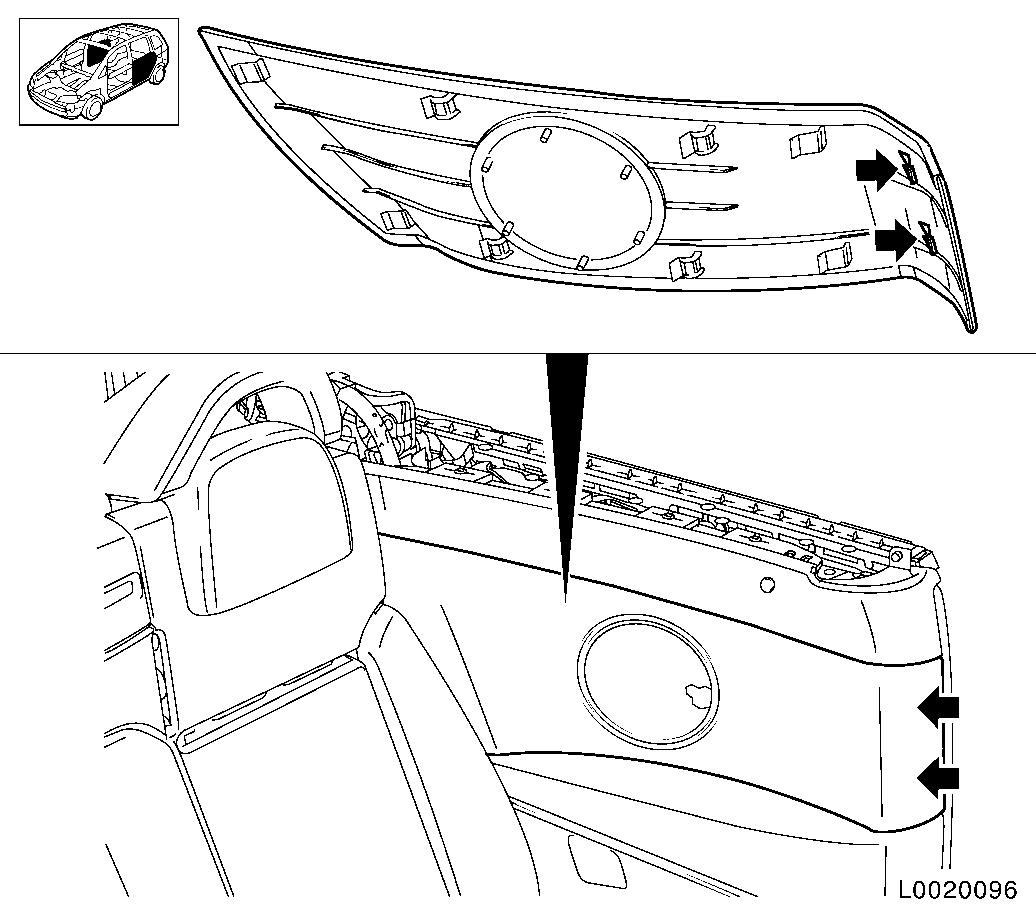
Detach front right side panel upper inner panelling Note: Only the left
side is shown for clearer depiction.
•
Unscrew 3x bolts
•
Undo 4x clip (1)
•
Unclip side panel upper inner panelling (2) 4x from guide
(arrows)
26.
Detach right speaker panelling Note: Only the left
side is shown for clearer depiction.
•
2x unclip (arrows)
•
Remove 8x from guide
27.
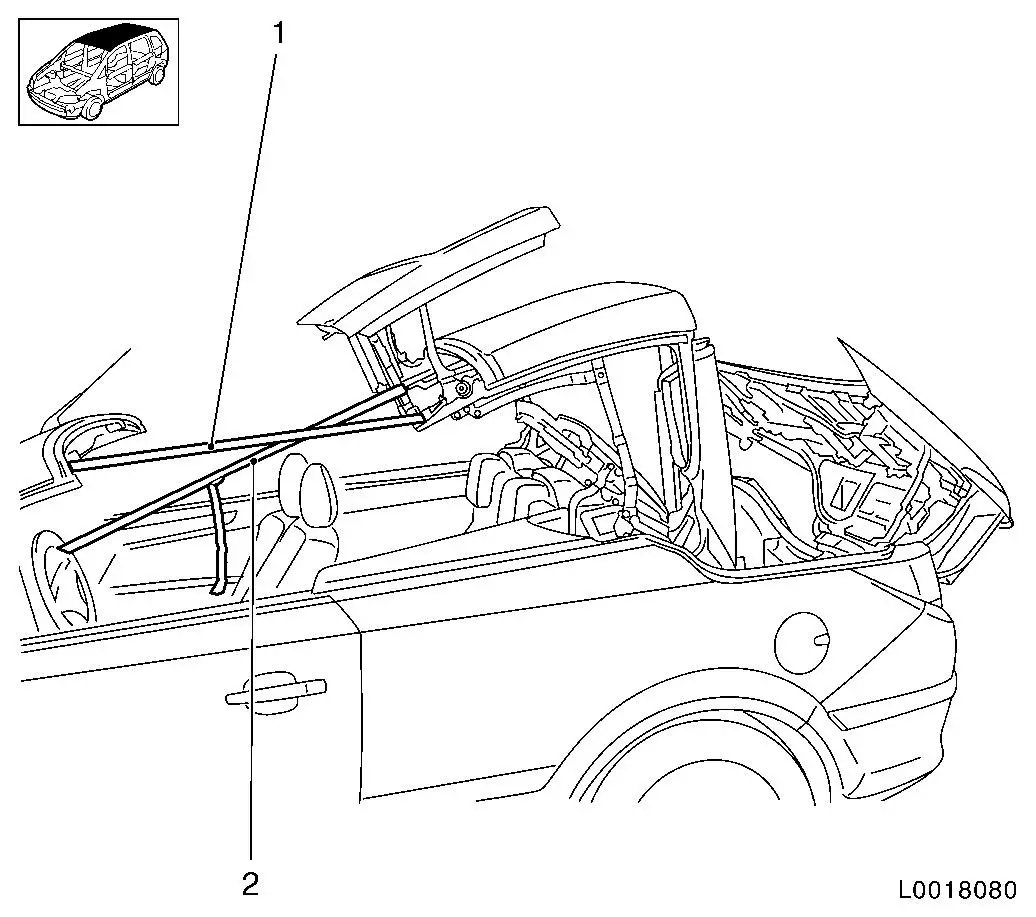
Mark position of centre folding roof Note: Note that the
markings and noted numbers of shims must only be regarded as
reference points when replacing the folding roof hinge, and must be
adapted if necessary.
28.
Close closing linkage (2) mechanically if necessary Note: For access to the
rear fastening bolts
•
Close the closure linkage with a screwdriver (1) placed on the
toothed rod
29.
Detach folding roof centre Note: Only the left
side is shown for clearer depiction.
•
Unscrew 6x bolt (2) Note: Note number of
shims in position. Note that the markings and noted numbers of
shims must only be regarded as reference points when replacing the
folding roof hinge, and must be adapted if necessary.
Unclip 2x wiring harness plug Note: Check for falling
shims
31.
Open closing linkage mechanically if necessary Note: For access to the
rear fastening bolts
32.
Detach right folding roof C-pillar Note: Only the left
side is shown for clearer depiction. Note: Note number of
shims. Note that the noted numbers of shims must only be regarded
as reference points when replacing the folding roof hinge, and must
be adapted if necessary.
•
Unscrew 3x bolts
•
Remove folding roof (1) Note: Recut
threads!
33.
Release rear window (1) Note: Note installation
position. Note that the markings must only be regarded as reference
points when replacing the folding roof hinge, and must be adapted
if necessary.
•
Separate 2x wiring harness plug (3) heated rear screen
–
Detach 2x cable tie
•
Unscrew 2x lower bolt (4)
•
Unscrew 2x upper bolt (2)
34.
Remove rear window Note: 2nd mechanic
required!
•
Unscrew 2x bolt (2)
•
Remove rear window upwards Note: Recut
threads!
35.
Move folding roof to cabrio position, parcel shelf erect
36.
Detach parcel shelf (1) Note: Only the left
side of the parcel shelf is shown in the illustration for simpler
depiction.
•
Detach cable ties along cinematic unit
•
Disconnect 2x wiring harness plug (3)
•
Unscrew 4x lower bolts (arrows)
•
Unscrew 4x bolt at top (2)
37.
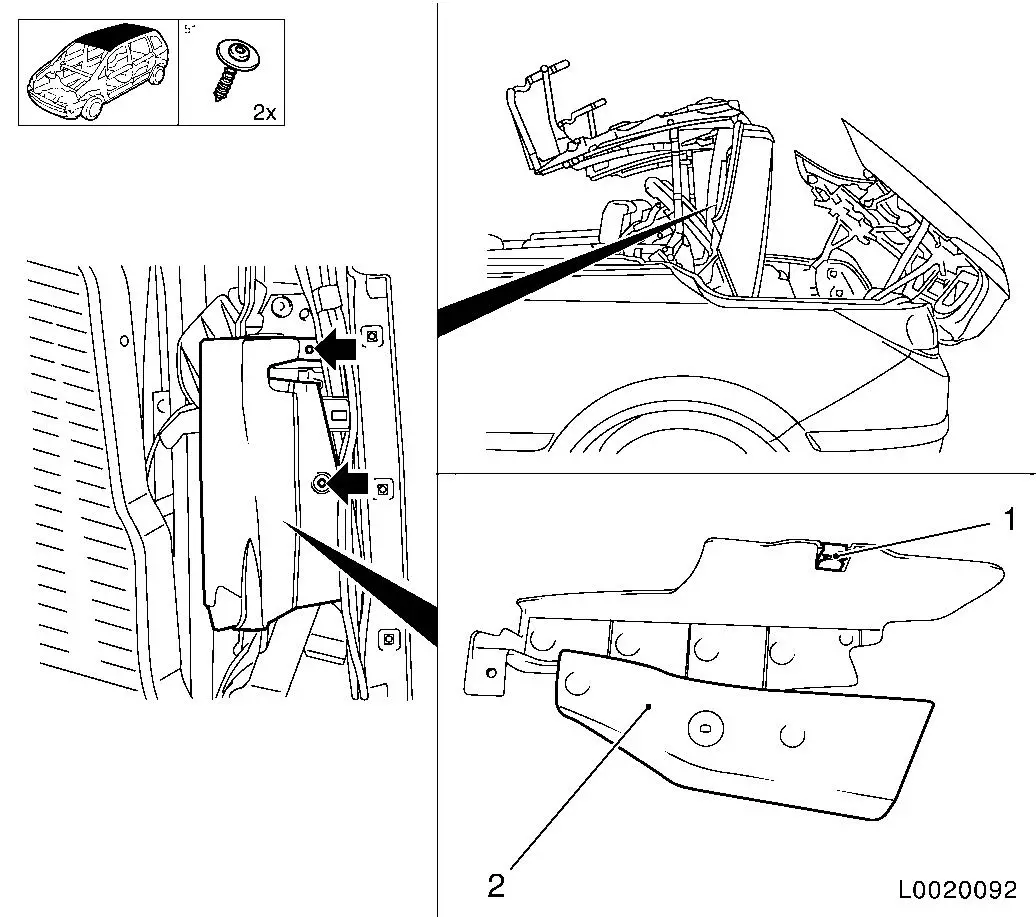
Detach visibility protector parcel shelf cylinder right Note: Only the left
side is shown for clearer depiction.
•
Unclip outer panel (2) 4x
•
Remove 2x hydraulic line Note: Mark installation
position of lines
•
Unscrew 2x bolt (3)
•
Remove inner panel (1)
38.
Remove folding roof hinge wiring harness
Install
39.
Install folding roof hinge wiring harness
40.
Attach visibility protector parcel shelf cylinder
•
Insert inner panel
•
Tighten 2x screw
•
Insert 2x hydraulic line
•
Clip in outer panel 4x
41.
Check routing of hydraulic lines and electrical lines
42.
Lock closing linkage mechanically if necessary Note: For access to the
rear fastening bolts
43.
Insert folding roof centre Note: 2nd mechanic
required!
•
Note marking
44.
Attach folding roof centre
•
Loosely insert 6x bolts Note: Note number of
shims Note: Re-use old
bolts
45.
Manually open closing linkage
46.
Bring centre folding roof to dimension previously noted, and
tighten
•
Tighten 6x bolt 9 Nm Note: Re-use old
bolts
47.
Close side closure
•
Clip in 2x linkage closure to cinematic unit
48.
Close pump pressure
•
Tighten bolt
49.
Insert parcel shelf
•
Connect 2x wiring harness plug
•
Install cable ties
•
Tighten upper bolts 3.9 Nm
50.
Connect battery.
51.
Open and close folding roof electrically
52.
Close side windows and check marking, adjust roof if
necessary.
53.
Open closure electrically
54.
Close closure electrically
55.
Install rear window Note: 2nd mechanic
required!
•
Insert rear window from top
–
Bring rear window to measured gap Note: Note markings
•
Screw in 4x bolt
56.
Install rear window Note: Note marking
Pull up rear window in lower area and attach
•
Tighten 4x bolt 9 Nm
•
Connect 2x wiring harness plug heated rear screen
–
Fit 2x cable tie
57.
Check gap at rear window and adjust if necessary
58.
Attach folding roof C-pillar Note: Note line
routing
•
Insert folding roof C-pillar Note: Note markings,
note number of shims
•
Screw in 3x bolt Note: Re-use old
bolts
–
Secure shims against falling using suitable aid
•
Move roof to service position, tighten bolts 9 Nm
59.
Close roof
60.
If the gap previously measured between the side window and the
C-pillar is not correct, it must be adjusted at the eccentric
roller at the rear.
•
Release bolt
•
Twist eccentric roller (1) until the measurement between the
rear side window and C-pillar is correct
•
Tighten bolt
61.
Adjust closing linkage
•
Release 2x bolts
•
Release linkage
•
Tighten 2x bolt 9 Nm
62.
Move roof to cabrio position, parcel shelf linkage set
63.
Align parcel shelf and flaps to dimension previously measured,
and fasten.
•
Unscrew 4x upper bolt if necessary
•
Tighten 4x lower bolts 8 Nm
•
Tighten 4x upper bolts 3.9 Nm if
necessary
64.
Close roof completely, check gaps and adjust if necessary
Adjust folding roof front, check gaps measured and adjust if
necessary
Adjust folding roof centre
Adjust folding roof rear window
Adjust folding roof C-pillar
65.
Replace all bolts in succession Note: All bolts for
installing the roof front, roof centre, C-pillar, assembly of
centring peg holder and rear window, are micro-encapsulated and
must be replaced in succession.
66.
Attach speaker panelling
•
Insert 8x into guide
•
Clip in 2x
67.
Attach front side panel upper inner panelling
•
Clip 4x bolt into guide
•
Clip in 4x clip
•
Tighten 3x bolt
68.
Attach rear window panelling
•
Insert panelling
•
Clip in 8x clip
69.
Attach outer C-pillar panelling
•
Attach clamp
•
Tighten 2x screw
70.
Attach outer C-pillar panelling
•
Insert into guide
•
Attach 2x in clamps
71.
Attach centre hinge panelling - both sides
•
Insert into guide
•
Attach 3x in clamps
72.
Install moulded headlining centre
•
Insert moulded headlining
•
Clip in 10x clip
73.
Open luggage compartment
74.
Attach upper tailgate inner panelling
•
Insert panelling
•
Insert 7x body-bound rivet
•
Attach 2x water drain hose
75.
Attach luggage compartment panelling (on right side)
•
Insert panelling
•
Insert 4x body-bound rivet
76.
Attach support for folding roof
•
Tighten bolt
77.
Attach right tail light
•
Connect wiring harness plug
•
Insert 2x into guide
•
Tighten 2x nut
78.
Fit lower tailgate inner panelling
•
Connect wiring harness plug
•
Clip in 8x clip
79.
Attach closing bar panelling
•
Tighten 2x screw
80.
Attach protective blind for steel folding roof
•
Tighten 2x screw
•
Insert into guide Note: Remove bridge on
switch for protective blind, steel folding roof