Field Remedy: 2797
| Subject: |
Driver Info Center - Missing menu
functions |
| Models: |
Engines: |
Option: |
| Astra-J 2011 |
All |
|
| Complaint: |
Missing functions in DIC: No possibility to
change units (Miles/Kilometers, Degrees Celsius/Fahrenheit) No
possibility to reset day trip meter - still possible with cluster
button No possibility to reset oil lifetime counter |
| Cause: |
Part of turn signal lever wiring harness
removed from production content. |
| Production: |
As of the following VIN's improved wiring
harnesses have been implemented into production: EP -
W0LPD8EG6B8080320 GLI - W0LPD6ED5BG110813 |
Remedy:
Note:
This rectification shall only be applied to Astra-J MY2011,
built before the above mentioned breakpoints.
In case of customer complaint a repair wiring harness
has to be installed.
Working Procedure:
1. Disconnect battery
2. Remove steering column lower trim cover
    - see working procedure "Steering Column Lower Trim Cover
      Replacement", group "Steering / Steering Wheel and Column",
      Service Instruction Astra-J.
      (Document Number 92299566)
3. Remove instrument cluster
    - see working procedure "Instrument Cluster Replacement",
      group "Driver Information and Entertainment /
      Displays and Gauges", Service Instruction Astra-J.
      (Document Number 92284148)
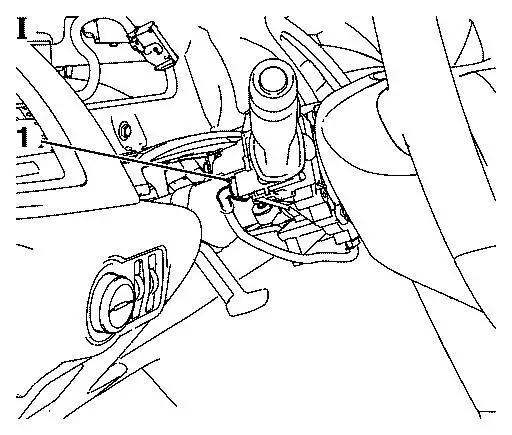
 4. Disconnect electrical connector (Picture I, 1) of turn signal
    lever
5. Open secondary locking electrical connector (Picture II, 1)
    Important:
    Carefully lift the secondary locking only for about 1mm!
    Note:
    If the electrical connector is damaged the entire instrument panel
    wiring harness has to be replaced!

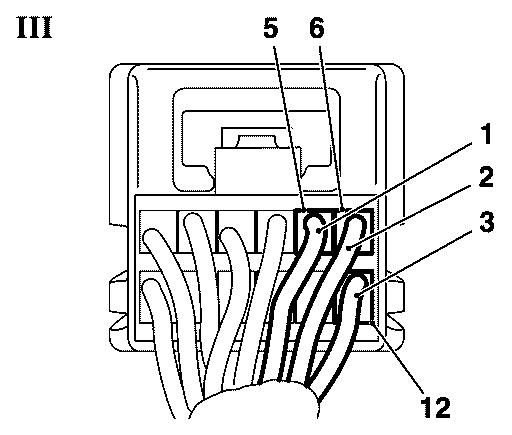
 6. Install the unlabeled end of repair wiring harness to electrical
    connector (Picture III)
    - Plug in grey/blue (1) wire to cavity 5
    - Plug in black/brown (2) wire to cavity 6
    - Plug in green/white (3) wire to cavity 12
7. Lock electrical connector secondary locking
8. Connect electrical connector
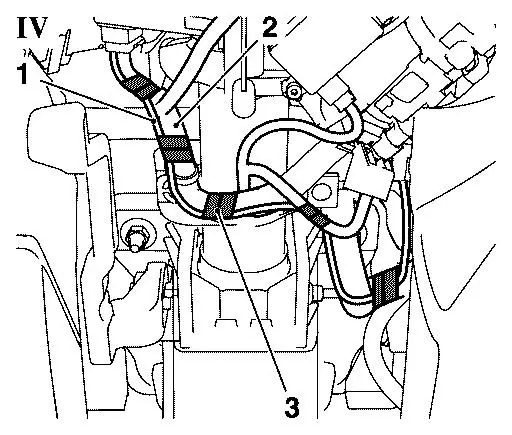
 9. Route repair wiring harness (Picture IV, 1) along original wiring
    harness (2) and fix it with textile tape (3)
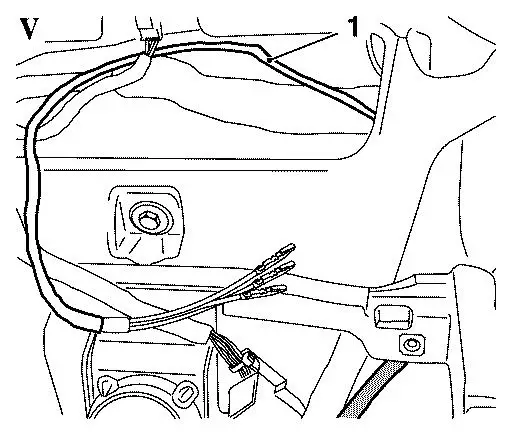
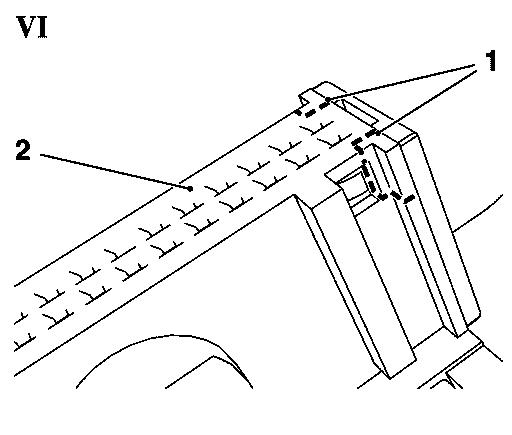
10. Route repair wiring harness (Picture V, 1) behind instrument panel
11. Remove instrument cluster electrical connector housing
    (Picture VI, 2)
    - Cut connector housing edges (1) at the dashed lines as shown on
      both sides using a cutter
    Important:
    Do NOT damage the inner electrical connector!
    If the electrical connector is damaged the entire instrument panel
    wiring harness has to be replaced!
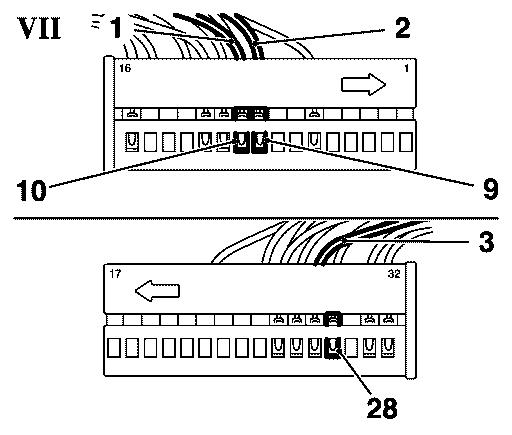
12. Install yellow labeled end of repair wiring harness
    to instrument cluster electrical connector (Picture VII)
    - Plug in green/white (1) wire to cavity 10
    - Plug in black/brown (2) wire to cavity 9
    - Plug in grey/blue (3) wire to cavity 28
13. Install new housing to instrument cluster electrical connector
    and fix it with a cable strap
    Important:
    Carefully reconnect the electrical connector to the instrument.
    Make sure not to damage/bent the pins of the instrument cluster
    during installation.
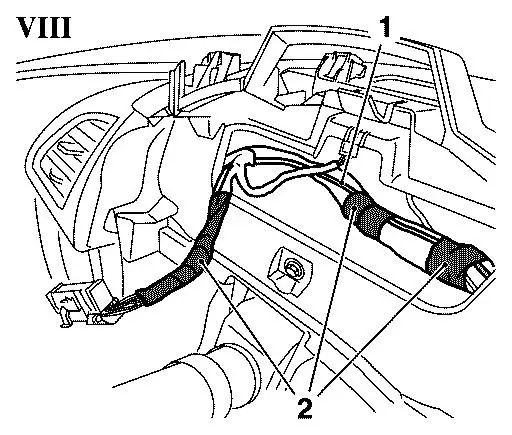
14. Fix repair wiring harness (Picture VIII, 1) with damper strip (2)
    to original wiring harness
15. Install instrument cluster
    - see working procedure "Instrument Cluster Replacement",
      group "Driver Information and Entertainment /
      Displays and Gauges", Service Instruction Astra-J.
      (Document Number 92284148)
16. Install steering column lower trim cover
    - see working procedure "Steering Column Lower Trim Cover
      Replacement", group "Steering / Steering Wheel and Column",
      Service Instruction Astra-J.
      (Document Number 92299566)
17. Connect battery
18. Program volatile memory
Spare-Parts: Part-No.: Catalogue-No.:
Special Part Repair-Kit wiring harness S-10705
Damper strip 1000x5x40                     90148142     17 82 800
Textile Tape*                              93186318     62 86 700
*) Proportional parts cost claiming is allowed only!
Labour Times: TC: Hours:
U3 279 70      Install repair              90           0,5
               wiring harness
The costs for this repair will be covered during warranty and policy.
For policy please refer to the Policy Guideline (WebPG/Kuugel).
The regular Warranty Procedure will apply.
| FunctionalGroup: |
N - Electrical Equipment |
| Complaint Group: |
04 - Electrical failures,13 - No/Poor
Function,23 - Wrong Indication |
| Trouble Code: |
|
|
