Timing Belt Replacement
| • |
EN-46788
Crankshaft Fixing Tool |
| • |
EN-46789
Camshaft Locking Tool |
| • |
EN-47634
Camshaft Sprocket Holding Tool |
For equivalent regional tools, refer to
Special Tools .
Removal Procedure
| 2. |
Protect the fender with
covers. |
|
Note: Avoid the
contact with cooling fluid and oil, it will damage the timing belt
and can not be reused.
|
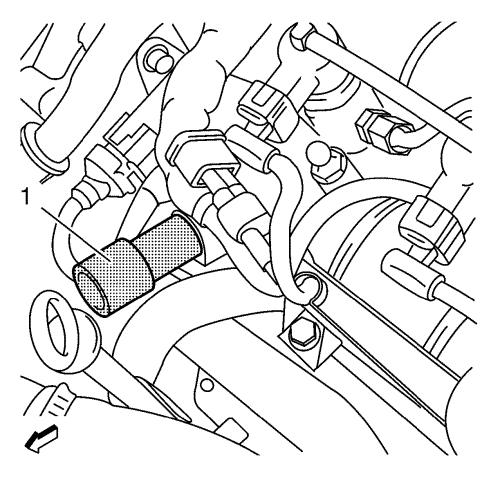
| 8. |
Set the cylinder one to
TDC: |
| |
• |
Remove the camshaft housing
closure bolt. |
| |
• |
Install the EN-46789
locking tool (1) in the camshaft housing. |
| |
• |
Turn the engine clockwise
until the EN-46789 locking tool (1) audibly
engages. |
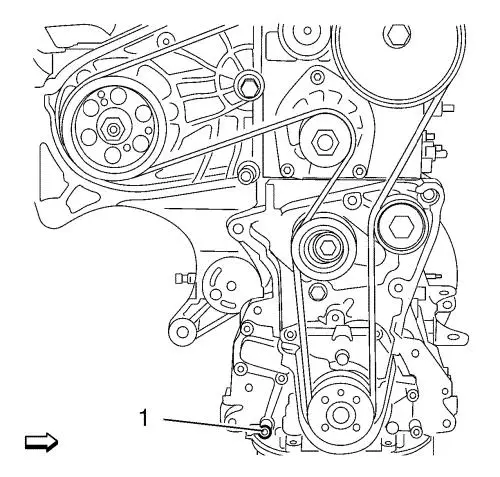
| 9. |
Remove the oil pump bolt
(1). |
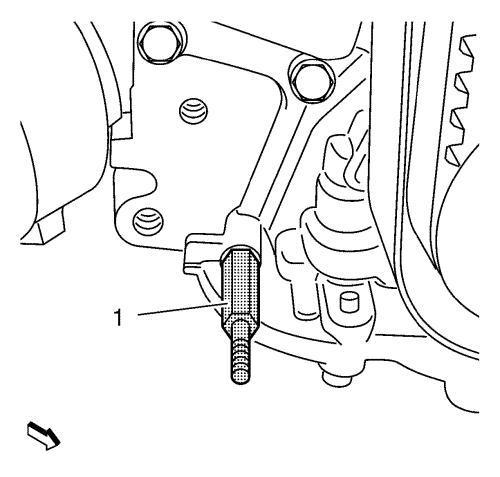
| 10. |
Install the fixing tool stud
(1) of the EN-46788 fixing tool . |
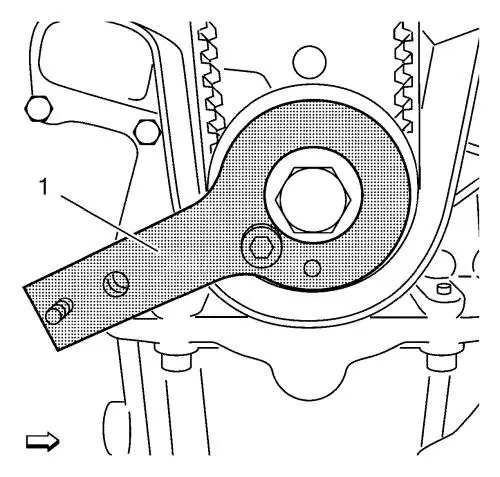
| 11. |
Lock the crankshaft, using the
EN-46788 fixing tool (1). |
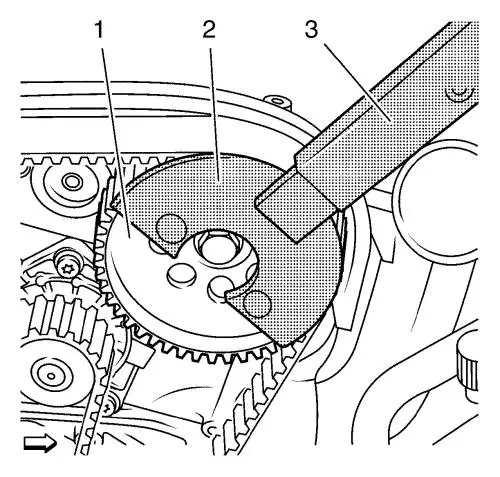
| 12. |
Loosen the camshaft sprocket
(1). |
| 13. |
Loosen the camshaft sprocket
bolt, by using the EN-47634 holding tool (2) with
the EN-956-1 extension (3). |
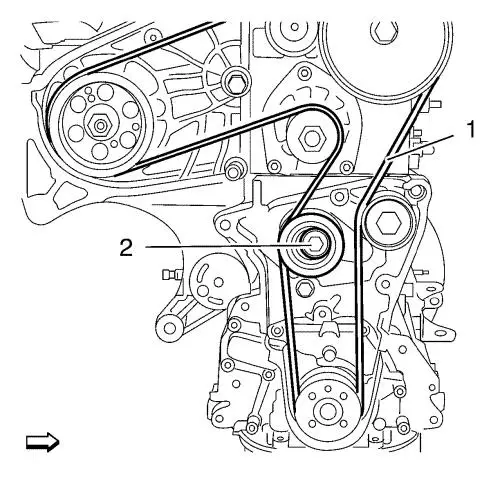
| 14. |
Loosen the timing belt
tensioner bolt (2) to release the tension from the timing
belt. |
| 15. |
Remove the EN-46788
fixing tool . |
|
Note: DO NOT damage
the timing belt. A damaged timing belt can not be reused.
|
|
Note: Observe the
direction of timing belt rotation.
|
| 16. |
Remove the timing belt
(1). |
Installation Procedure
| 1. |
Lock the crankshaft, using the
EN-46788 fixing tool (1). |
| |
|
|
| |
• |
Install the NEW timing belt to
the crankshaft sprocket. |
|
Note: Make sure that the
timing belt does not fall out of the sprocket during the
installation procedure.
|
| |
• |
Install the EN-46788
fixing tool (1). |
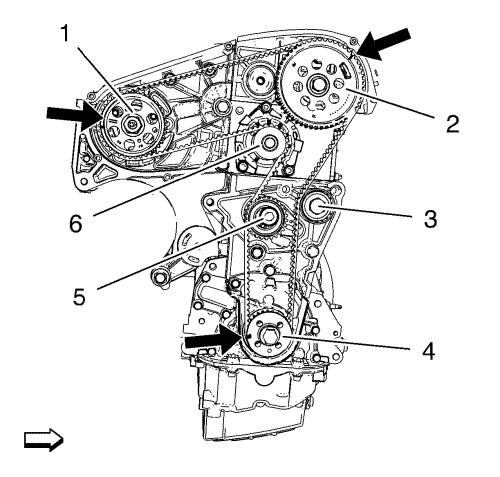
| 2. |
Install the timing belt in the
following sequence: |
|
Note: The marks on
the timing belt must fit to the marks on the sprockets, see arrows
in picture.
|
|
Note: The timing belt
tensioner must be lose.
|
| |
• |
Start with the crankshaft
sprocket (4). |
| |
• |
Second the timing belt
tensioner (5). |
| |
• |
Third the water pump
(6). |
| |
• |
Fourth the high pressure pump
sprocket (1). |
| |
• |
Fifth the camshaft sprocket
(2). |
| |
• |
The last one is the belt idler
pulley (3). |
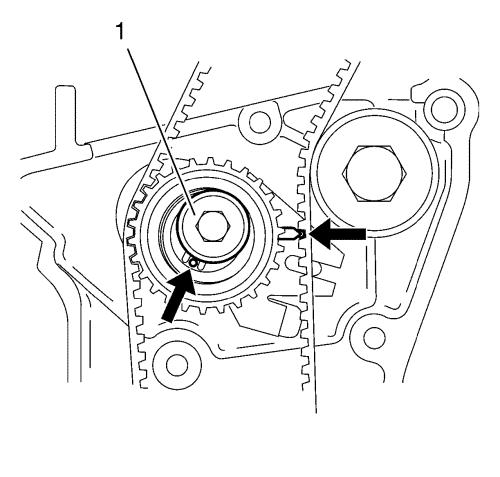
| 3. |
Bring the tensioner (1) in
correct tension. |
| |
• |
Loosen the tensioner
bolt. |
| |
• |
Bring the mobile index to the
reference position (bore), see at arrows in picture. |
| |
• |
Tighten the tensioner bolt to
25 N·m (18 lb ft) . |
| 4. |
Fasten the camshaft sprocket
bolt. |
| |
• |
Install the EN-47634
holding tool (2) to the camshaft sprocket (1). |
| |
• |
Hold up with the
EN-956-1 extension (3) and tighten the camshaft
sprocket bolt to 120 N·m (89 lb ft)
. |
| 5. |
Remove the EN-47634
holding tool (2) and the EN-956-1 extension
(3). |
| 6. |
Remove the EN-46788
fixing tool and the EN-46789 locking tool
. |
|
Note: It is absolute
necessary to turn the engine clockwise, not in another
direction.
|
| 7. |
Rotate the engine
720°. |
| 8. |
Check the engine
timing. |
| |
• |
Install the EN-46789
locking tool . |
| |
• |
Install the EN-46788
fixing tool . |
| 9. |
Remove the EN-46789
locking tool and the EN-46788 fixing tool
. |
| 10. |
Install the oil pump bolt and
tighten to 9 N·m (80 lb in) . |
| 16. |
Remove the covers from the
fender. |
|
