Instrument Panel, Remove and Install
 Remove, Disconnect Remove, Disconnect Engine compartment: Disconnect battery ground cable. Unbolt both wiper arms and remove from wiper bearings. Remove panels for wiper bearing apertures. Wind deflector - unscrew fastening bolts (see illus. I), raise in the centre and pull out both parts one at a time. Water deflector - unscrew hex nuts (1) and remove retainer plugs (2). Remove water deflector from bulkhead. Unscrew wiper linkage fastening bolts, disconnect wiring harness plug (3) from wiper motor. Remove screen wiper linkage. Disconnect speedometer cable. Detach rubber grommet for speedometer cable at bulkhead. | 
|
Instrument Panel Assembly
Instrument panel without airbag (instrument panel cover position)
 Important! Important! Use shear clips (2) only for vehicles without passenger airbag. | 
|
Remove, Disconnect Remove storage compartment under instrument panel, glove compartment and centre console - see corresponding operations. If present, press radio aperture upwards and remove. With radio - unscrew 4 bolts and remove radio upwards out of bracket with 2 removal bars. Detach and unbolt fuse box cover (see illus.). Remove fuse box downwards from instrument panel. | 
|
If present, unbolt bracket for anti-theft warning system control unit and remove from instrument panel. If present, unbolt AC relay frame and remove from instrument panel. | 
|
Layout of Heating Components
1 Mixed air nozzle housing, left
2 Left air distributor duct
5 Right air distributor duct
6 Mixed air nozzle housing, right
| 
|
Layout of Heating Components (Continued)
|
7 |
Right mixed air nozzle |
|
8 |
Centre mixed air nozzle |
|
9 |
Control knob, mixed air, air distribution, heater fan |
|
10 |
Control knob, recirculating air slider |
|
11 |
Recirculating air slider panel |
|
12 |
Centre air distributor duct |
|
13 |
Air distributor housing |
|
|
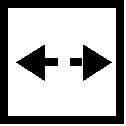
Remove, Disconnect Heating Controls Remove hazard warning lamps switch together with multiplug from aperture in controls. Using plastic wedge, turn both mixed air nozzles backwards past stop so that a 1.5 cm/0.6 in. wide gap is visible at the upper edge (see illus. II). Lever nozzle insert off from rotary cams and remove towards rear and upwards (see illus. III). Lever off control knob of recirculating air slider with a screwdriver. Lever off recirculating air slider panel from controls using a screwdriver. If present, remove seat heating switch. To remove switch, fabricate a tool acc. to dimensions in illus. IV. Remove switch from heating controls with fabricated tool (see illus. V). | 
|
Remove, Disconnect Unscrew fastening bolts (1) from heating controls and pull out controls far enough from instrument panel to gain access to the cable connection. | 
|
Unclip Bowden cables (1, 2, 4, 5) from control unit and disconnect wiring harness plug. Remove wiring harness plug of hazard warning switch (3) out from under housing. Disconnect wiring harness plug from TID / DID and remove TID / DID. Detach centre air distributor ducts from the instrument panel. | 
|
Remove, Disconnect Mixed air nozzle housing, left Lever out left mixed air nozzle insert from housing using 2 screwdrivers. Mixed air nozzle housing - unscrew bolts (1) and remove housing from air distributor hose. Disconnect wiring harness plug for light control. | 
|
Mixed air nozzle housing, right Lever out right mixed air nozzle insert from housing using 2 screwdrivers. Mixed air nozzle housing - unscrew bolts (1) and remove housing from air distributor hose. | 
|
1 Upper cover, steering column
12 Switch - turn signal lamp
14 Lower cover for steering column
| 
|
Remove, Disconnect Steering Wheel Turn steering to "straight ahead" position. Remove cover cap with horn button from steering wheel and disconnect wiring harness plugs. | 
|
Release nut on steering spindle and remove. Remove steering wheel from steering spindle using KM-210-A. Claws of removal hook point outwards. Airbag steering wheel: Remove airbag steering wheel - see corresponding operation in this group | 
|
Remove, Disconnect Unscrew cover for steering column - remove upper and lower panelling. Unclip signal switch on the left and wiper switch on the right together with their shift lever from shift housing. Press together both upper and lower tabs (see illus. I).
Important! Each switch and lever shall not be disassembled.
Remove, Disconnect Shift housing - lever out the 2 housing safety plugs, upper and lower. Turn shift housing to the left (bayonet catch) and remove from steering column (see illus. II). Vehicles with driver airbag: Unscrew fastening bolts for switch housing (see illus. III). Remove switch housing from steering column. | 
|
Remove, Disconnect Instrument Assembly: Instrument housing cover - unscrew fastening bolts and remove. | 
|
Instrument insert - unscrew 2 bolts, press up retainer clip and pull out instrument insert far enough from instrument panel to gain access to the speedometer cable. | 
|
Remove, Disconnect Release speedometer cable by pressing down retaining spring and remove from instrument insert. Remove instrument insert. Release tab for instrument wiring harness plug. Remove wiring harness plug from instrument panel. | 
|
On vehicles with airbag: Remove airbag control unit. Release wiring harness plug and disconnect. Unscrew hex nuts and remove airbag control unit.
Important! The airbag control unit is sensitive to shock. If it has fallen from a height greater than 50 cm, it may no longer be installed. | 
|
Remove, Disconnect Disconnect wiring harness plug for brake light switch at brake pedal. If present, disconnect antenna plug and wiring harness plug from radio bracket. Unscrew instrument panel bracket at centre - bolt at floor panel fastening (arrow). Disconnect wiring harness from panel reinforcement of instrument panel. | 
|
Instrument panel - unscrew side fastening bolts on the left and right sides of the instrument panel (arrows). Instrument panel in engine compartment - unscrew hex nuts in the plenum chamber. Remove instrument panel from bulkhead. | 
|
Remove, Disconnect Additionally on vehicles with airbag: Remove A pillar panelling, lower left. Detach door weatherstrip below from body web. Unscrew fastening bolts and snap button (arrows). Remove panelling A pillar. | 
|
Unscrew cover at air distributor housing and remove. Remove battery - unscrew bracket fastening bolt and remove battery from plenum chamber. | 
|
Remove, Disconnect Additionally on vehicles with airbag: Unscrew fastening bolts (1) at steering column support. Unscrew hex nut (3) for crash strut. Loosen hex nuts (4) behind lower A pillar panelling. If passenger airbag present, disconnect wiring harness plug for airbag unit. Unscrew hex nuts (2) for airbag unit bracket. Remove instrument panel with passenger airbag.
 Install, Connect Install, Connect Insert instrument panel with passenger airbag. Screw on airbag unit bracket - 22 Nm / 16 lbf. ft. Connect wiring harness plug for airbag unit. Tighten bolts at steering column support and hex nuts for crash strut and in area of lower A pillar. Install A pillar lower panelling and cover at air distributor housing. Insert battery in plenum chamber and screw on bracket. | 
|
Install, Connect Instrument panel (engine compartment) - bolt on hex nuts in plenum chamber (see illus. I). Instrument panel (vehicle interior) - screw on side fastening bolts on the left and right sides of the instrument panel (see illus. II). Bolt on instrument panel bracket (see illus. III). Install wiring harness on metal reinforcement of instrument panel. If present: connect antenna plug and radio wiring harness plug. Install brake light switch.
 Tighten (Torque) Tighten (Torque) Instrument panel to bulkhead - 22 Nm / 16 lbf. ft. Instrument panel to bulkhead bracket at side - 6 Nm / 4.5 lbf. ft. Lower bracket to floor - 6 Nm / 4.5 lbf. ft. | 
|
Install, Connect Instrument Assembly: Snap wiring harness plug for instrument in instrument panel. Place speedometer cable on instrument insert and secure with spring. Slide instrument insert into the space provided for it on the instrument panel - fasten with 2 bolts and secure with spring. Bolt on instrument housing cover. On vehicles with driver's airbag: install instrument housing cover with cover for steering column. Screw on speedometer cable in engine compartment. Fasten rubber grommet for speedometer cable at bulkhead. | 
|
Steering wheel Guide tabs on signal switch housing into groove of steering column - turn right (bayonet catch) and secure with new plugs (see illus.). Driver's airbag: guide switch housing onto steering column and bolt on. Engage signal switch on the left and wiper switch on the right with wiring harnesses connected in housing.
Important! Signal switch must be in zero position. | 
|
Install, Connect Screw on upper and lower covers for steering column (1, 2). Insert washer and pressure spring for steering wheel fastening over steering spindle on to ball bearing. Ensure steering is in straight ahead position when placing steering wheel on steering spindle, so that steering wheel spokes are in a horizontal position. | 
|
Fasten steering wheel with a new retainer and fastening nut - 25 Nm / 18 lbf. ft. Install cover cap with horn button. Airbag steering wheel: Install airbag steering wheel - see corresponding operation in this group. |
|
Install, Connect Mixed air nozzle housing, right: Place mixed air nozzle housing on air distributor duct and fasten with bolts (1). Slide mixed air nozzle insert into housing. |
|
Mixed air nozzle housing, left: Connect wiring harness plug for light control on housing. Guide mixed air nozzle housing into the space provided for it on the instrument panel and fasten with bolts (1). Fit mixed air nozzle insert in housing. |
|
Install, Connect Insert centre air distributor duct into the space provided for it on the instrument panel. Connect TID / DID wiring harness plug and place TID / DID into space on instrument panel. | 
|
Heating controls: Connect wiring harness plug (3) on controls. Install Bowden cables on controls.
|
Clip colour code, Bowden cable: |
|
Mixed air lever (4) |
- black |
|
Recirculating air slider (5) |
- blue |
|
Air distributor lever (in driving direction) |
|
rear (1) |
- grey |
|
front (2) |
- brown |
|
|
Install, Connect Fit heating controls in instrument panel and bolt on. If present, insert switch for seat heating in heating controls. Install recirculating air slider panel and knob. Insert mixed air nozzles in housing. Engage hazard warning lamps switch with multiplug in aperture in controls. | 
|
If present - install radio. If present - insert radio aperture in instrument panel. Screw on fuse box and press on cover. If present - screw on bracket for anti-theft warning system control unit. If present - screw on relay carrier for air conditioning (illus.). | 
|
Install, Connect On vehicles with airbag: Screw on airbag control unit with hex nuts. Connect wiring harness plug. Install centre console, ashtray and glove compartment - see corresponding operations. Install storage compartment under instrument panel - see corresponding operation. |
|
Screen wiper linkage, connect wiring harness plug to wiper motor and bolt on. Bolt on water deflector with hex nuts and install fastening plugs (1). Bolt on both parts of cowl. | 
|
Install, Connect Install both wiper arms.
Important! The two wiper arms are not identical. The wiper arm on the passenger side is 36 mm/1.4 in. longer than on the driver's side. In addition, the wiper arm on the passenger side is angled just behind the spring unit (arrow). Illustration shows LHD. Layout is symmetrical for RHD vehicles.
 Measure Measure When aligning the wiper arms, check installation dimensions for rest position. (Illustration shows LHD, symmetrical for RHD). Distance dimensions extend from the window trim (visible end of glass) to the blade centre at the blade attachment point.
Install, Connect Tighten both wiper arms with hex nut and spring washer - 10 Nm / 7 lbf. ft. | 
|
|

