Press ball bearing on slip ring side (1) to stop on armature shaft with suitable assembly sleeve.
Important!
Twist protection on ball bearing must point upwards.
Assemble
Press ball bearing into front housing cover by hand.
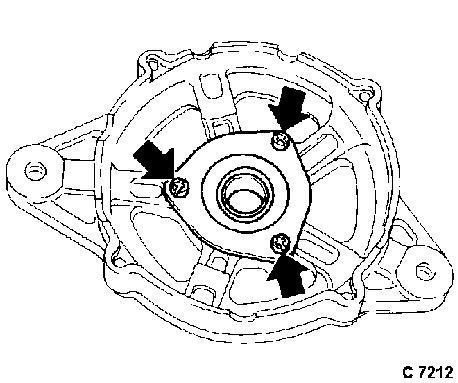
Bolt retaining ring to end shield (arrows).
Assemble
Place carbon brush plate with retaining plate above locating bolt on diode plate.
Solder connection (arrow) between carbon brush and diode plate.
Place insulating sleeve (1) on locating bolt.
Solder phase guide of stator windings to diode frame.
Important!
To prevent diodes overheating when soldering, hold connecting strands on diode plate with long nose pliers.
Ensure that connection wires are correctly routed!
Assemble
Insert rotor in front housing cover.
Attach spacer ring, fan and pulley to shaft stump and fasten with split washer and nut.
Tighten (Torque)
Fan and pulley to rotor - 55 Nm / 41 lbf. ft.
Assemble
Drive new radial shaft seal (1) to stop in rear housing cover with suitable assembly sleeve (2).
Assemble
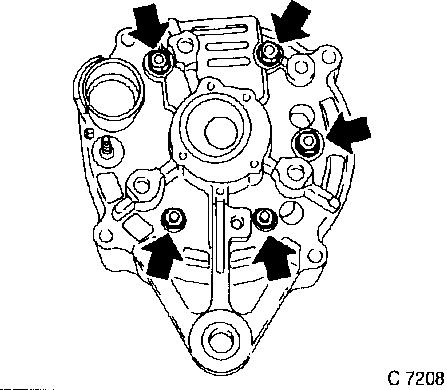
Install diode and carbon brush plate with stator winding in rear housing cover (arrows).
Important!
Note position of stator in housing.
Assemble
Wind insulation tape around drive splines of vacuum pump on rotor (1). Lift carbon brushes from outside through housing aperture with wire pin (2). Join pre-assembled housing halves.
Important!
Note position of stator in housing.
Assemble
Remove wire pin holding carbon brushes from housing and remove insulation tape from armature shaft.
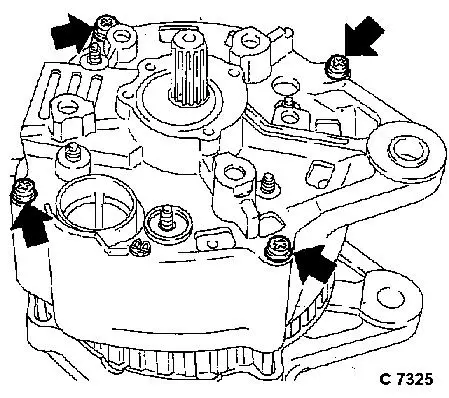
Install through bolts.
Tighten (Torque)
Through bolts to alternator - 7 Nm / 5 lbf. ft.
Assemble
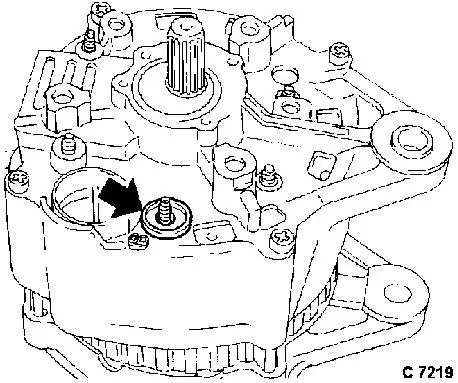
Insert insulating sleeve for connection pin "B" and fasten wiring harness to alternator housing.
Assemble
Place seal ring in groove on alternator housing and bolt vacuum pump to alternator - 7 Nm / 5 lbf. ft.
Inspect
Fill approx. 5 cm 3 engine oil into oil filler aperture and check that alternator can be turned easily by hand.
After assembling alternator, check alternator power and alternator voltage - see operation "Alternator, Check".