|
Brake Lines, Replace
 Remove Remove
| 1. |
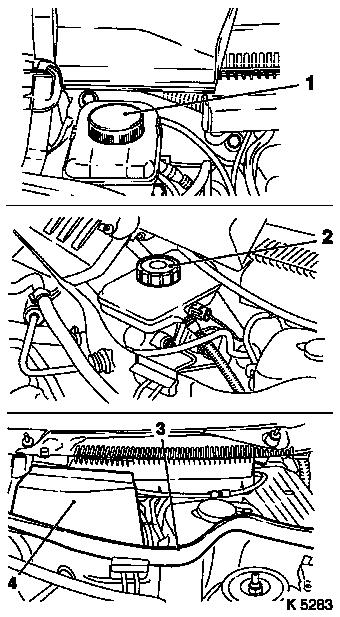
Pull seal (1) away from plenum chamber as far as necessary
| • |
Raise covering flap (2) for brake master cylinder
|
|
| 2. |
Detach closure cap (3) from brake fluid reservoir
| • |
Top up brake fluid reservoir to "MAX" mark and seal with MKM-558-10 (4)
|
|
|

|
| 3. |
Remove brake line
- Remove brake line from brake master cylinder to hydraulic
modulator
- Vehicles with Left Hand Drive

- Vehicles with right hand drive
- Brake Line – Rear Left or Right, Remove and Install
(Vehicles with Disc Brakes)
|
 Install
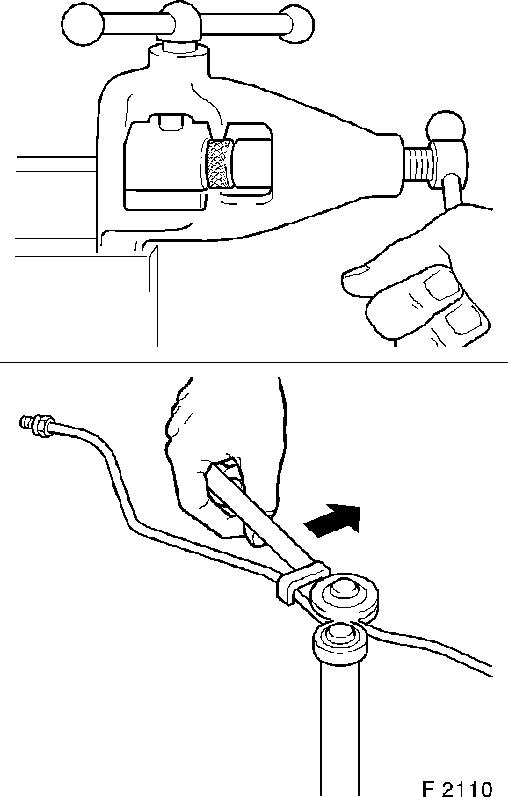
| 4. |
Bend new brake lines using the brake line to be replaced as a
pattern
Note: Use bending tool
to avoid changes in cross-section
| • |
Arrange protective sheaths of the brake lines in their original
positions
|
|
| 5. |
Push the corresponding retaining bolt on to the brake line and
flare end of brake line
Note: Note design of
original flaring
Note: The brake lines
are mainly supplied by the metre without retaining bolts and
flaring. If brake lines have to be produced, compliance with the
thread diameter of the existing retaining bolt is essential.
|
|
|
| 6. |
Install new brake lines
Note: When replacing
brake lines, ensure that these are not routed between electric
cables. Chafed points automatically lead to failure of the
electrical system. The distance between brake lines and electric
cables should be at least 25 mm
.
- Install brake line from brake master cylinder to hydraulic
modulator
- Vehicles with Left Hand Drive
- Vehicles with right hand drive
- Brake Line – Rear Left or Right, Remove and Install
(Vehicles with Disc Brakes)
| • |
Tighten retaining bolts of brake lines
| – |
Tightening torque 16 Nm
|
|
|
| 7. |
Remove MKM-558-10 (1) from brake
fluid reservoir
|
| 8. |
Bleed brake system and check for leaks
|
| 9. |
Install closure cap (2) on brake fluid reservoir
|
| 10. |
Close closure cap (4)
| • |
Place seal (3) on plenum chamber
|
|
|
|
|
