|
Replace one con-rod bearing (Z 10 XE, Z 10 XEP,
LHD)
 Remove Remove
| 1. |
Remove oil pan
Note: Remove oil tank -
see operation "Removing and installing oil tank"
|
| 2. |
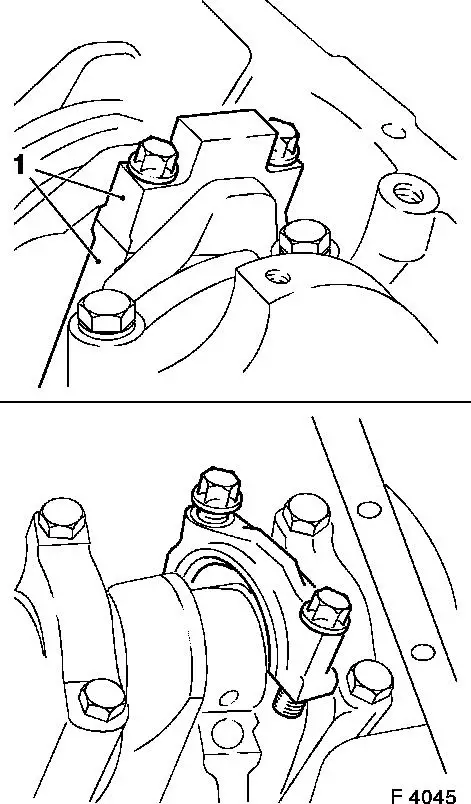
Remove con-rod bearing cap (1)
| • |
Set piston to BDC position
|
Important: Caution: The mating
surfaces of the cod-rods and con-rod bearing caps form an
individual fit and as a result must never be interchanged or
damaged. Do not lay on mating surfaces
|
| • |
Unscrew 2 bolts
|
|
|
|
| 4. |
Inspect components
| • |
Con-rod bearing journal, con-rod bearing cap, bearing
shells
|
|
| 5. |
Insert bearing shells
| • |
De-grease con-rod bearing journal
|
|
 Install
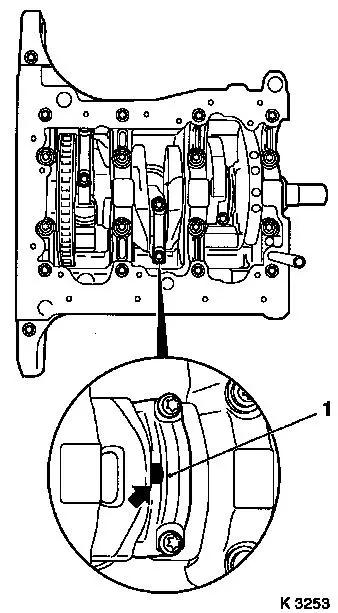
| 6. |
Fit con-rod bearing cap
Important: Bead (arrow) on
con-rod bearing cap should face transmission side
|
| • |
Place plastic gauge across width of con-rod bearing journal
|
| • |
Tighten 2 bolts ( 10 Nm + 60° +
15° ) (M6)
| – |
From engine number 19P13554 ( 13 Nm +
60° + 15° ) (M6.5)
Note: Bolts do not have
to be replaced when measuring con-rod bearing play. Do not rotate
crankshaft.
|
|
|
| 7. |
Remove con-rod bearing cap
|
|
|
| 8. |
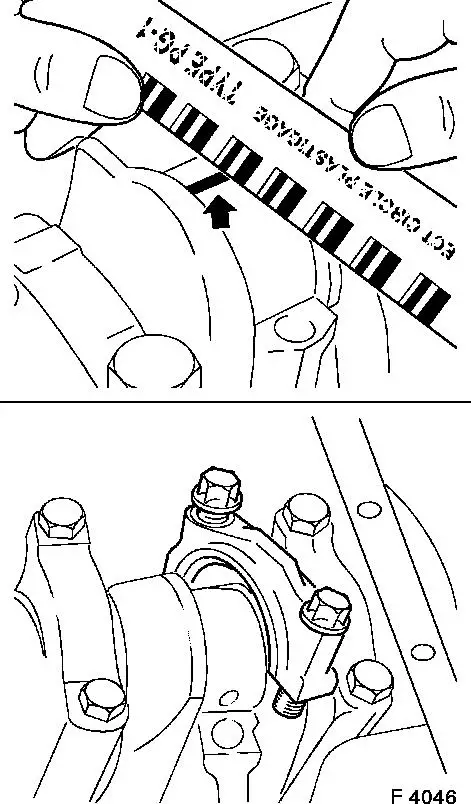
Measure con-rod bearing clearance
| • |
Compare plastic gauge (plastic thread) to measuring scale
|
| • |
Permissible con-rod bearing play: 0.019 to 0.071 mm.
Note: Do not confuse
millimetre and inch markings on measuring scale.
|
|
| 9. |
Fit con-rod bearing cap
| • |
Clean con-rod bearing journal and con-rod bearing shell and
coat with engine oil
|
Important: Bead on con-rod
bearing cap should face transmission side.
|
| • |
Tighten bolts ( 10 Nm + 60° +
15° )
| – |
From engine number 19P13554 ( 13 Nm +
60° + 15° ) (M6.5)
|
|
|
|
|
| 10. |
Install oil pan
Note: Install oil pan -
see operation "Removing and installing oil pan".
|
|
