|
Step D - Damage type 4, Replacement of plug
casings and individual spring contacts
D4.1 - Release secondary lock
|
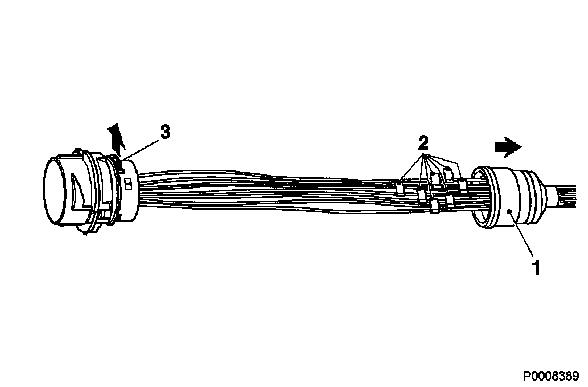
- Push back rubber grommet (1) and remove.
- Number all cables according to plug diagram (see section 5) (2)
so that it will not be possible to confuse the cables when
connecting them later.
- Release secondary lock (3) of spring contacts with small
screwdriver or designated release tool.
|
D4.2 - Release primary lock and remove plug
casing
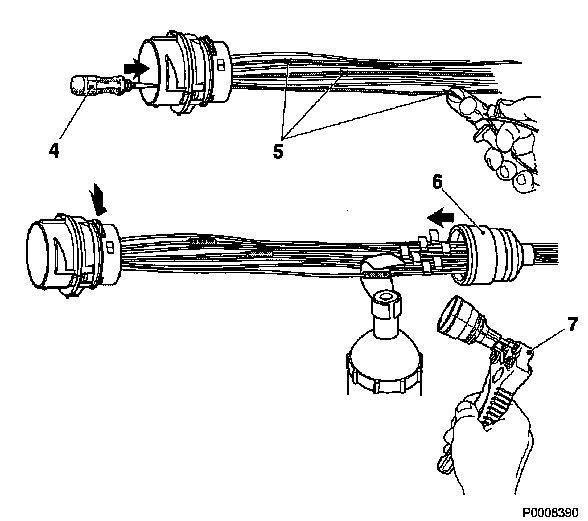
- Insert release tool (4) into locking groove of intact spring
contacts to the stop.
- Pull released spring contact out of plug casing.Insert contacts
into new plug casing one at a time.
Note: Lead ends must
be guided through new rubber grommet.
- Sever defective spring contacts with lead ends individually at
suitable locations, varying separation locations (5) to essentially
retain the same cross-section for the entire wiring harness.
- Insert new spring contact with lead end into the new plug
casing.
- Insert into plug casing, check seating is secure.
Note: Pay attention
to rubber grommet.
- Crimp new lead end in accordance with steps D1.1 to D1.4
 . .
- Number new lead end close to plug according to plug
diagram.
- For water-tight wiring harness plugs, provide chambers that are
not occupied with sealing plugs.
Repeat steps D4.2 to D4.3 for replacing additional spring
contacts.
- Slide on new rubber grommet (6) using three-pronged pliers
(7).
D4.3 - Assemble wiring harness plug
|
- Attach secondary lock.
- Insulate wiring harness according to D1.6.
- Secure rubber grommet on wiring harness plug.
|
|
