Important: Note
specification for welded, brazed and riveted joints and body repair
with structural adhesive !
Remove
1.
Remove attaching parts
2.
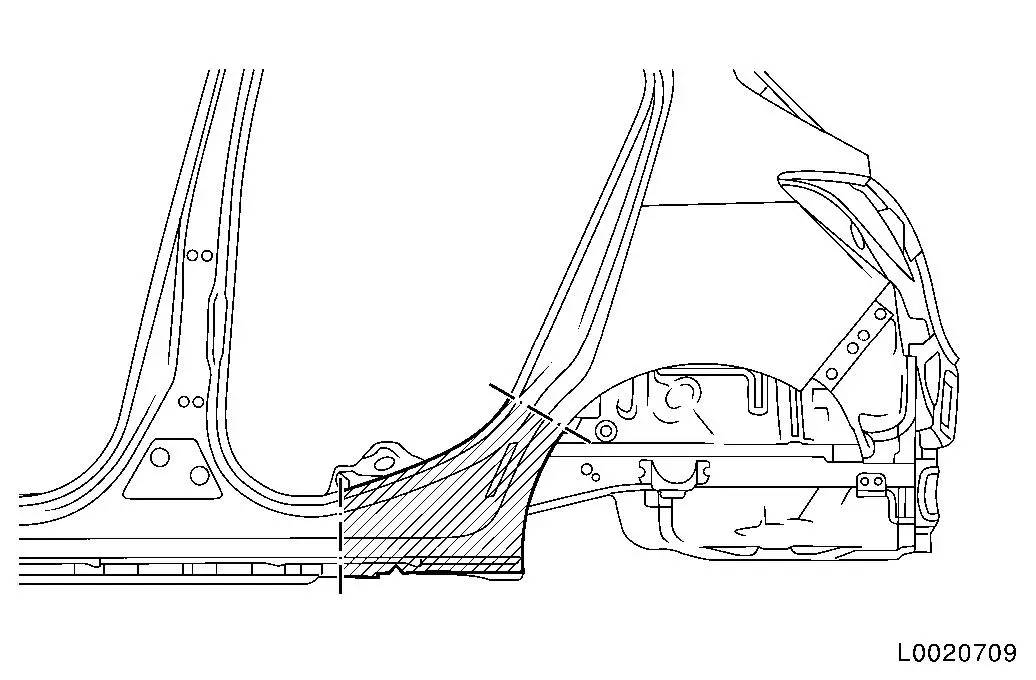
Cut and drill away rear sill panelling
Install
3.
Cut new part to size within the component supplied Note: For vehicles
without extra door seal, remove the corresponding welded bolt on
the new side panel.
•
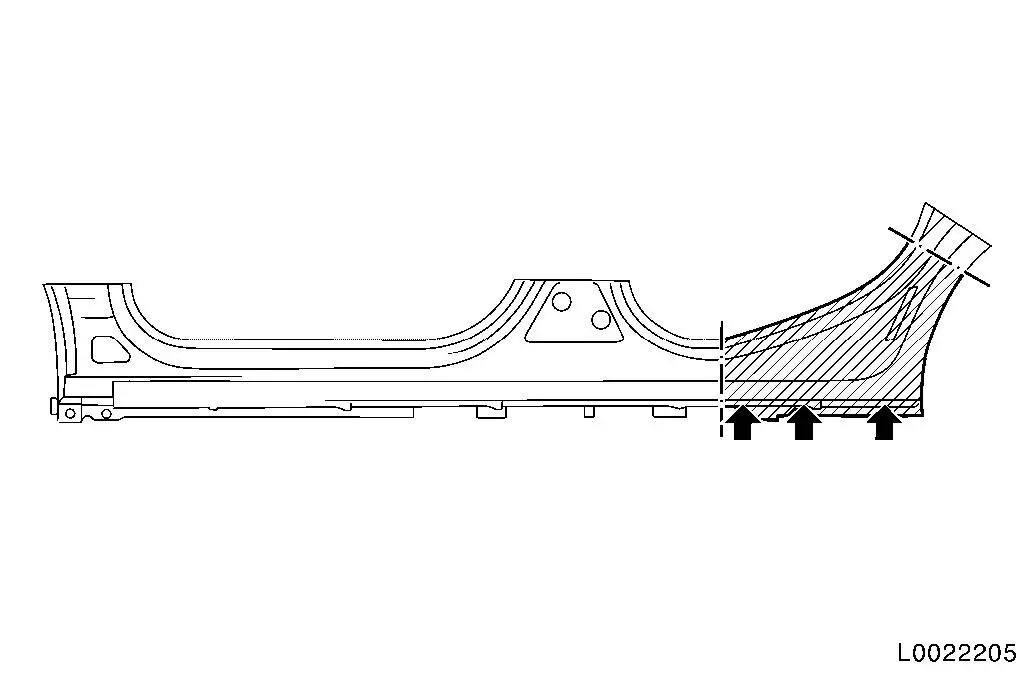
Make 3x slot 5x18 mm
(arrows)
4.
New part, sill panelling rear, install and remove
5.
Apply corrosion protection adhesive system 93 160 535/15 05
000 Note: Leave 40 mm
around the MIG brazed seams free of adhesive.
6.
Adjust rear sill panelling to fit
7.
Weld in rear sill panelling and MIG-braze Note: SPP, Special
Parameter Program. The number of points is given in the literature
from the welder manufacturer.
8.
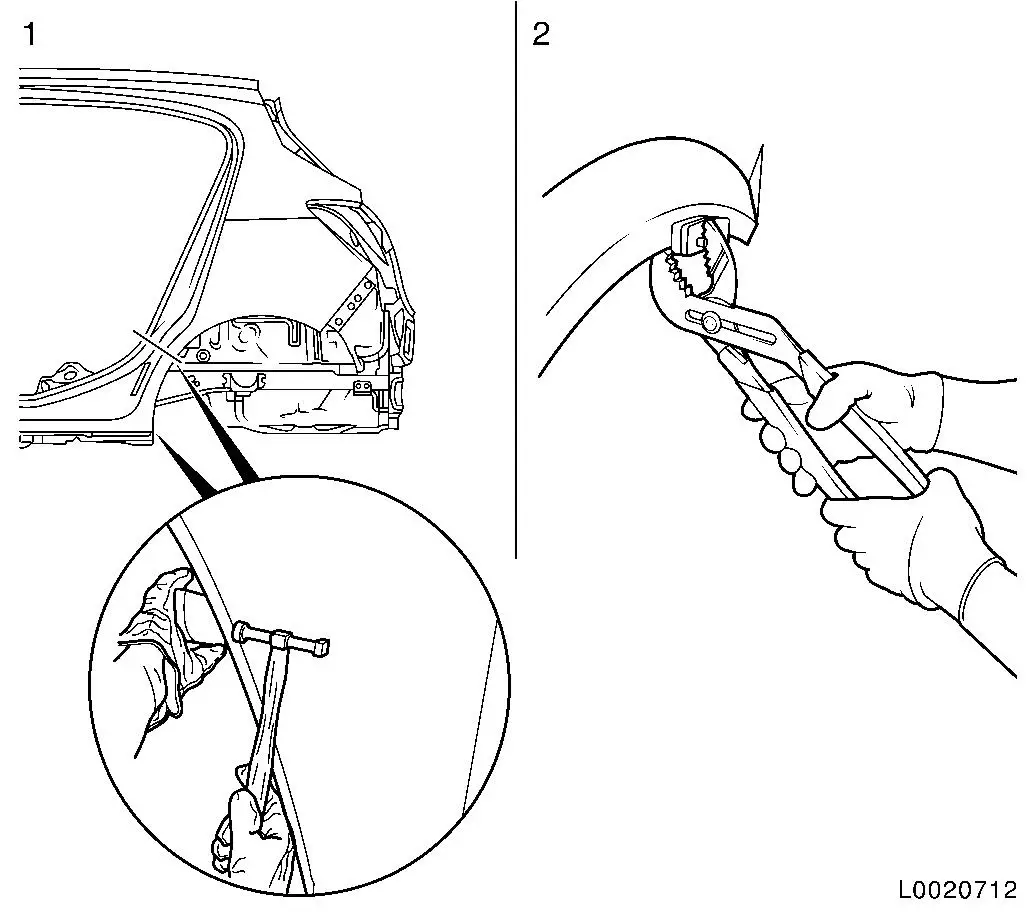
Bend the wheel arch
•
Using a suitable hammer, bend over the flanged edge, at the
same time holding a small mallet or block against it (1).
•
Bend over flanged edge using bending pliers (2) KM-6396
•
Apply excess adhesive as a seam seal and corrosion protection
using a spatula or flat paintbrush
9.
Weld in rear inner sill panelling and MIG-braze
10.
Grind MIG brazed seams
11.
Seal body, weld and brazing seams Note: Observe corrosion
protection measures for seam seals.
12.
Apply underseal. Note: Observe corrosion
protection measures for PVC protection
13.
Seal cavity Note: Observe
protective wax corrosion protection measures.