|
Manual Transmission, Remove and Install
(M20/M32)
Applies to Z 13 DTH, A 13 DTR, Z 17 DTR and A 17
DTS
Note: If the
transmission is replaced, the following parts must be
transferred:
| 1. |
Connection piece for clutch actuation |
| 2. |
Engine damping block retainer |
| 3. |
Holder for shift cables |
 Remove Remove
| 2. |
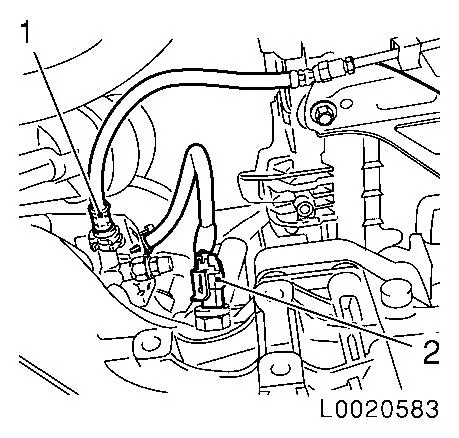
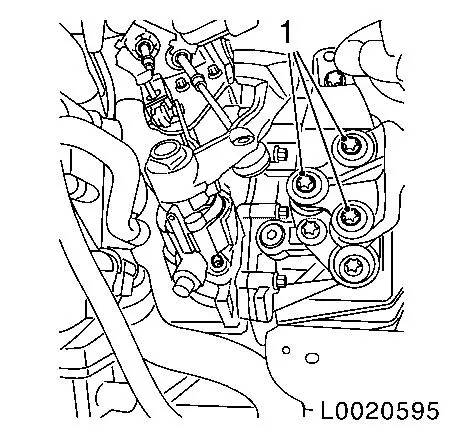
Detach clutch pressure line (1) from transmission
Note: Collect escaping
brake fluid
| • |
Draw pressure line out of connector
Note: Seal pressure
line with plug.
|
| • |
Drive retaining clip into connector
|
|
| 3. |
Disconnect wiring harness plug (2) for reversing lamp
switch
|
|
|
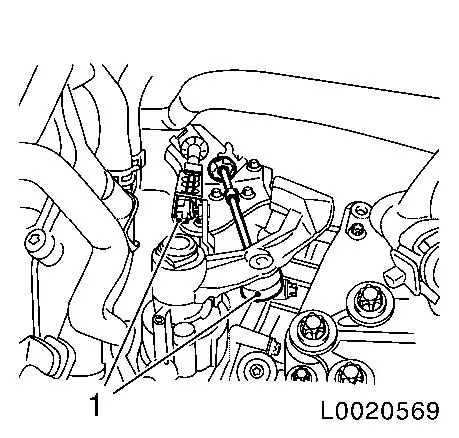
| 4. |
Detach 2 shift cables (1) from transmission
| • |
Detach 2x gearshift cable from shift linkage lever
|
| • |
Detach 2 shift cables from retainer
|
|
|
|
|
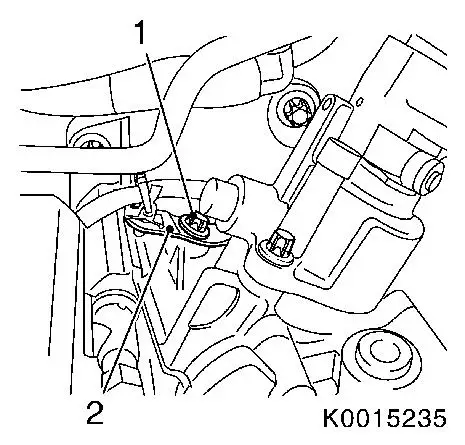
| 5. |
Detach bracket for upper wiring harness (2) from
transmission
| • |
Unclip wiring harness plug
|
|
|
|
| 6. |
Release transmission at top
Note: Use DT-48783 .
|
|
| 7. |
Attach engine bridge EN-47650 
|
| 8. |
Detach transmission from left engine damping block
|
|
|
| 9. |
Remove front axle body
|
| 10. |
Drain off transmission fluid
|
| 11. |
Detach right axle shaft
| • |
Z 13 DTH, A 13 DTR
Note: Axle shaft
remains in wheel hub.
Close openings in transmission with plugs.
|
| • |
Z 17 DTR, A 17 DTS
Note: Detach axle shaft
from intermediate shaft.
Axle shaft remains in wheel hub.
|
| • |
Attach axle shaft to vehicle underbody
|
|
| 12. |
Z 17 DTR, A 17 DTS only: detach intermediate shaft
Note: Close openings in
transmission with plugs.
|
| 13. |
Remove left axle shaft
Note: Axle shaft
remains in wheel hub.
Close openings in transmission with plugs.
| • |
Attach axle shaft to vehicle underbody
|
|
Important: Do not damage wiring
harnesses and attaching parts
|
| 14. |
Lower engine and transmission on the left hand side
|
| 15. |
Remove rear torque support bracket
|
|
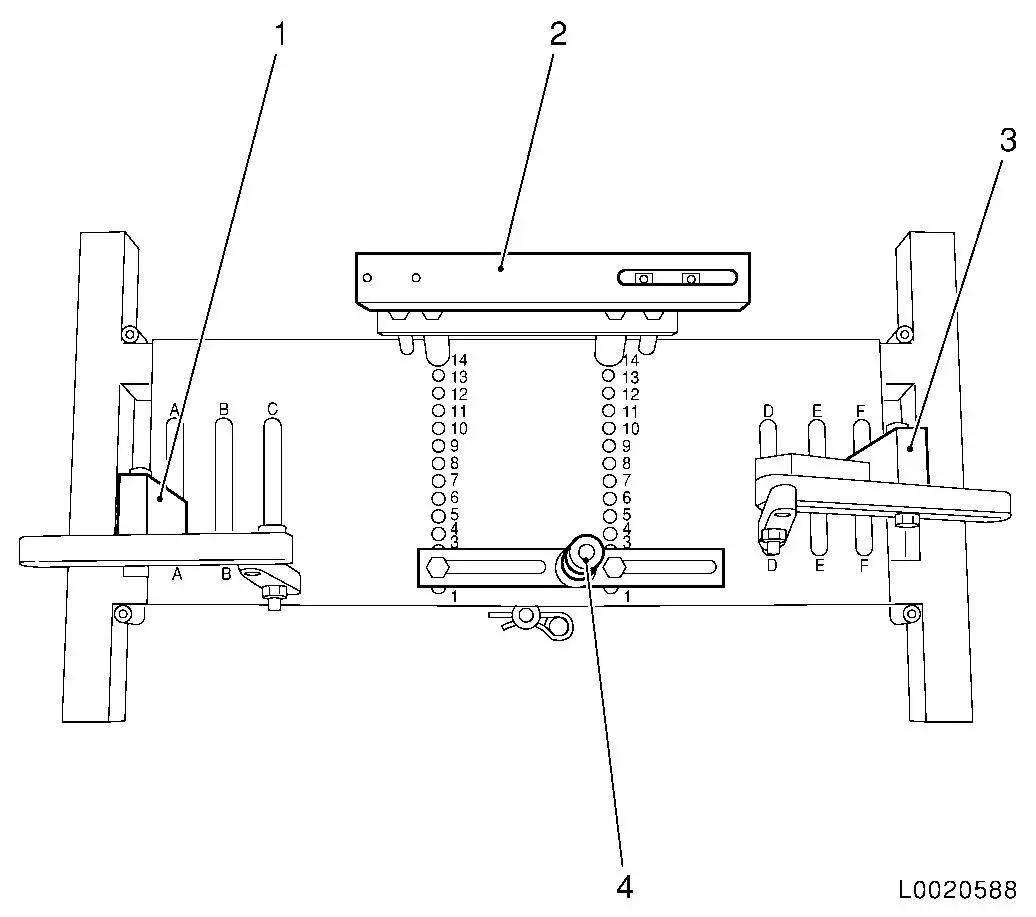
| 16. |
Place transmission fixture DT-47648
on KM-904 and assemble as shown in
illustration:
|
Component
|
Position on base plate
|
Designation
|
|
DT-47648-2
(4)
|
2
|
Clutch housing support
|
|
DT-47648-3
(2)
|
14
|
Transmission housing support
|
|
DT-47648-5 left
(1)
|
A
|
Rear transmission support with pivot arm
|
|
DT-47648-5 right
(3)
|
F
|
Front transmission support with pivot arm
|
|
|
Important: Pay strict attention
to manufacturer's notice for transmission fixture DT-47648 .
|
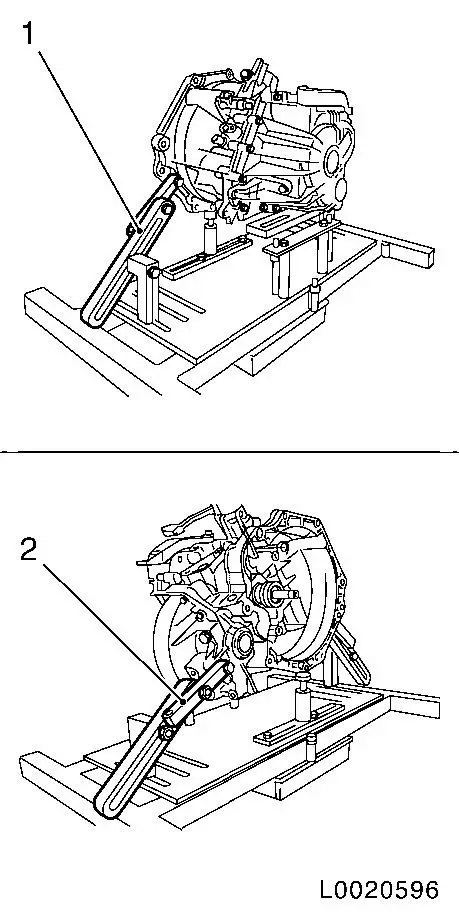
| 17. |
Attach DT-47648 to transmission
Note: Loosen all screw
connections of the swivel arms and supports to the base plate
before placing them under load. Rotate the supports as far down as
possible by way of the spindles.
| • |
Place DT-47648 with supports beneath
the transmission
|
| • |
Tighten screw connections on the supports
|
| • |
Attach pivot arms (1) and (2) to transmission
|
| • |
Tighten the screw connections of the pivot arms starting from
the transmission to the base plate
Note: Align the pivot
arms so that as a little lever force as possible is created.
|
|
|
|
| 18. |
Release transmission at the bottom
| • |
Press the engine away from the transmission and slowly lower
with the hydraulic jack
Note: Do not damage
wiring harnesses and attaching parts
|
|
Important: Do not damage
attaching parts when putting the transmission down.
|
| 19. |
Detach transmission from DT-47648
Note: 2n mechanic
required.
| • |
Put transmission down carefully
|
|
 Install
| 20. |
Attach transmission to DT-47648
Note: 2n mechanic
required.
|
| 21. |
Install transmission using DT-47648
| • |
Raise transmission and align it
|
| • |
Place transmission so that it is in even contact with the
engine
Note: Ensure it is
seated perfectly.
|
|
| 22. |
Fasten transmission at the bottom
|
| 23. |
Fasten transmission at the bottom
| • |
Tighten 2x bolt M10 40 Nm
|
|
| 24. |
Detach DT-47648 from transmission
|
Important: Do not damage wiring
harnesses and attaching parts
|
| 25. |
Raise engine and transmission on the left hand side
|
| 26. |
Attach transmission to left hand engine damping block
| • |
Screw in 3 bolts
Note: Do not tighten
bolts yet.
|
|
| 27. |
Install rear torque support bracket
| • |
Tighten 2 bolts 80 Nm + 45°
|
|
| 28. |
Attach left axle shaft
|
| 29. |
Z 17 DTR, A 17 DTS only: install intermediate shaft
|
| 30. |
Install right axle shaft
| • |
Z 17 DTR, A 17 DTS
Note: Attach axle shaft
to intermediate shaft.
|
|
| 31. |
Install front axle body
Note: Do not install
front exhaust pipe and central silencer yet.
|
| 32. |
Fasten left engine damping block
| • |
Tighten 3 bolts (1) 80 Nm +
45°
|
|
|
|
| 33. |
Detach engine bridge EN-47650
|
|
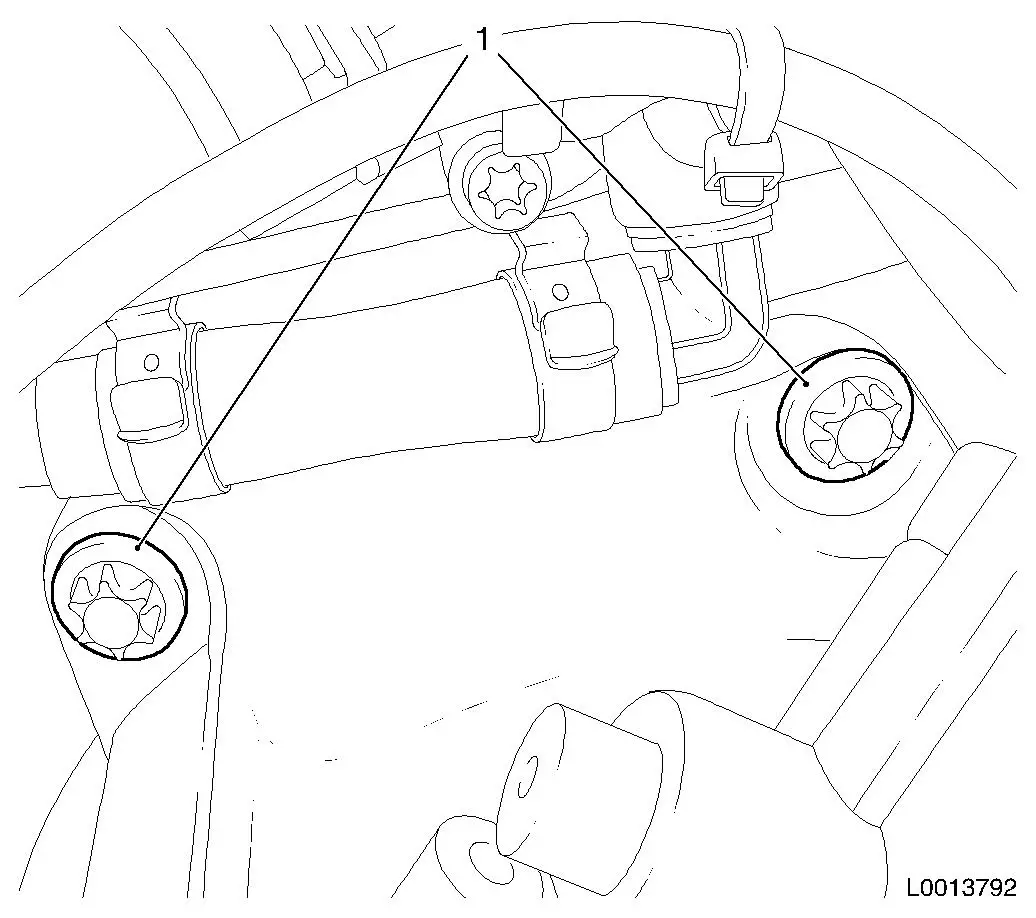
| 34. |
Fasten transmission at the top
Note: Use DT-48783
| • |
Tighten 2x bolt (1) 60 Nm
|
|
|
| 35. |
Install exhaust system
| • |
Z 13 DTH with Diesel Particle Filter
|
| • |
Z 13 DTH without Diesel Particle Filter, A 13 DTR
|
|
| 36. |
Attach bracket for upper wiring harness to transmission
|
| 37. |
Connect wiring harness plug for reversing lamp switch
|
| 38. |
Attach clutch pressure line to transmission
| • |
Press pressure line into connector
Note: The pressure line
must audibly engage.
|
|
| 39. |
Attach 2x shift cable to transmission
| • |
Clip 2x shift cable into counterhold
|
| • |
Attach 2x shift cable to shift linkage lever
|
|
| 40. |
Top up with transmission fluid
|
| 41. |
Bleed hydraulic clutch actuation (F13+/F17+/M20/M32)
|
| 42. |
Transmission Shift Linkage, Adjust
|
| 43. |
Install battery support
|
| 44. |
Program volatile memories
|
|
