|
Outer Panelling – Tailgate Door, Replace
Caution
When adhering the outer panel of the tailgate ensure that the
water drain is not sealed up.
|
(Example – replace door outer panelling)
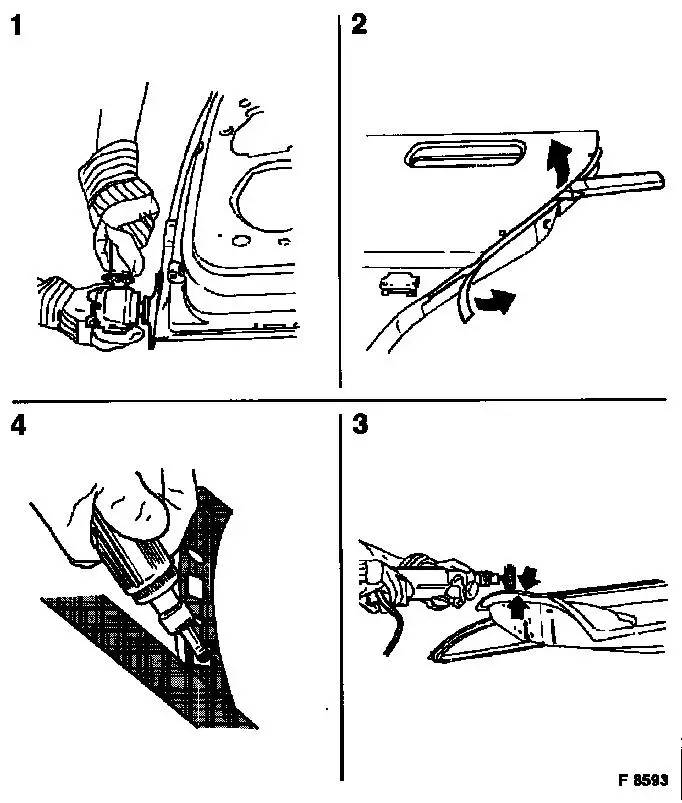
 Remove Remove
- Door, detach attaching parts
- Remove sealing compound
- Drill off welding points
- Grind flanged edges (1) all around
- Detach door outer panelling (2) from frame and remove remaining
flange.
- Remove residual adhesive (3) on frame, grind down adhesive
flange
- Grind down adhesive flange (4) of new part only in vicinity of
spot welds (note: the new hem seam adhesive adheres to the new part
primer coat)
- If necessary, realign frame.
|
|
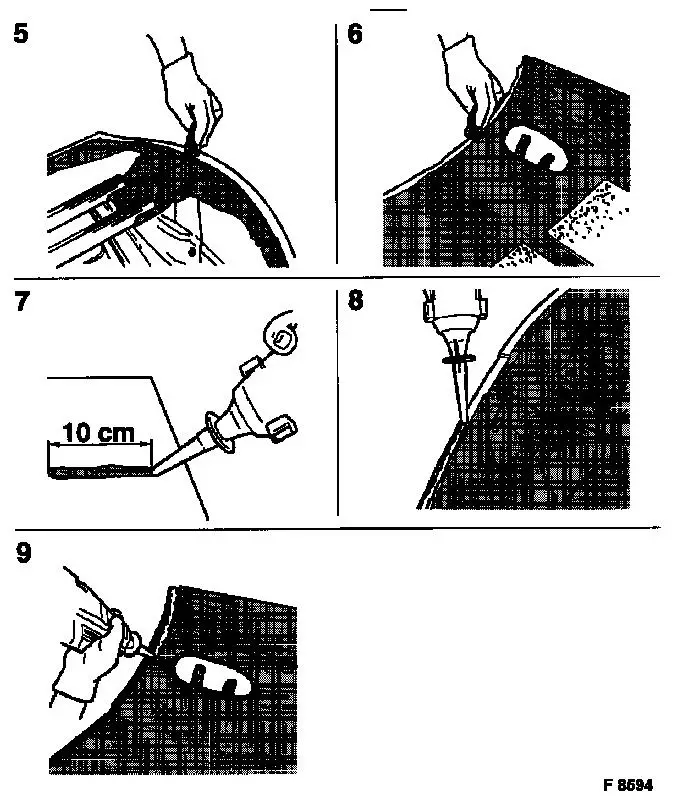
 Install
- If necessary, realign frame.
- Fit new part to frame and the cut sections.
- Activate the adhesive flange on both sides (5) of the door
frame and one side of the outer (6) using activator form the
adhesive set
- Insert adhesive cartridges from adhesive kit in BETAGUN 2000;
apply 10 cm test bead (e.g. to cardboard) (7).
- Apply adhesive track (4 mm diameter) to adhesive flange on door
(8) and outer panelling (9)
|
|
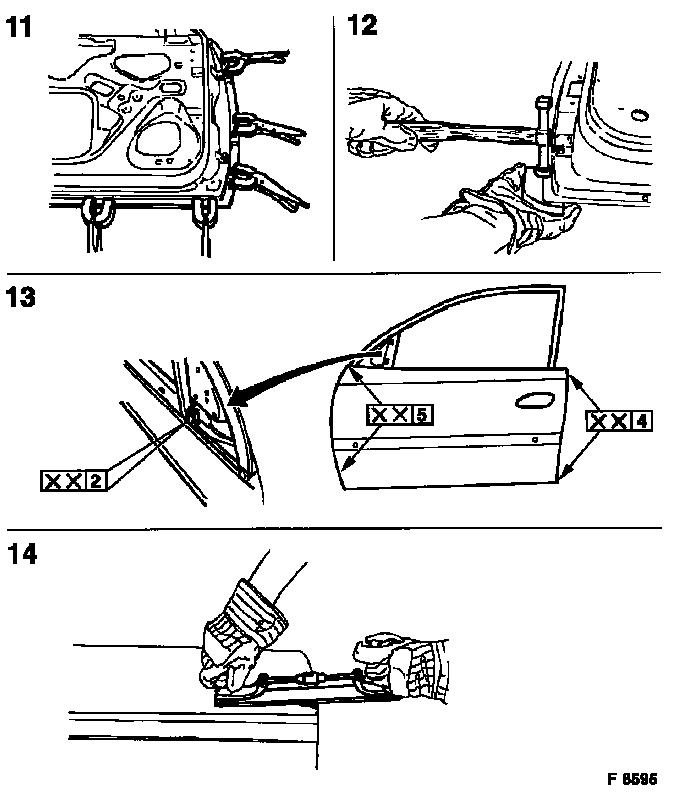
- Align and fix outer door panelling on frame (11)
- Flatten down the hem flange of the door outer panelling (panel
hammer and machine hammer), whilst holding a mallet or block
against it (12)
- Coat all areas ground to bare metal with adhesive as seam
sealant and corrosion protection with spatula or flat brush, remove
excess adhesive (additional sealant compound not necessary)
- Spot weld the door outer panelling (13) (to avoid indentations
on the outer skin, work with copper plate)
- Check surface in visual area and – if necessary –
re-finish (14)
- Seal cavities (90 396 212 / 17 58 995); carry out painting
- Attaching parts; attach door
|
|
|
