|
Manual Transmission, Remove and Install (Vehicles
with 4-Cylinder Petrol Engine)
 Remove Remove
|
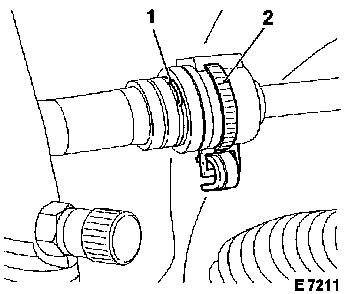
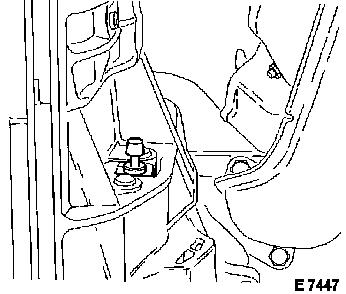
Disconnect battery. Completely fill brake fluid reservoir and
seal with dummy seal. Open retaining band (2) for connection part
at bulkhead. Press retaining clamp (1) out of connection part with
small screwdriver. Disconnect clutch actuation pressure line. Press
retaining clamp (1) in again.
Caution
Collect escaping brake fluid.
|
|
|
Remove
Raise vehicle.
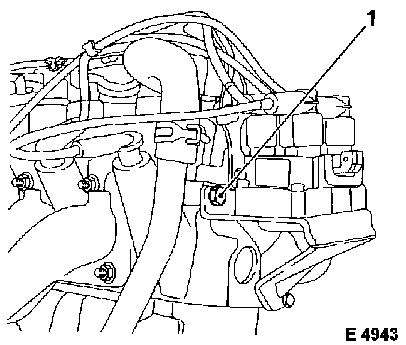
Vehicles with 4 cylinder OHC engine only: Remove wiring harness
plug from dual spark ignition coil – accessible from vehicle
underside. Unscrew fastening screw (1). Unclip wiring harness from
bracket of dual spark ignition coil.
|
|
|
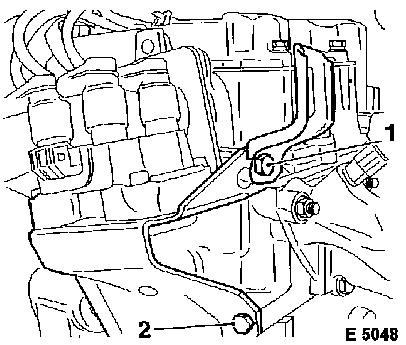
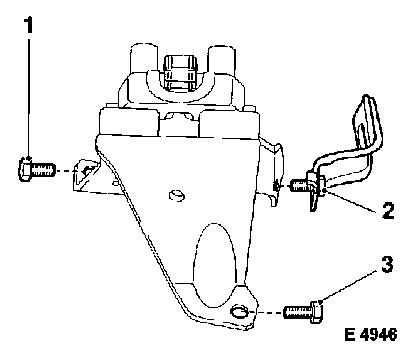
Unscrew fastening bolt (1) with engine transport shackle from
camshaft housing. Unscrew fastening bolt (2) from cylinder
head.
Illustration shows the dual spark ignition coil with engine
removed for better presentation.
|
|
|
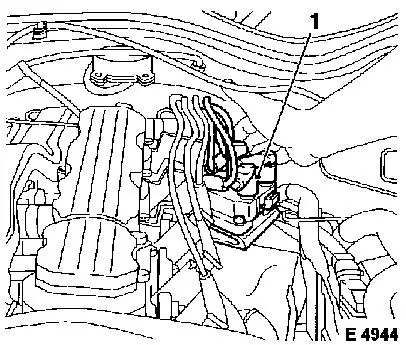
Remove dual spark ignition coil (1) upwards.
Remove ignition lead plugs from dual spark ignition coil.
|
|
|
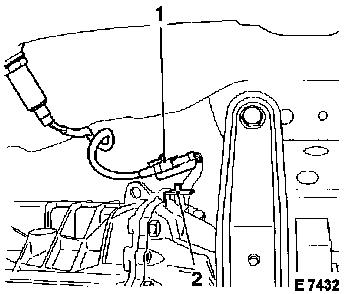
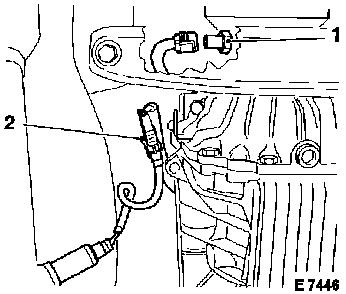
All vehicles:
Unclip wiring harness plug (1) of oxygen sensor from bracket
(2), lift retaining bracket and disconnect wiring harness plug.
Lift retaining bracket and disconnect wiring harness plug from
reverse lamp switch.
For Engines Y 22 XE/Z 22 XE: In addition, disconnect wiring
harness plug of front oxygen sensor.
|
|
|
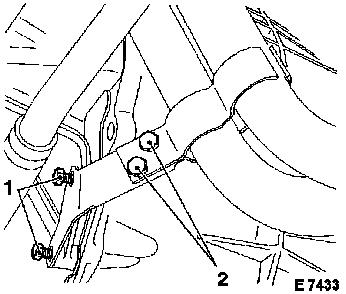
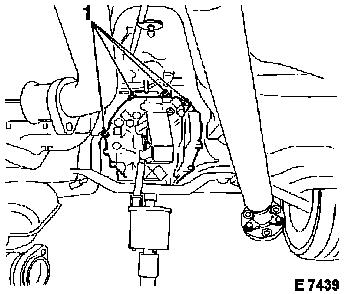
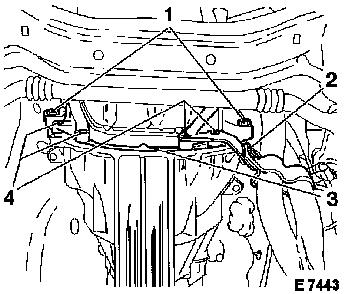
Unscrew catalytic converter from front muffler. Unscrew exhaust
bracket from transmission (1) and loosen at exhaust pipe (2).
Make pressure line of clutch actuation accessible from
below.
|
|
|
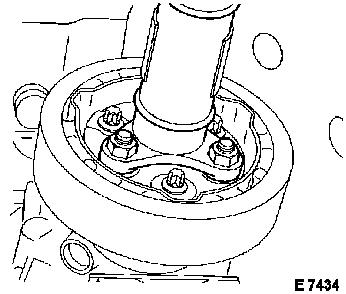
Unscrew propshaft from transmission flange, MKM-604-18. Slide
propshaft together and connect on the side to the right.
|
|
|
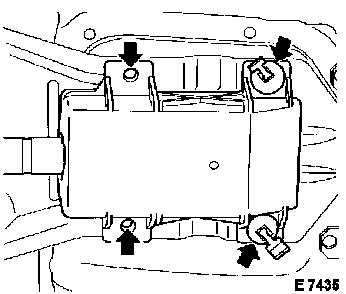
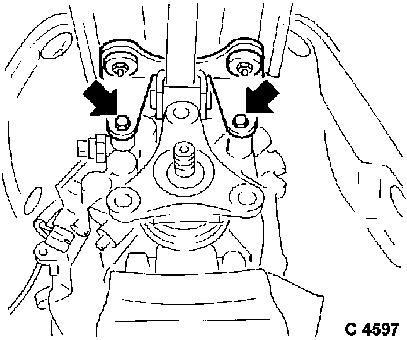
Pull 4 clips (arrows) of shift rod cover out of shift outrigger.
Push cover forwards.
Remove retaining clamp from pin. Pull pin out of shift rod and
gearshift lever.
|
|
|
Unscrew shift outrigger from transmission (2 screws).
|
|
|
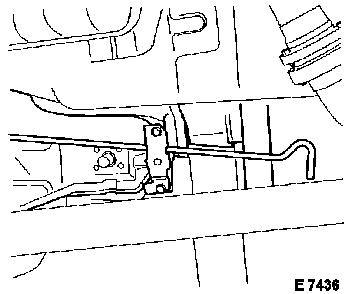
Secure shift outrigger against falling down by jamming in a tyre
lever.
|
|
|
Unscrew engine supports (2 screws each) on both sides of
transmission (1). Loosen engine supports (1 screw each) on both
sides of engine block (2).
Remove cover plate (3) from clutch.
|

|
|
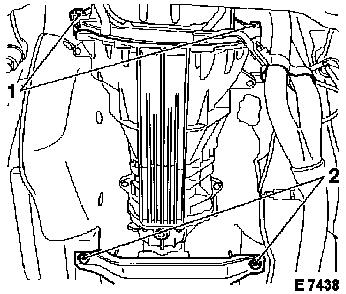
Unscrew 2 lower screws (1) for transmission to engine block.
Support transmission with hydraulic jack. Unscrew crossmember
(2) from vehicle floor.
|
|
|
Lower transmission using hydraulic jack, so that it can be moved
past the shift outrigger. Unscrew 4 upper screws (1) for
transmission to engine block. Press transmission off engine block
and lower.
Caution
Do not damage oxygen sensor.
Install manual transmission (vehicles with 4-cylinder
engine):
 Install
Engage a gear at the shift actuation. Thinly coat teeth of
transmission drive shaft with lubricating paste. Raise transmission
with hydraulic jack, align with engine and flange.
|
|
Torque
4 upper bolts for transmission to engine – 60 Nm / 44 lbf.
ft. Raise transmission, crossmember to vehicle floor – 45 Nm
/ 33 lbf. ft., tighten thread and insert fastening bolts with
locking compound. Lower hydraulic jack.
Torque
|
2 lower screws (1) for transmission to engine – 60 Nm / 44
lbf. ft.
Position cover plate (3) for clutch, engine supports to
transmission (4, on left side with exhaust bracket) – 22 Nm /
16 lbf. ft.
Engine supports to engine block – 60 Nm / 44.5 lbf. ft. (M
10), 22 Nm / 16 lbf. ft. (M 8).
Exhaust bracket (2) to exhaust pipe – 20 Nm / 15 lbf.
ft.
Catalytic converter to front exhaust pipe – 25 Nm / 18
lbf. ft. Remove tyre lever from shift outrigger.
Shift outrigger to transmission – 22 Nm / 16 lbf. ft.
Install
Insert pin in shift rod and fork. Secure pin with retaining
clamp. Fasten cover for shift rod with 4 clips.
|
|
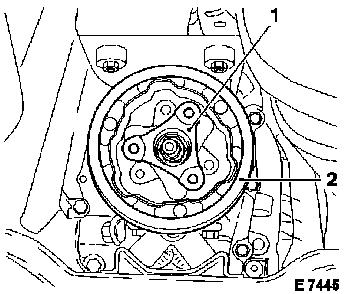
Torque/angle method
|
Propshaft with new fastening bolts to output flange (1) –
50 Nm / 37 lbf. ft. + 75° + 15°, MKM-604-18 (at the same
time align vibration damper (2)).
|
|
Install
|
Connect wiring harness plug (2) for oxygen sensor, so that
retaining bracket engages. Clip wiring harness plug into
transmission bracket.
Connect wiring harness plug to reverse lamp switch (1), so that
retaining bracket snaps in.
For Engines Y 22 XE/Z 22 XE: In addition, connect front oxygen
sensor wiring harness plug.
|
|
|
Vehicles with 4-cylinder OHC engines only:
Install dual spark ignition coil (1). Connect ignition cable
plugs.
Caution
Note ignition sequence – ignition cables and dual spark
ignition coil are marked with cylinder numbers.
|
|
Install
|
Screw fastening bolt (1) into cylinder head, fastening bolt (2)
with engine transport shackle to camshaft housing and fastening
bolt (3) and tighten. Attach wiring harness plug for dual spark
ignition coil. Clip wiring harness to bracket of dual spark
ignition coil.
Torque
Dual spark ignition coil bracket to cylinder head 15 Nm / 11
lbf. ft.
|
|
Install
|
All vehicles:
Route pressure line of clutch actuation upwards.
Lower vehicle. Insert pressure line in connection piece, thereby
ensuring that pressure line engages audibly in retaining clamp (1).
Fasten connection piece to bulkhead with retaining strap (2).
|
|
Remove
|
Unscrew dummy cap from brake fluid reservoir.
Install
Bleed clutch actuation – see operation "Hydraulic Clutch
Actuation, Bleed".
Connect battery.
|
|
|
