Timing Case Cover, Remove and Install
 Remove, Disconnect Remove, Disconnect For X 20 DTH with air conditioning: Detach relay box from air cleaner housing and place to one side. Remove air cleaner housing - see illustration "Air Cleaner Housing, Air Duct". Remove ribbed V-belt tensioner - see operation "Ribbed V-belt Tensioner Assembly, Remove and Install". Remove front exhaust pipe. Unbolt fastening nut (1) from engine damping block bracket. Attach engine to Engine Bridge MKM-883-1 (2) and raise engine as far right as possible in direction of travel thereby ensuring that no components are damaged. | 
|
Remove, Disconnect Remove fastening bolts from timing case cover (1) and carefully separate timing case cover from timing case with a wide, flat spatula (2).
 Important! Important! Do not lever off timing case cover or use force to separate it from timing case, as permanent deformation results in leakage.
 Clean Clean Clean sealing surfaces on timing case cover and timing case - cover aperture in timing case with lint-free cloth. | 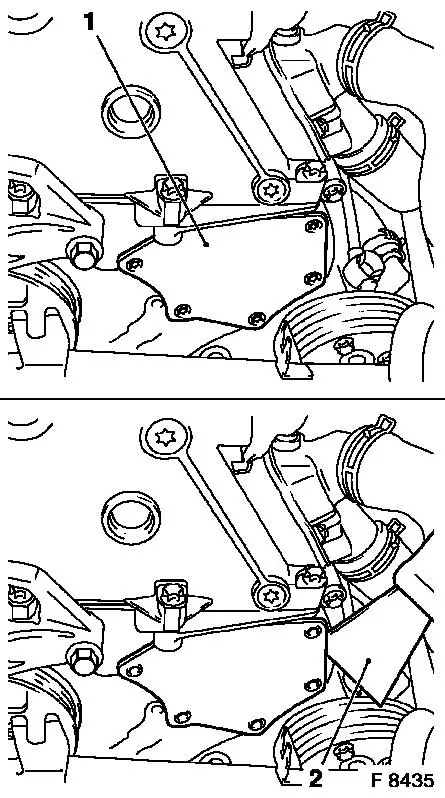
|
 Install, Connect Install, Connect Apply an approx. 2 mm (Dimension I) thick bead of silicone sealing compound (grey) to timing case cover.
Important! The application of silicone sealing compound (grey), installation of timing case cover and tightening to torque must be performed within 10 minutes.
Install, Connect Attach timing case cover to timing case with new fastening bolts - secure using 2 threaded bolts (M6) - tightening torque 6 Nm / 4.5 lbf. ft. Lower engine using engine bridge and attach engine damping block bracket to engine damping block - tightening torque 45 Nm / 33 lbf. ft. Install front exhaust pipe with new gasket and new fastening nuts. Install ribbed V-belt tensioner - see operation "Ribbed V-belt Tensioner Assembly, Remove and Install". | 
|
Notice: Before assembling components of the intake system (hoses, connections, etc.), they must be cleaned of any possible contamination (grease, oil, etc.). When tightening the hose clamps, be sure to observe exactly the tightening torque of 3.5 Nm / 2.6 lbf. ft.
Important! It is only ensured that the intake system is free of leaks, thus ensuring operational safety of the engine, if the hose clamps are tightened correctly to the prescribed tightening torque.
Install, Connect Install air filter housing - see illustration "Air Filter Housing, Air Flow Guide". For X 20 DTH with air conditioning: Attach relay box to air cleaner housing.
|
