Piston with Con-rod, Remove and Install
 Remove, Disconnect Remove, Disconnect Remove cylinder head - see operation "Cylinder Head, Remove and Install (X 16 SZR)" or "Cylinder Head, Remove and Install (16 LZ2 and 20 NEJ)". Remove oil pan - see operation "Oil Pan, Remove and Install (X 16 SZR with Air Conditioning)", "Oil Pan, Remove and Install (X 16 SZR without Air Conditioning)", "Oil Pan, Remove and Install (16 LZ2)" or "Upper Part of Oil Pan, Remove and Install (20 NEJ)". For 20 NEJ: Remove oil intake pipe (1), oil baffle plate (2) and crankshaft bearing bridge (3). Mark sequence of the con-rod bearing caps (4) - bead (5) of the con-rod bearing cap points to flywheel side. Remove con-rod bearing cap from con-rod. | 
|
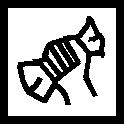
Remove, Disconnect Remove combustion residue from upper part of cylinder bore. Carefully remove piston with con-rod upwards out of cylinder bore with hammer handle.
 Clean Clean Con-rod bearing journals and con-rod bearing caps.
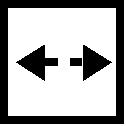
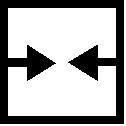 Install, Connect Install, Connect Piston ring position - piston ring (I) every 180 ° . Oil scraper rings (II) - offset 25 to 50 mm from gap of the intermediate ring to the left and right. Lightly coat piston rings with engine oil and compress with piston ring compressor. Carefully push pistons and con-rod into cylinder bore hole with hammer handle.
 Important! Important! Ensure correct installation position - arrow (1) on the piston head points to engine timing side, bead on con-rod points to flywheel side. | 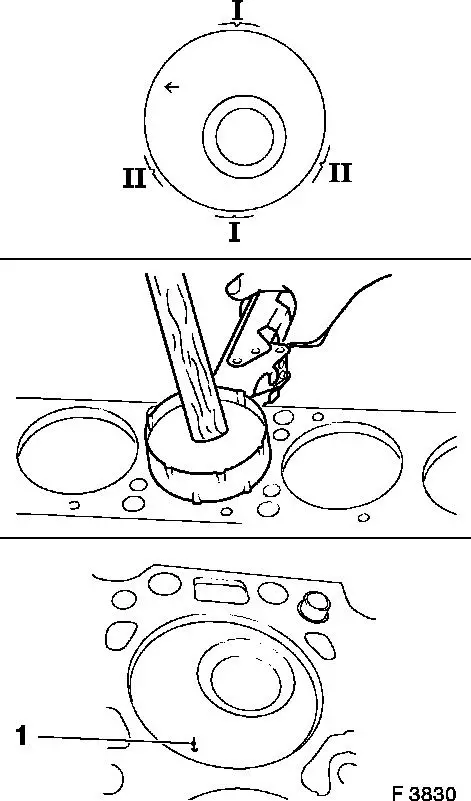
|
Install, Connect Note sequence of con-rod bearing caps. Attach con-rod bearing caps to con-rod with new fastening bolts - bead (1) on con-rod bearing caps points towards flywheel side - tightening torque X 16 SZR: 25 Nm / 18 lbf. ft. + 30 ° , 16 LZ2 and 20 NEJ: 35 Nm / 26 lbf. ft. + 45 ° + 15 ° . | 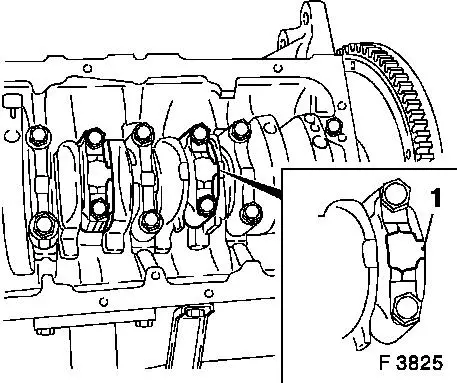
|
Install, Connect For 20 NEJ: Attach crankshaft bearing bridge to cylinder block and to crankshaft bearing caps - tightening torque 20 Nm / 15 lbf. ft. Attach oil baffle plate to crankshaft bearing bridge - tightening torque 20 Nm / 15 lbf. ft. Attach oil intake pipe to oil pump and to crankshaft bearing bridge - tightening torque 8 Nm / 6 lbf. ft. 1) . Install oil pan - see operation "Oil Pan, Remove and Install (X 16 SZR with Air Conditioning)", "Oil Pan, Remove and Install (X 16 SZR without Air Conditioning)", "Oil Pan, Remove and Install (16 LZ2)" or "Upper Part of Oil Pan, Remove and Install (20 NEJ)". Install cylinder head - see operation "Cylinder Head, Remove and Install (X 16 SZR)" or "Cylinder Head, Remove and Install (16 LZ2 and 20 NEJ)".
1) Re-cut thread before re-use and insert with screw locking compound (red). The installation time including torque check is max. 5 min.
|
