volkswagen Workshop Repair Guides

Volkswagen Golf Workshop Service and Auto Repair Manuals

Adjustment table > < Removing and installing drive flange oil seal
5 speed manual Gearbox 020
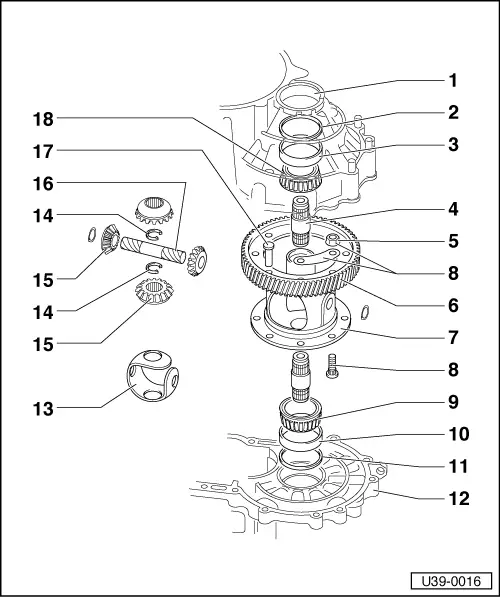
Final drive, Differential
Dismantling and assembling differential
 
U39-0016

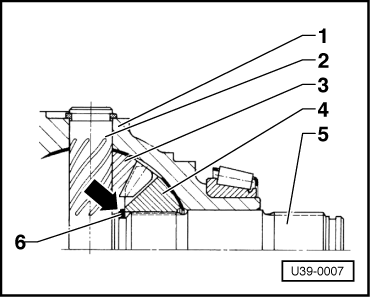
Differential bevel gear shaft secured with extended rivets

Play free location of drive flange shafts => page 39-19

Caution!
The inner and outer races of the taper roller bearings are matched and must not be interchanged.
  • Bearing housing
  • Shim S2
    • Is always 1 mm thick
  • Outer race
    • ◆ Pulling out => fig. 9 .
    • ◆ Knocking => fig. 10 .
  • Shaft for drive flange
    • ◆ Turn slightly when pulling out as thrust washer tends to catch.
    • ◆ Press in carefully when installing, do not damage thrust washer.
  • 70 Nm
 
U39-0016
  • Crown wheel
    • Is matched to output shaft.
    • ◆ Press off => fig.4 .
    • ◆ To fit, heat to 100° C => fig.5 .
    • ◆ If gears are replaced, adjust output shaft
  • Differential housing
    • ◆ If replaced: Adjust differential
  • Service parts
    • ◆ Service only installing => fig. 6 .
  • Bearing inner race
    • ◆ Pull off => fig.1 .
    • ◆ To fit, heat to 100° C and press fully home => fig.2 .
    • ◆ Remove shaft for drive flange first.
    • ◆ If replaced:
      Adjust differential
  • Outer race
    • ◆ Pulling out => fig. 11 .
    • ◆ Knocking in => fig. 12 .
  • Shim S1
    • ◆ Find thickness
 
U39-0016
  • Gearbox housing
  • One-piece thrust washer
    • ◆ Lubricate with gear oil before
      installing
  • Differential pinions
    • ◆ Install => fig. 7 .
  • Pinion shaft
    • Knock out with a drift, do not damage thrust washer when installing
  • Rivet
    • ◆ Production only drill out => fig. 3 .
  • Bearing inner race
    • ◆ Press off => fig.1 .
    • ◆ To fit, heat to 100° C and press fully home => fig.2 .
    • ◆ Remove shaft for drive flange first.
    • ◆ If replaced:
      Adjust differential
  • Circlip
    • ◆ Find thickness =>fig. 8 .
 
U39-0017

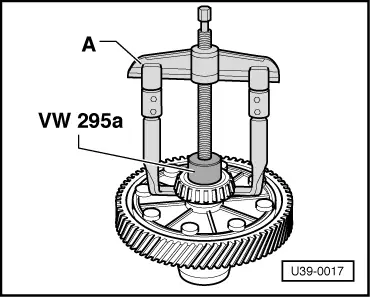
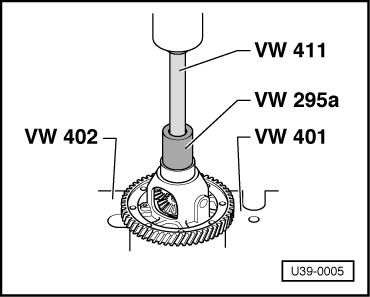
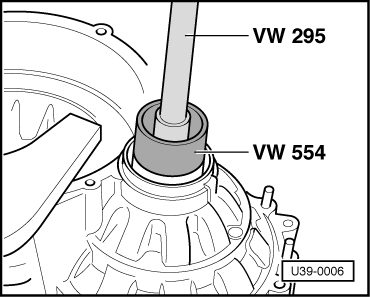
→ Fig.1     Pulling inner race off

  •      A -     Puller such as Kukko 20/1 with 100 mm reach hooks.
 
V39-0645

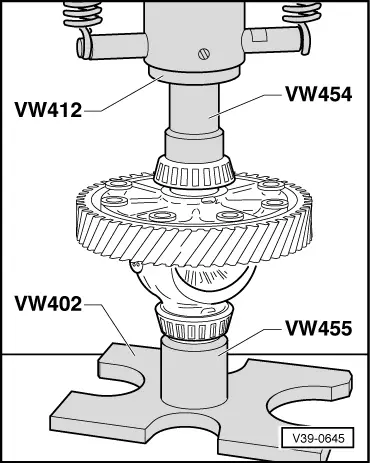
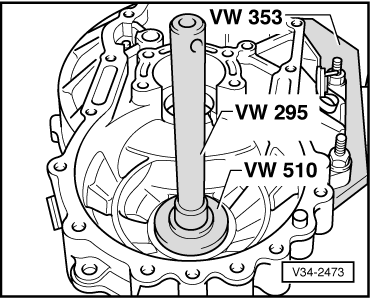
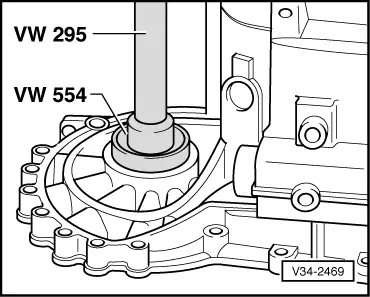
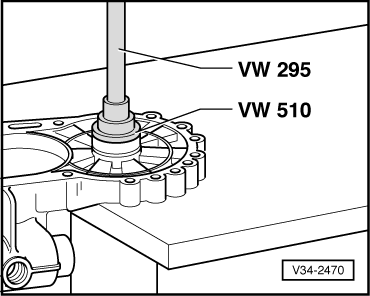
→ Fig.2     Pressing inner race home

Heat race to 100° first and install.

 
V34-0605

→ Fig.3     Drilling rivet heads

Drill rivets out with 12 mm drill from the centre punched or countersunk side and knock them out.

Caution!
Clean differential before and after drilling. Protect bearings from the drill chips.
 
U39-0005

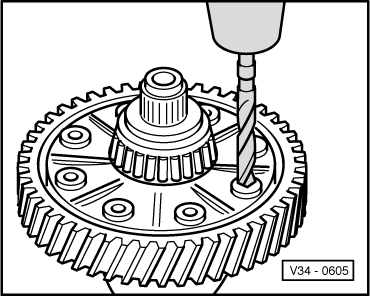
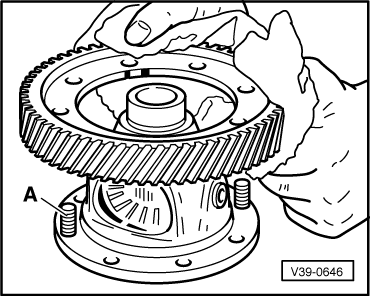
→ Fig.4     Pressing crown wheel off

 
V39-0646

→ Fig.5     Heat crown wheel to about 100° C and install

Guide crown on the housing with screws -A- from repair kit.

 
V34-0606

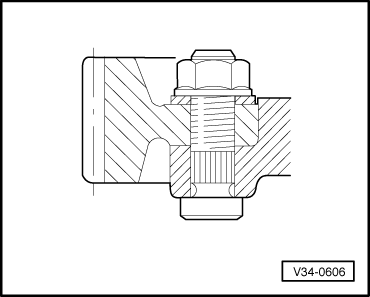
→ Fig.6     Bolt crown wheel to housing with special screws, washers and nuts - Part No. 171 498 088 (Repair Kit).

 
V39-0136

→ Fig.7     Installing differential pinions

  • ‒ Lubricate one-piece thrust washer with gear oil and install it
  • ‒ Insert small pinions, knock spindle in and secure.
  • ‒ Insert large pinions offset 180° and swing in.
 
U39-0007

→ Fig.8     Find thickness of circlip -arrow-

  •      1 -     Differential housing
  •      2 -     Differential pinion spindle
  •      3 -     Differential pinion
  •      4 -     Differential gear
  •      5 -     Drive flange shaft
  •      6 -     Circlip
  • ‒ Press shaft against differential pinion needle.
  • ‒ Press differential gears against housing and press thick circlip into groove. If circlip jams at the sides, install thinner circlip.

The following circlips are available:

Part No.

Thickness (mm)

020 409 299

2.0

020 409 299 A

2.3

 
U39-0006

→ Fig.9     Knocking differential bearing outer race out of bearing housing

 
V34-2473

→ Fig.10     Knocking differential bearing outer race into bearing housing

 
V34-2469

→ Fig.11     Knocking differential bearing outer race out of gearbox housing

 
V34-2470

→ Fig.12     Knocking differential bearing outer race into gearbox housing

Adjustment table > < Removing and installing drive flange oil seal