volkswagen Workshop Repair Guides

Volkswagen Workshop Service and Repair Manuals

Installing windscreen > < Installing plenum chamber cover
Removing windscreen
Removing windscreen
–  Remove A-pillar trims → General body repairs, interior; Rep. Gr.70.
–  Remove left and right sun visors → General body repairs, interior; Rep. Gr.68.
–  Remove interior mirror → General body repairs, interior; Rep. Gr.68.
–  Remove water deflector strips on left and right → Chapter
   
–  Slide cover -V.A.G 1474/8- between windscreen -1- and dash panel.
–  Thrust awl -V.A.G 1474/2--2- through adhesive bead.
–  Pull cutting cord -3- through adhesive sealing material into inside of vehicle using awl -V.A.G 1474/2--2-.
  N64-10089
–  Secure inside end of cutting cord against falling out using pull handle -V.A.G 1351/1--3-.
–  Loosen sealing lip in upper area of windscreen with a plastic wedge and spray in cleaning solution D 009 401 04 (as substitute for lubricant).
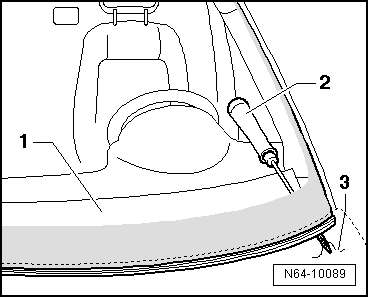
–  Place cutting cord -2- using small tube -1- in upper area of window.
–  If gap is too small, guide cutting cord on outside and push under lip with a plastic wedge.
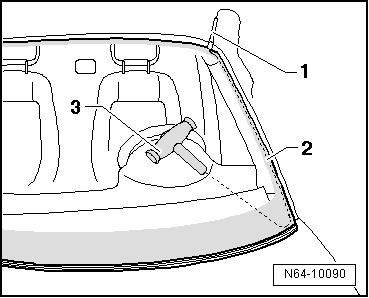
–  Lay cutting cord -2- around window and guide second end of cord inwards into interior.
l  Ensure that cutting cord -2- lies under window in corners.
  N64-10090
–  Secure other end of cord to reel device -V.A.G 1654 A-.
–  Position reel device -V.A.G 1654 A- in “position I”.
–  Reposition reel device -V.A.G 1654 A- as necessary and cut window free.
–  Use wedge -V.A.G 1474/5- to press cutting cord against window glass while cutting in order to avoid damaging dash panel and to create clearance at window flange.
  N64-10091

Installing windscreen > < Installing plenum chamber cover