
Golf Mk5
|
|
|
|
|
|
|
 Note
Note
|
|
|

|
Note
|
|
|

|
|
|
|
|
|
|
|
|
|
|
|
|
Note
|
|
|
|
|
|
|
|
| Component | Nm | ||
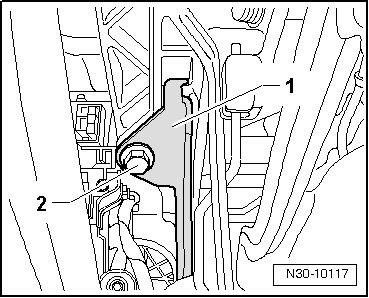
Mounting bracket to bulkhead
| 25 | ||
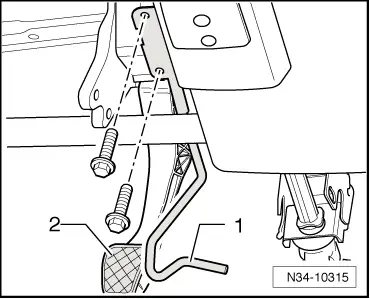
| Crash bar to steering column mounting bracket (attachment with 2 bolts) | 10 | ||
| Crash bar to steering column mounting bracket (attachment with 1 bolt) | 20 | ||
|