| –
| All threaded holes into which self-locking bolts are to be screwed must be cleaned of residual locking fluid carefully with a thread tap. |
| –
| Always renew self-locking bolts and nuts. |
| –
| Check whether dowel sleeves for aligning engine and gearbox are fitted in cylinder block and install if necessary. |
| If dowel sleeves are not fitted, difficulties shifting gears, clutch problems and possible noises from the gearbox (rattling of gears which are not engaged) could occur. |
| –
| Ensure that intermediate plate is correctly seated on engine. |
| –
| Clean input shaft splines and apply thin coat of grease for clutch plate splines -G 000 100-. |
| The clutch plate must slide easily to and fro on the input shaft. |
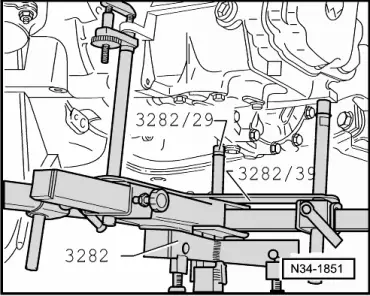
| To install gearbox „02S“, set up gearbox support -3282- with adjustment plate -3282/39-. |
| –
| Align arms of gearbox support according to holes in adjustment plate. |
|
|
|

 Note
Note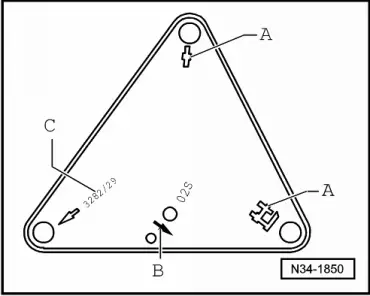

 WARNING