volkswagen Workshop Repair Guides

Volkswagen Workshop Service and Repair Manuals

Removing and installing trim strip on door trim > < Removing and installing front door trim (4-door vehicles)
Removing and installing rear door trim
  Note
Removal and installation is described for right side of vehicle. Follow same instructions for left side as appropriate.
Removing
–  Switch off ignition.
   
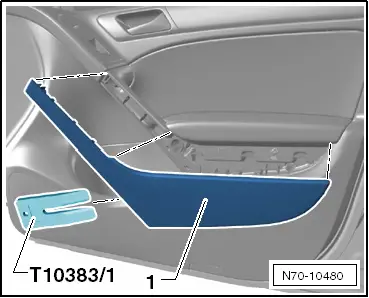
–  Detach decorative trim -1- from door trim using wedge -T10383/1-.
  N70-10480
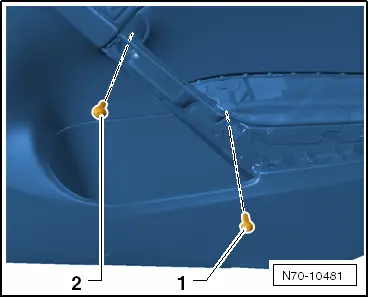
–  Remove bolts -1- and -2- (4.5 Nm).
  N70-10481
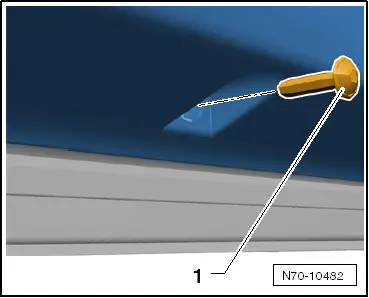
–  Remove bolt -1- on underside (4.5 Nm).
  N70-10482
  Caution
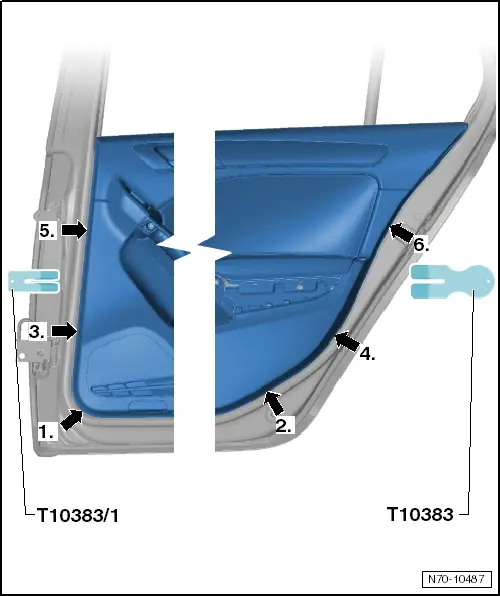
When the door trim is separated, there is a risk that fastening elements may be damaged. To avoid this, always follow the specified order and positions of clips when removing the door trim.
–  Release door trim from clips in -specified sequence- using wedges -T10383-.

–  Pull door trim upwards vertically out of window slot.
   
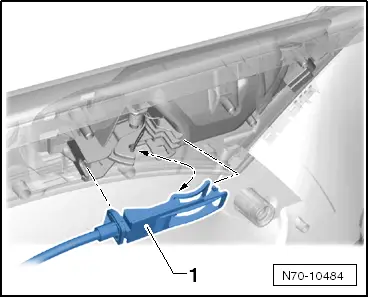
–  Now unhook Bowden cable -1- from interior door handle on inside of door trim.
–  Depending on vehicle equipment, disconnect wiring harnesses from door trim.
Installing
–  Install in reverse order of removal.
If door trim is renewed on vehicles with manual window regulator, it is necessary to adjust the new door trim using workshop equipment. To do this, a hole must be made in the door trim for the window regulator shaft.
  Note
Before installing, check securing clips for damage and renew if necessary.
  N70-10484
  Caution
Before installing door trim, ensure that the locking mechanisms of all clips are in -position 1-.
It is not possible to install the door trim without problem if clips are in -position 2-!


Removing and installing trim strip on door trim > < Removing and installing front door trim (4-door vehicles)