volkswagen Workshop Repair Guides

Volkswagen Workshop Service and Repair Manuals

Electric coolant pump > < Checking thermostat
Removing and installing 4/2-way valve with thermostat
  Note
The thermostat is located within the 4/2-way valve and cannot be replaced individually.
   
Special tools and workshop equipment required
t  10 mm jointed spanner -3185-
t  Refractometer -T10007-
t  Special wrench, long reach -T10058-
t  Torque wrench -V.A.G 1331/-
t  Drip tray for workshop hoist -VAS 6208-
t  Hose clip pliers -VAS 6340-

»Carry out the following work sequence«
Removing
–  Remove noise insulation → General body repairs, exterior; Rep. gr.50
–  Removing cowling with radiator fan -V7-.
  Note
Renew gaskets and seals.
–  Remove engine cover panel → Chapter.
   
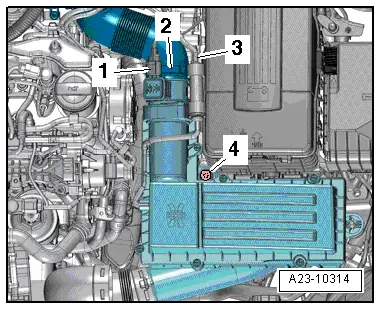
–  Disconnect electrical connector -1- from air mass meter -G70-.
–  Pull off hose -3- on air filter housing.
–  Loosen bolt -arrow 4-.
–  Remove air filter housing together with air mass meter and suction hose .
–  Disconnect earth strap at battery with ignition switched off → Electrical system; Rep. gr.27.
–  Remove battery and battery tray → Electrical system; Rep. gr.27.
  A23-10314
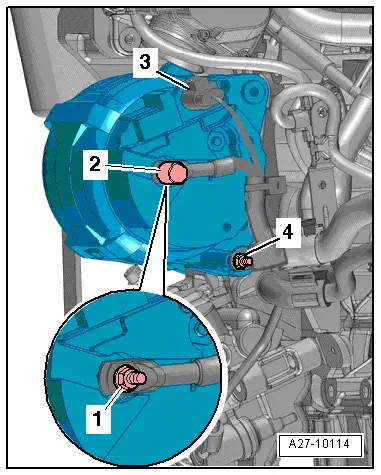
–  Remove the generator → Electrical system; Rep. gr.27.
–  Guide alternator with extreme caution past radiator to prevent damaging it.
  A27-10114
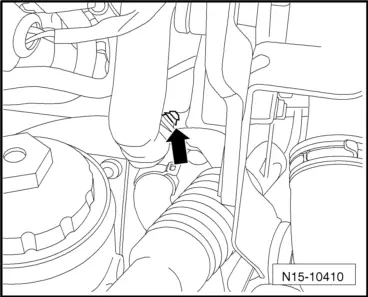
–  Unclip wiring harness from bracket -arrow-.
  N15-10410
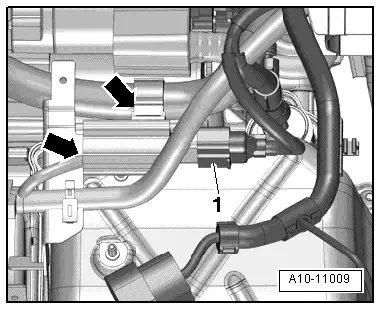
–  Free wiring harnesses -arrows- and electrical connector -1- at bracket.
  A10-11009
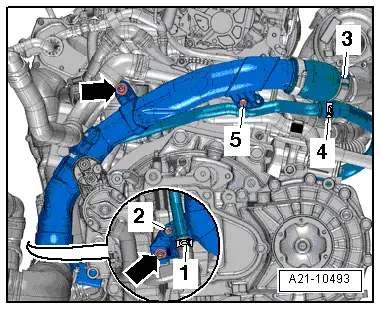
–  Unscrew bolts -2, 5- and -arrows-.
–  Free electrical lines and hoses on left air pipe using removal lever -80 - 200-.
–  Release hose clip -3- and remove left air pipe.
  Note
Disregard -item 1, 4-.
–  Drain coolant → Chapter.
  A21-10493
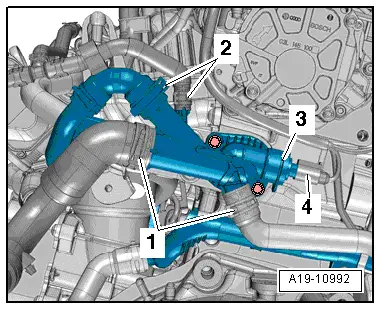
–  Pull coolant hoses off. Release hose clips -1- for this.
  Note
Disregard -items 2, 3, 4-.
  A19-10992
–  Remove electrical connector -1- for Hall sender -G40- from bracket.
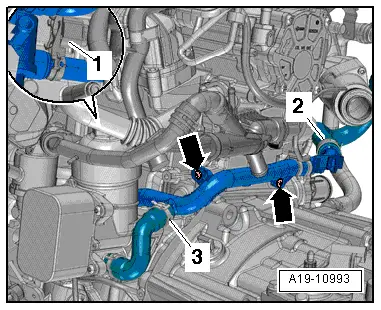
–  Unscrew bolts -arrows- and pull front coolant pipe to side away from 4/2-way valve.
  Note
Disregard -item 2, 3-.
  A19-10993
–  Pull coolant pipe out of connection -C- for 4/2-way valve. Leave in its installation position.
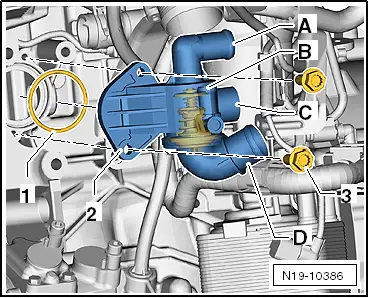
  N19-10386
–  Unscrew bolts -arrows-.
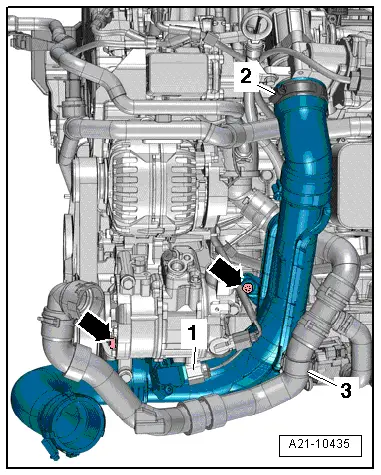
–  Free coolant hose -3-.
–  Release hose clip -2-.
–  Disconnect electrical connector -1- on charge pressure sender -G31-/intake air temperature sender -G42- and remove right air pipe.
  A21-10435
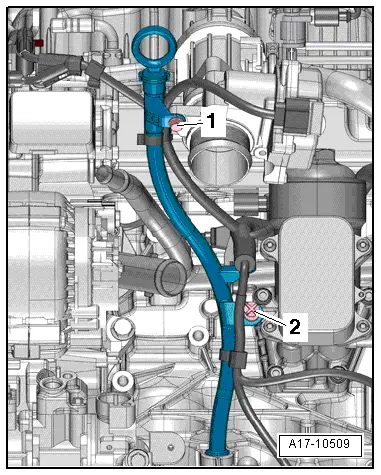
–  Unscrew bolt -1-.
–  Press off clip -2- using removal lever -80 - 200-.
–  Pull oil dipstick guide tube upwards out of cylinder block and press aside.
  A17-10509
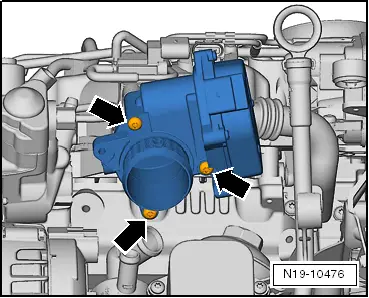
–  Remove throttle valve module -J338-.
  N19-10476
–  Pull coolant hoses off unions -A, B and D-.
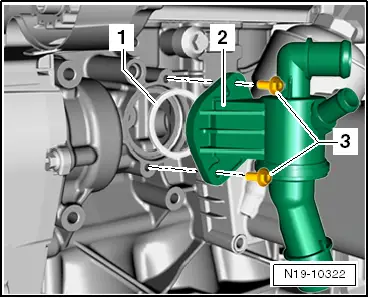
–  Remove securing bolts -3- for 4/2-way valve -2-.
–  Pull valve out from cylinder block.
Installing
–  Moisten new O-ring -1- with coolant.
  N19-10386
–  Thread 4/2-way valve in past ancillary bracket in direction of oil filter module.
  N19-10414
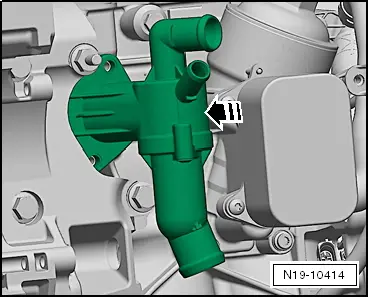
–  Insert union -2- of 4/2-way valve with O-ring -1- into cylinder block with slight rotary motions.
  N19-10322
–  Thread coolant pipe into connection -C- for 4/2-way valve.
Remaining installation is carried out in the reverse order. When installing, note the following:
  N19-10386
–  Tighten securing bolts -3- using T-bar and 10 mm socket -3185-. Specified torque: 15 Nm.
Specified torque for throttle valve module -J338- → Chapter.
–  Replenish coolant → Chapter.
–  Install throttle valve module -J338- → Chapter.
–  Install alternator → Starter, current supply, CCS; Rep. gr.27.
–  Installing charge air pipe → Chapter.
–  Install poly V-belt → Chapter.
  N19-10322

Electric coolant pump > < Checking thermostat